diy solar

diy solar

Elegant way to pre-charge between 2 Anderson connectors?

kolek

Inventor of the Electron
Joined
Sep 29, 2021
Messages
416
I was planning on not having a switch on my battery, and just unplugging it using an Anderson connector when I need to disconnect it.

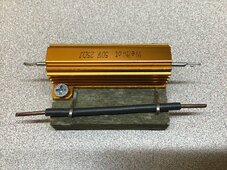
But I still need a precharging circuit.

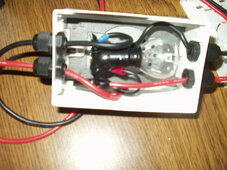
Someone should sell a pre-charge connector for Anderson connectors, but since they don't, what's an elegant way to handle it, or do I just need to build a switch with a pre-charge circuit?
 
How about a tiny parallel anderson connector that connects through a light bulb or resistor, and you connect the tiny anderson before the big one.
 
How about a tiny parallel anderson connector that connects through a light bulb or resistor, and you connect the tiny anderson before the big one.
Interesting idea but I'm having trouble visualizing that.
 
One Anderson with a resistor in parallel with another without a resistor. Plug the first one in, wait a second, plug the second one in.
You lost me at "One Anderson with a resistor"
How?
I understand I need to put a resistor in between the 2 connectors first, I'm looking for an elegant way of doing it.
 
Two Anderson connectors in parallel on each side.
One has a resistor in series with the positive lead.
Plug that one in first.
Once the recharge time has elapsed, plug in the other one.
 
Since you do not want to plug or unplug under load you really need a circuit disconnect on one side or the other. This disconnect/breaker can have a pre-charge setup. I built a simple momentary toggle switch with a 48vDC forklift bulb for my system.
 

Attachments

  • P1010026.JPG
    P1010026.JPG
    225.4 KB · Views: 24
  • P1010012.JPG
    P1010012.JPG
    220.9 KB · Views: 23
I usually just use a test light to charge the caps slowly when making the second connection. Test light is nice cause you can see the caps filling up as the light goes dim. The anderson does pose a small problem when hooking both up at once. I would just add a jumper to one then us the test light to charge the caps on the other terminal.
 
What I don't get is why nobody sells plug & play pre-charge things that can just be thrown inline and they work.

I got enough headaches with this DIY battery nightmare without having yet another circuit to worry about. Every additional hurdle like this costs me a freakin' week because I have to go and search out and then order parts online, and I'm in Japan so half the time I can't find what I want easily, even though it seems like everything is readily available on amazon dot com in the U.S.

I'm really just not qualified to be doing this nonsense in the first place. :fp2
Just buy a $1 resistor and skip this Anderson thing and disconnect the main battery cable, plug in Anderson and then use resistor between the main cable and battery terminals. Takes about twenty seconds and $1.
 
This is what I made years ago for Anderson SB50’s.

One side is a resistor, the other is just a piece of wire appropriately spaced and secured to a piece of scrap wood.

Just hold the APP connectors on each side for a bit and then plug them together.

Aint pretty but it works 😎.
 

Attachments

  • 41A16FD2-15ED-4A5F-B34E-0DF3AE6A74FF.jpeg
    41A16FD2-15ED-4A5F-B34E-0DF3AE6A74FF.jpeg
    413.4 KB · Views: 14
I’ve got a half dozen of these things laying round so one is always handy and I’m out about $15 total amongst all of them.

Here is the resistor I used :


It’s a low DIY hurdle to clear 😎
 
What are the Anderson’s connected to? Can you do precharging at some other terminal?
 
Put alligator clips on a resistor to initially connect the power. After 10 seconds remove the resistor and connect the Andersons direct.

Put everything on a board if you want elegant.
 
Do people notice continued power consumption with the inverter off?

When powering up my MPII with a bench top supply, with the MPII off it had zero watts consumption.

Do other larger inverters do the same? Or do AIO always have some sort of minor load due to MPPT or bits and pieces?
 
Back
Top