eod1991
New Member
I will continue to update this thread until I get the system complete (yea right).
In preparation for solar I have been upgrading my 113 year old farm house with solar in mind. We changed out both A/C systems for LG Red heat pump systems
All new Gerkin Windows
And all new insulation in the upstairs.
I am in the process of redoing the siding and I am adding 3/4” of foam board to the exterior.
This started as a way to have backup power if the grid goes down. By the time I started ordering stuff I had convinced myself to do it all at once and get it over with.
Site: Central Kansas
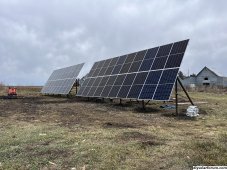
System type: Full off-grid solar power
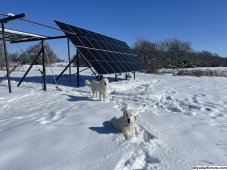
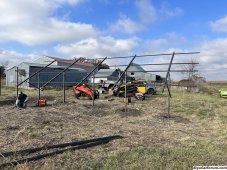
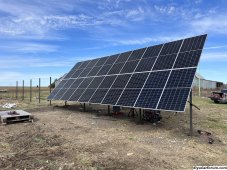
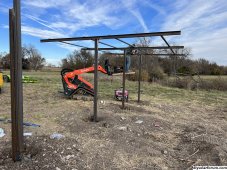
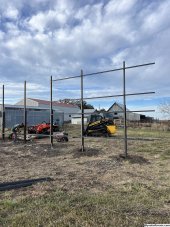
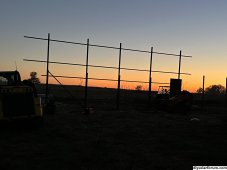
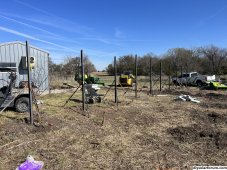
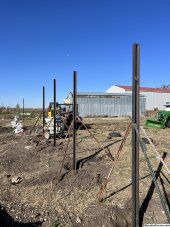
Mount: Custom built steel ground mount
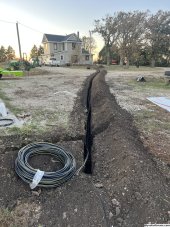
Distance: PV array is roughly 150’ from batteries and inverters
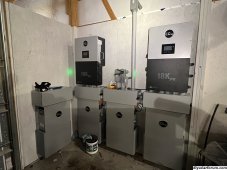
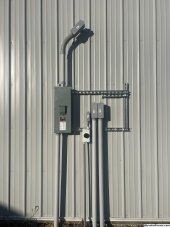
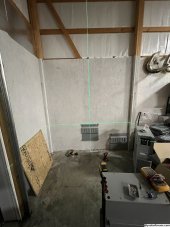
Inverter/Bat Location: Inverter and battery are located inside 40x60 shop
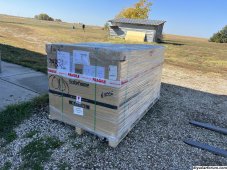
Backup Power Source: PDG 15kw 3600 rpm diesel generator hooked to a 250 gal diesel tank.
Inspections: N/A
Equipment:
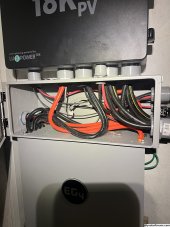
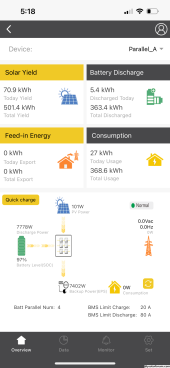
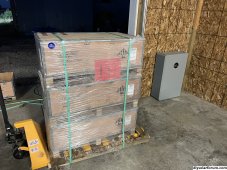
40x blue sun 460W bifacial panels
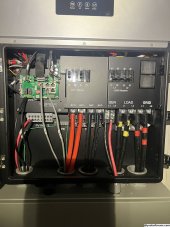
2x EG4 18Kpv inverters in parallel
4x EG4 48v 14.4Kw power pro batteries
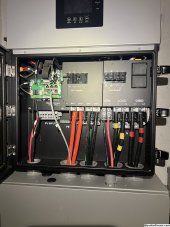
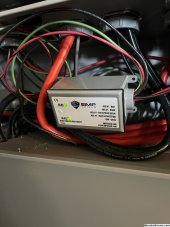
1x 600V EMP Sheild
1x15kw Diesel Generator
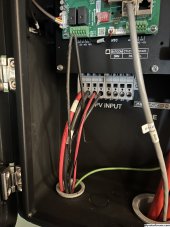
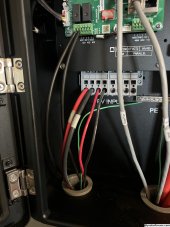
Panels: Each array has 20 panels on it. 10 are wired in series for a max VOC of 508V. Both of those series strings are paralleled with Staubli MC4 connections. This makes for 1 string from each array going back the the inverter with 510V at 23 Amps.
New 460W: VOC 50.8
I used UL 4703 10AWG direct burial rated PV cable.
Grounding/Earthing:
I connected all of the aluminum PV frames to the steel ground mount and ran that to an 8’ grounding rod located at the PV array.
Everything else that needed grounding at the shop (18kPV, batteries, etc) will be connected to the grounding rods at the shop.
A/C side
From the main panel at the house to the disconnect at the back of my shop I ran aluminum 4/0 mains, 2/0 neutral and #6 copper ground direct buried it a 24” deep trench.
I have ordered 2 additional power pro batteries and I am currently waiting for those to come in. We were running out of battery halfway through the night and I don’t want to have to rely on running the generator multiple nights a week.
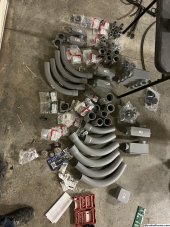
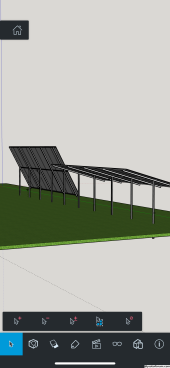
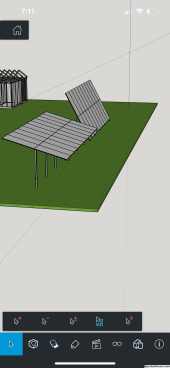
I designed and built the racking for the panels in sketchup. I didn’t even realize I could have bought a similar pre designed system. This would have saved me time and money but it was fun building everything.
I’ll add some photos for now and keep updating and adding information as I have time.
In preparation for solar I have been upgrading my 113 year old farm house with solar in mind. We changed out both A/C systems for LG Red heat pump systems
All new Gerkin Windows
And all new insulation in the upstairs.
I am in the process of redoing the siding and I am adding 3/4” of foam board to the exterior.
This started as a way to have backup power if the grid goes down. By the time I started ordering stuff I had convinced myself to do it all at once and get it over with.
Site: Central Kansas
System type: Full off-grid solar power
Mount: Custom built steel ground mount
Distance: PV array is roughly 150’ from batteries and inverters
Inverter/Bat Location: Inverter and battery are located inside 40x60 shop
Backup Power Source: PDG 15kw 3600 rpm diesel generator hooked to a 250 gal diesel tank.
Inspections: N/A
Equipment:
40x blue sun 460W bifacial panels
2x EG4 18Kpv inverters in parallel
4x EG4 48v 14.4Kw power pro batteries
1x 600V EMP Sheild
1x15kw Diesel Generator
Panels: Each array has 20 panels on it. 10 are wired in series for a max VOC of 508V. Both of those series strings are paralleled with Staubli MC4 connections. This makes for 1 string from each array going back the the inverter with 510V at 23 Amps.
New 460W: VOC 50.8
I used UL 4703 10AWG direct burial rated PV cable.
Grounding/Earthing:
I connected all of the aluminum PV frames to the steel ground mount and ran that to an 8’ grounding rod located at the PV array.
Everything else that needed grounding at the shop (18kPV, batteries, etc) will be connected to the grounding rods at the shop.
A/C side
From the main panel at the house to the disconnect at the back of my shop I ran aluminum 4/0 mains, 2/0 neutral and #6 copper ground direct buried it a 24” deep trench.
I have ordered 2 additional power pro batteries and I am currently waiting for those to come in. We were running out of battery halfway through the night and I don’t want to have to rely on running the generator multiple nights a week.
I designed and built the racking for the panels in sketchup. I didn’t even realize I could have bought a similar pre designed system. This would have saved me time and money but it was fun building everything.
I’ll add some photos for now and keep updating and adding information as I have time.
Attachments
-
 IMG_7052.png172.5 KB · Views: 96
 -
 IMG_6509.jpeg1.3 MB · Views: 97
 -
 IMG_6502.jpeg1.3 MB · Views: 99
 -
 IMG_6495.jpeg1.4 MB · Views: 93
 -
 IMG_6497.jpeg722.2 KB · Views: 83
 -
 IMG_6504.jpeg662.7 KB · Views: 75
 -
 IMG_6473.jpeg1.4 MB · Views: 75
 -
 72063449258__C3C642D6-63FA-40A8-857C-40A92E354490.jpeg722.1 KB · Views: 79
 -
 72040125177__D09C87B8-0349-4BBD-ACD6-C2C50B682047.jpeg748.3 KB · Views: 81
 -
 IMG_7051.png254.1 KB · Views: 80
 -
 IMG_6359.jpeg1.4 MB · Views: 72
 -
 IMG_6372.jpeg1.2 MB · Views: 81
 -
 IMG_6414.jpeg1.2 MB · Views: 82
 -
 IMG_6431.jpeg528.5 KB · Views: 91
 -
 IMG_6448.jpeg1.6 MB · Views: 95
Last edited: