diy solar

diy solar

Patching hole in garage roof after removing vent - I'm lost!!

pulper11

New Member
Joined
Feb 14, 2022
Messages
120
I'm wondering if someone can help me here.

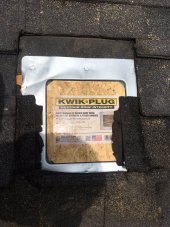
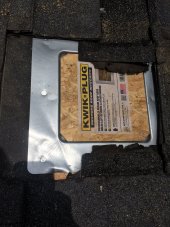
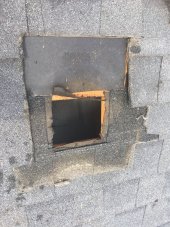
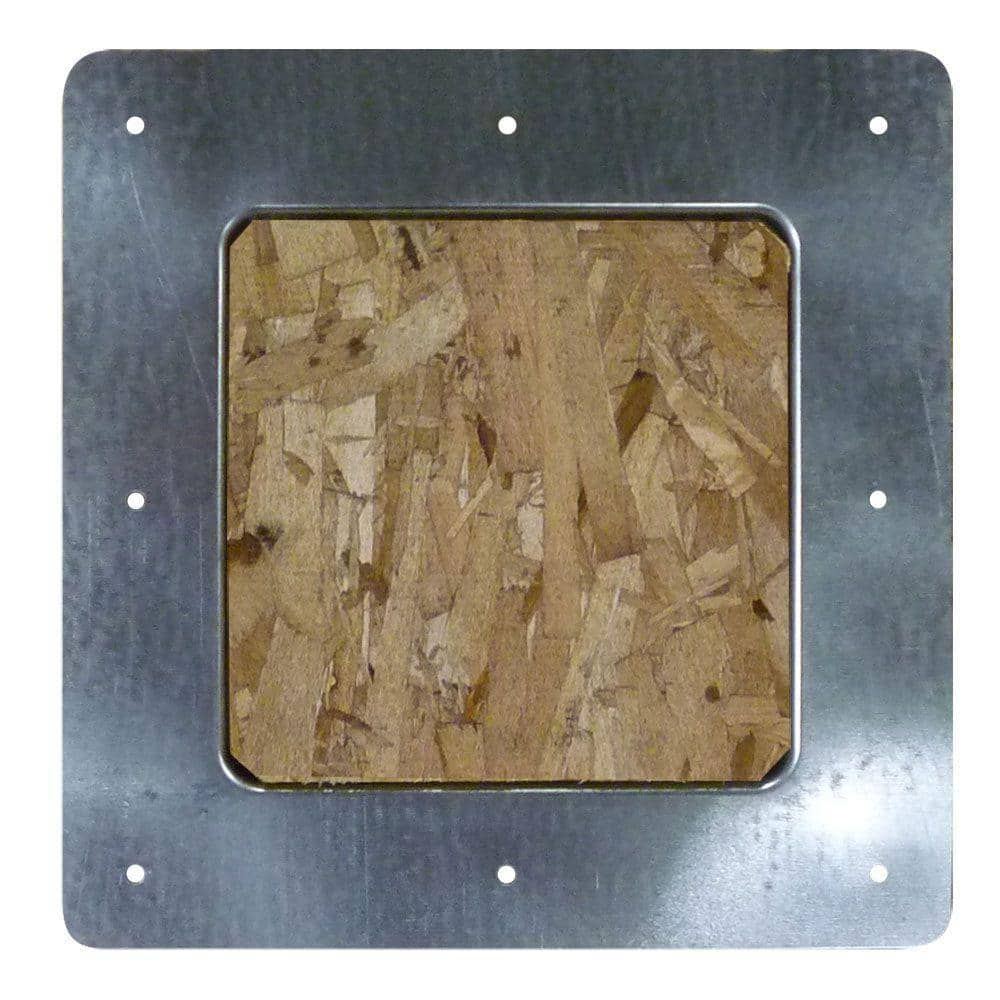
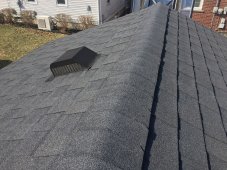
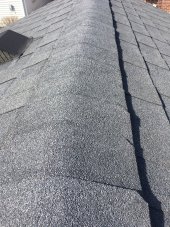
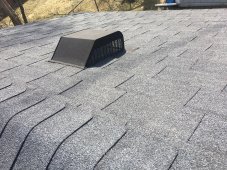
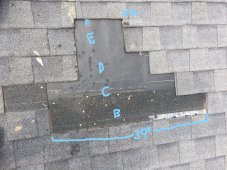
I'm putting up solar on my detached garage roof. This roof has two vents on the south facing side where I need my panels. I've removed one of the vents and used something called a "kwik-plug" with 8 nails to cover the hole. However, I'm at a loss as to what to do next. Felt and then shingles? Caulking underneath the plug?

Any advice on this? Figured I should get come advice before tackling the other vent in case I've done something wrong.

Pics attached.

Thanks!
 

Attachments

  • IMG_2587.JPG
    IMG_2587.JPG
    295.6 KB · Views: 39
  • IMG_2583.JPG
    IMG_2583.JPG
    265.9 KB · Views: 40
  • IMG_2573.JPG
    IMG_2573.JPG
    336.5 KB · Views: 40
You can just nail some tar paper over the patch or the space looks small enough you can probably use window flashing tape to vapor seal the area affected by the hole. It’s a bit tricky fitting in new shingles to complete the patch. If you can find shingles that are the same size as the old ones you simply replace the incomplete shingles with new ones and you are good. Sometimes the shingles are so well stuck to each other that you can’t fill them in without destroying the shingles around them and that’s the tricky part.
 
Since this will be covered by your panels you probably don't care about appearance. So get some roof flashing (aluminum comes in a roll)
Cut a piece long enough to slide up under the upper shingle row, against the decking. Go in 4 inches or so. Use roofing sealant on the bottom of the flashing. If you hit nails while trying to slide flashing under, you just pry them up.

TIP: when you remove the other vent, try not to cut up the shingles, pry them up, and slide the vent out.
 
I'd go belt and suspenders; @BradCagle is right on the correct way to do it, but I would add some of that spray roof sealant over the whole thing just to reduce risk.

Also, make sure you have insulation on the inside to match the rest of the roof so you don't get condensation issues.
 
Felt over the wood cut into the mix-its best done when the sealant on the singles is plyable (warm in sun) or try cool to see if they pop loose. Its best done removing the nails with say a wonder bar (flat bar that slips under nails) I would replace alonger run of singles not juts that small hole as its easier. I have done tons of roofing.If you know nothing on this read up on the web about it.(hopefully you filled the hole with wood?)
 
Thanks everyone so much for your replies!

To answer a couple of questions here, I do not care about the appearance as it will be underneath the panels. However, I've written to my inspector to see if shingles are still required. I have a feeling that they will be. If not, then that makes it so much easier.

The 12" plug that I used in the pictures has a 7.5" x 7.5" area that fills the hole that is wood. I made the hole slightly bigger so that it would fit.
Here is a link to the product that I used:


The vent was really tarred down to the roof which made it difficult for me to remove it without breaking up the attached shingles. I'm sure a pro would have had no issue with it but I certainly did! With very high temps and me dripping wet with sweat, I was just happy to get it out of there at the end! Not to mention my fear of heights. Hopefully the next one will be better.

I'll let you know his response when I hopefully get it. I'm assuming that if shingles are not required, then I'd use the aluminum flashing technique from @BradCagle. If they are required, then I'd use the technique from @onokai. Of course I'd still have a couple questions afterwards, I'm sure.

Thanks again for the replies! Very much appreciated.
 
You need to waterproof it as water always finds a way in. The shingle job is about 20 minutes-easy to do-you need a few singles (they are 39inchs-metric or 36 inchs wide the old standard US ) The metal flashing can work but thats a jo bo repair in my view. You can buy a few singles from. a roofing company I'm sure-color is not important. Fix it right once they say and since it being covered it will be hell to access again.
 
Last edited:
Heard back from my inspector. He indicated that it will require shingles and not just a patch.
I have been watching some youtube videos and am getting ready to do this.
Two quick questions:
1. Is my roof using architectural shingles or 3-tab? I've attached a couple pictures.
2. If architectural, is there any issue with using 3 tab to replace (since they're cheaper and also b/c I just bought them, lol).
Thank you.
 

Attachments

  • IMG_2360.JPG
    IMG_2360.JPG
    1 MB · Views: 17
  • IMG_2358.JPG
    IMG_2358.JPG
    414.9 KB · Views: 17
  • IMG_2357.JPG
    IMG_2357.JPG
    786.1 KB · Views: 17
Those are architectural shingles. I put down a lot of shingles in my il-spent youth so here's my advice. When you do the repair, remove the entire affected shingles and replace them with whole shingles. You do not want to depend on tar for the seal. Tar is unlikely to last the rest of the life of your roof and will eventually leak. Also, be sure to fully patch the underlayment. Ice and water shield in small rolls like sold to install windows and door casings is good for small repairs in the underlayment. Be sure to overlap by several inches on the sides.
 
Last edited:
I removed a vent during my solar install and replaced it with a Soladeck which is how I got my cables through the roof. The Soladeck my be the same size as the vent that you are replacing. If you are careful removing the uphill shingles you may be able to reuse them around the soladeck flashing.
 
Last edited:
Thanks @camelCase and @Ampster!
Do you guys know if I can fix the area using 3 tab, knowing that I don't care too much about appearance given it will be covered up by the panels?
Also, @camelCase, I purchased some 30# felt paper. I'm assuming this is fine. Based on your post, I will try to find where the underlayment is underneath the shingles and overlap with the new felt paper by a couple of inches. Correct? Also, can I use regular 1.5" roofing nails for the felt?
Thank you!!!
 
You could use 3 tab, but there is no reason to. You can buy architectural shingles at lowes or home depot. #30 felt paper is fine for the underlayment, too. The nails just need to be long enough to pierce through the decking (plywood) so 1.5" nails are perfect as long as there is only a single layer of shingles on the roof.
 
3 tabs are easy to spot as each tab is about 12 inches long-thats what your phjoto looks like but the angles are hard to tell exactly . Some time ago roofing went metric and the 3 tabs are now 39 inch divided buy 3 gives you the tab length .
Either way 3 tab will work fine.
 
Last edited:
I decided to return the 3-tab and buy the architectural shingles. I think they are a better fit now that I look more closely at the roof.

I've removed some of the broken shingles on both areas and the put felt overlapping with the other felt.

I figured I'd ask you guys a few questions on one of these first rather than both to get me started and avoid confusion.

On the attached picture I've labeled a few sections.
A. is where there is a break in the shingle.
B. is approx 39" in length. Which is very close (if not dead on) to the length of my replacement shingles.
If you look at the right side of C, D, and E, it looks as though they each increase in offset from B as you go up the picture. Like an upside down stair case.
So, this is what I think I should do next:
Fill in B and C with a full sheet.
Trim the shingles on the left side of D and E so that I can fit a full sheet in their spaces.
F has me confused, and unfortunately it is getting pretty close to the ridge vent (not shown).
Any advice is most welcome!
Thanks.
 

Attachments

  • InkedIMG_2636.jpg
    InkedIMG_2636.jpg
    1 MB · Views: 14
If you look at the stair step in photo on right hand side-thats what you need on left hand side as well. No lines should line up as they do on the left rows F,E and D. You have the newer 39 inch metric shingles .You need 5 at least rows of new singles cut to fit-look at some videos if you do not know how to roof.There are somegraet books as well at teh library on thisi I'm sure. The roofers handbook is what I have but I have roofed a 1/2 dozen jobs before. Get a roofing blade in your utility knife and a wonder flat bar to lossen nails up under shingles and the right lenght of gavanized roofing nails (whats under this roof-open attic?) To short is no good as is to long.Row A is to hard to make out whats going on in. this photo? But thats where you start with a new single. So that said row A (break in single does not mean anything to me?) If its broken reaplace it.
start at bottom.This is a easy repair use a straight edge to cut the singles .
 
That red box is your first shingle, cut it to length so it fits perfectly there. Only nail in the nail line, which is the mid point/line with a little sticky tar on it. Tuck the corners (where the "these corners" arrows are pointing) under the existing shingles.

InkedIMG_2636.jpg
 
Your next shingle goes here. Again tuck the corners in under the existing shingles.

Keep going just like this. You can start to cut the length of the shingles down smaller on the rest.

InkedIMG_2636 (1).jpg
 
Back
Top