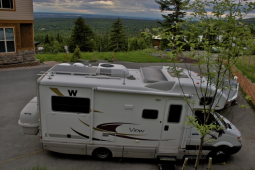
Full-Disclosure:
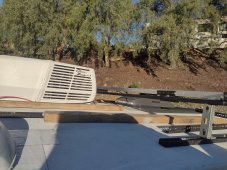
Although the Mabru installation does leverage the standard/existing 14"x14" opening from the rooftop A/C, these additional changes were required:
1) Mounting Bolts: Drill 4 holes from the roof-top all the way down through the Ceiling, one bolt per corner.
NOITE: Care was taken so that the holes could be capped inside of the RV without becoming an eyesore if/when replacing the Mabru with a standard roof-top A/C.
2) 12 VDC wires: Drill 1 hole from the roof-top but not all the way down through the Ceiling,... The DC wires are routed within the Ceiling structure, which is about 4" thick in the Winnebago View/Navion.
3) A/C Intake (to collect hot air from the Coach): As shown I opted to use just the Front Vent. making an extra opening in the Ceiling (inside the RV) but without going all the way up to the roof-top, so the roof-top opening remained at 14"x14". But the Front Intake opening was made as large (or just a bit larger) than the Intake on a standard 15,000 BTU RV unit, to ensure the Mabru is not compromised.
NOTE: Care was taken so that the liner *leather-like" material is rolled back to allow the ceiling opening to be refilled as it was originally, if/when replacing the Mabru with a standard roof-top A/C.
4) Connection to the existing Coach's ducting required some minor modifications to the "Airflow Director" on the Mabru.
5) To control the LP Furnace we had to replace the GE Thermostat ... Apparently the GE Thermostat requires a link to the control board on the GE root-top A/C.
NOTE: All existing (unused) roo-top connections were capped in place to allow for a seamless roll-back to a standard roof-top A/C.
Also, all modifications were consulted with and approved by Mabru, to avoid any Warranty issues.


")