diy solar

diy solar

Technique to Accurately drill bracket holes in concrete?

svetz

Works in theory! Practice? That's something else
Joined
Sep 20, 2019
Messages
7,473
Location
Key Largo
Have a 16' rail held by 4 brackets, one side is up against a wall, the rail is a bit wider than the bracket, so can't drill through the bracket holes, drilling through porcelain tile over concrete. The brackets are fixed on the rail, so no leeway with bracket wiggling.

The best I can think of is to use a pencil to mark the holes, move the rail, drill the holes, move it back and screw it down. Use some tape to minimize wandering.

But, slight inaccuracies add up and that technique hasn't work that well in the past for me, so for stuff like this I prefer to drill through the bracket holes, typically starting at the two opposite ends to insure the distances are right, then do all the rest. Can't do that here so looking for a pro tip.
 
Last edited:
Use a smaller drill first with the rails and brackets in place..
That's what I do where possible.

I often use anchors that are a bit smaller than the hole to allow a bit of slop, where allowable.

Which is almost everything I do since I set the rules for the crap I'm installing anyways. No failures in my industrial environment so far in 10 years I've been pretending to be a qualified construction worker.
 
Have a 16' rail held by 4 brackets, one side is up against a wall, the rail is a bit wider than the bracket, so can't drill through the bracket holes, drilling through tile over concrete. The brackets are fixed on the rail, so no leeway with bracket wiggling.

The best I can think of is to use a pencil to mark the holes, move the rail, drill the holes, move it back and screw it down. Use some tape to minimize wandering.

But, slight inaccuracies add up and that technique hasn't work that well in the past for me, so for stuff like this I prefer to drill through the bracket holes, typically starting at the two opposite ends to insure the distances are right, then do all the rest. Can't do that here so looking for a pro tip.
A picture of the bracket would be helpful.
In the past when I had difficult brackets to put up I used those thin 1/8" cardboard sheets sold for school projects and just traced out the bracket and slots then cut them with out with a box cutter or scissors. Then I was able to put them on the wall and level them and tape each side down then drill the holes.
 
With the rail attached I doubt I can drill through the bracket holes, definitely not where the
rail is near the wall. The brackets are typical, about 4" x3" with four holes for 1/4" tapcons.
Just enough room underneath to fit the tapcon, a socket wrench, and well chosen swear words.

With a stubby pencil I Should be able to get good locations assuming nothing moves from
start too finish. I suppose I could draw around the outside of all the brackets first to confirm
nothing moved while drawing the holes. I know one the problems is if the pencil is tilted
the hole center is off. Can't spaypaint over the holes, wife would shoot me.

Should have mentioned earlier, the cardboard template idea won't work as the mounting
surface is very irregular (steps).
keep-calm-and-dewalt-on

Hmmm, how about drawing around the outsides of the brackets, then take one off and use it as a guide to start the holes?
 
Last edited:
As long as your brackets are consistent that works too.

I did that with the last robot enclosure I put up actually, because I was using 8020 parts and they're all pretty much bang on.
 
Okay... about to start drilling for dust...

Have the outlines and holes all marked (just in case the brackets aren't all the same). Naturally, the rail moved after doing the center two, took a while to get realigned and I can see it's not perfect, but the worst is within ~1/32".

Wrapped a 3/16" bit with tape until it's the same diameter as the bracket hole. Ideally, I just need to get all 16 started, then I can come back and drill a pilot, then the proper sized hole. I figure worse case I can make the hole in the bracket a bit bigger.
I believe in you buddy.
 
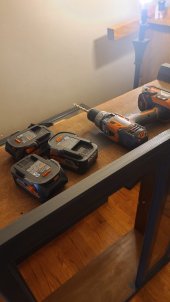
Speaking of drilling, anyone seen my battery charger?

4 dead batteries. No charger. Project to get done today.

16373360042241839587766719396907.jpg
 
Complete and utter disaster. Porcelain is harder than concrete to drill through. Fortunately, I can still see where the holes are supposed to be so I'm angling the bit over and I seem to be able to sink them fairly accurately. Won't know till I try putting them in.

...anyone seen my battery charger?...
My wife always tells me it's right where I left it. But, I always find it in the last place I look.
 
Last edited:

Dag nab it!​

Twice now, once the tile has been penetrated the drill has gone straight into a void. Each has been on a different bracket.
Any ideas to make it more structural?
 
Complete and utter disaster. Fortunately, I can still see where the holes are supposed to be so I'm angling the bit over and I seem to be able to sink them fairly accurately. Won't know till I try putting them in.


My wife always tells me it's right where I left it. But, I always find it in the last place I look.
Not me… I always keep looking where I used it last. Maybe someone will put it there…
 

Dag nab it!​

Twice now, once the tile has been penetrated the drill has gone straight into a void. Each has been on a different bracket.
Any ideas to make it more structural?
How big is the void? What is the wall type? Fill with construction adhesive? Use butterfly lags?
 
How big is the void? What is the wall type? Fill with construction adhesive? Use butterfly lags?
Not a wall, it's tile over a concrete staircase. The holes are fairly far back (~2") from the step edge... figuring there's a crack in the concrete or a void.

Update
So only the two holes with issues. The bottom of the stairway is stuccoed over, can't see anything from there...

I suppose it's time to pull out the probe....

alien-surgeon-260nw-108871751.jpg
 
Last edited:
Pity the hole was too small for the endoscope. The bottom one feels like a hefty chunk is missing from underneath, probably the whole corner chipped off, at least 5" deep.

The next one up feels like a crack, solid all around the probe.

I wonder if I could get cement down the hole to fill the void and use epoxy in the crack and not make a mess of everything?

If you have any thoughts let me know....
 
Last edited:
Easiest way to free drill, is to mark the holes, then make a (large) cross to mark the center of the hole. When you start the drilling, do not put it on hammer until the beginning of the hole is centered. Another option is to make a wood template first and use that to drill the holes.

Tiles will have air pockets behind them, just make sure the anchors are in the concrete behind them. If it is a wood wall with drywall, it won't be able to take much weight unless you screw into the studs. If it is in the floor, distribute the weight.

If you have cracks, you might want to fix those first, your hardware store will be able to sell you what you need.
 
Easiest way to free drill, is to mark the holes...
That's what I ended up with, couldn't keep the brackets aligned while drilling.

Tiles will have air pockets behind them, just make sure the anchors are in the concrete behind them.
Using 1/4" tapcons, concrete underneath the tiles.

Got the holes now (although the tile is porcelain so I need to go back and drill them a bit wider lest inserting the tapcon crack the tile)... once I've got them widened I'll try screwing it down and see how well they line up.

Trying to figure out what to do with the void and the crack (two screw problems). So many screws it probably isn't important...but...

Right now I'm thinking I can get some empty caulking-gun tubes and put in some cement to fill the void (assuming I can't find something for that ready-made to go) to fill the void. Similarly, the crack might be best handled with an epoxy injection?

Let me know if you have better ideas.
 
Last edited:
Okay, just have to vacuum up some mess and then see how many brackets I need to redrill and how many tapcon heads I snap off...
 
I don't know what it is you are using the brackets for but if it is covering the tiles anyway then I'd be fixing a timer board or batten to the wall first.

The position of board/batten fixings into the wall doesn't need to be super accurate and it can be made to secure directly into wall studs. Then the bracket can affix to the board/batten - getting the bracket drill holes in the right place is way easier with timber.
 
Either all that obsessing paid off or I was worried about nothing.
Didn't crack any tiles, didn't have to redrill any brackets and didn't snap any heads off.

Seems to be really solid, but I still want to deal with the void and the crack (these
are hidden underneath the tile, not visible just structural and prevent two screws
from getting a good grip) so if you have any ideas on them please let me know!
Whew!

Thanks Everybody!​


... to the wall first....
Doesn't attach to the wall, it's porcelain tile over a concrete stairwell.
Full-Square-Round-Drill-5D-Diy-Diamond-Painting-Superhero-Deadpool-Than-heart-humor-Cross-Stitch-Wedding.jpg_Q90.jpg_.webp
 
Last edited:
Back
Top