diy solar

diy solar

48V system install into my home, a 27' travel trailer.

Update: I ordered a few things to see if they will work for mounting the panels on my roof. For the price I paid, I'm very pleased. PXL_20230912_171813191.jpgPXL_20230912_171951216.jpgPXL_20230912_171820856.jpg

PXL_20230912_172815147.jpg

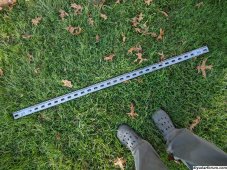
It's no Iron Mountain setup, but this is better than most other solutions. I also got in some 5' sections of low profile stainless unistrut. That will be going down first, the standoffs will mount to that, and then the panels will be mounted to the extrusion. I have to clear a few things on my roof top, mostly tank vents, and the unistrut and mount combo is pretty much the perfect height to clear the obstructions.

The only disappointment was the spring nuts I ordered. They are galvanized steel, and I'm sure I ordered what was described as stainless.

I'm trying to stick with stainless and aluminum to keep any future rust as minimal as possible.

It took a surprising amount of my time to figure out what screws to use to attach this to the roof structure. It's only 3/8 plywood over 3/4" x ~1 1/2" trusses. Talk about sketchy, but, as long as I catch 3-4 of them, it will be fine. I settled on screws, finally, but am annoyed that I have to order a box of 250,since they are roofing screws and you use a LOT of screws for installing metal roofing. Once I order those, I'll be sure to post pics.

I still haven't heard back from watt247, so I'm still in limbo for getting my questions answered, but I'm not in a rush yet so I'll give them another day before I try again.
 

Attachments

  • PXL_20230912_173002282.jpg
    PXL_20230912_173002282.jpg
    2.5 MB · Views: 1
Oh! I also ordered this. I think it will be useful for getting batteries topped off before install. PXL_20230912_175715834.jpg

It switched on and didn't blow up, so that's usually a good sign. I'll be testing it out with my o-scope in the not too distant future, so that will be something fun to look forward to.

I really like the display on this thing. The colors are even more vibrant in person. My higher amperage 30V unit doesn't look as good as this.
 
I talked with Ian from watt247 today. He answered my questions that I had. I decided to order one MPP 3048LV-MK for now. I don't need 6kW at this time. I still have a lot of other things to figure out. I know I can fit two of these units in my trailer. I don't mind paying a bit more shipping later to get another unit if I need it. I don't have to worry about battery capacity feeding a 6kW unit right away. And finally, I'll be running my panels as in a 2S2P configuration and we'll see how she goes.
 
I'm excited since my 3048 is out for delivery, and I am home sick, so, at least something fun will happen today.

I also spent a bit of money on 4 20Ah LiFePo4 batteries to get a battery in the system since it is required by the 3048. No comment as of yet on the batteries I selected, but I will see if they hold up for the very light use that I expect to put them through until I figure out a more capacious solution.
 
Last edited:
It's arrived! I got it out of the box and powered it up with the 60V power supply that I bought. I changed a few of the settings, and was very glad to get rid of that beep. PXL_20230920_131948765.jpg

I wasn't expecting it to come with any coms board, so it's good that it at least comes with the RS232 and USB interface. I might poke around at that later.
PXL_20230920_132207278.jpg

PXL_20230920_132156638.jpg

Sitting idle it's only drawing a smidgen over 41W. That's not bad at all!

So far, so good.
 
Taking the advice from Will, I made up two pigtails to test the pv input. I'm still waiting for the batteries to show up before I hook up the PV, abd in really hoping they show up before the sun goes down. Two panels are in full sun at the moment and I'm excited to s the system work!

PXL_20230920_154514753.jpg

You may notice that I used ferrules on the ends that go into the PV terminal block. I prefer doing that.
 
Still no batteries, but, two panels in series:PXL_20230920_165351370.jpg
In full, but late sun, are putting out 93V and ~6A. 550W for a simple short circuit test is pretty good. Trees are starting to throw shade, but, production is still pretty great.
 
frankenstein-its-alive.gif

I HAVE HARNESSED THE POWER OF THE SUN! BOW BEFORE ME AND QUIVER! MUAHAHAHAHAHA!

AHEM...

The panels are now shaded:PXL_20230920_165351370.jpg

PXL_20230920_173343835.jpg

And here's my very temporary, kinda janky test setup:PXL_20230920_173528441.jpg

But! The unit is on and charging! PXL_20230920_173852831.jpg
The MPPT is dropping the voltage down to between 60-70 from ~93. I'm so giddy!

Annoyingly, I'm feeling well enough at this point fast I'll go in to work tomorrow, but I'll certainly be testing all this again after work.

Huzzah!
 
It's dusk and it's still running. I've got the cables running through my door, and I've got other stuff to do, so, I'm calling it for the evening, though I wanted to see how long this would keep going. PXL_20230920_190651006.jpg

PXL_20230920_190710413.jpg
 
Today was an historic day. I harnessed the power of the sun to cook rice! My little Zojirushi rice cooker was powered via the 3048 with between 5-600W coming in from the two panels.

PXL_20230921_164431743.jpg

PXL_20230921_152930417.jpg
I'm beyond pleased with how the system is performing, with how janky everything is currently.


My shunt/monitor came in. It's a re-badged junctek 600A unit. I'm not really sure why I ordered a 600A unit. That's a bit silly. But there's no kill like overkill!

PXL_20230921_181622314.jpg

So far, it's fine. The voltage readings are off enough to annoy me, but not enough to do anything about since the calibration is only available in 1% steps, and that's just not fine enough. I'd prefer a direct mV offset, though, maybe that wouldn't hold up over temperature swings? But I do think that the offsets should be at least .1% to get closer. The ammeter on the shunt seems to be dead on to my adjustable power supply. I'm sure I'll have more so say after I use it for a longer period of time, but, the price and features are both very good, and it seems to just work, which I also like.
 
PXL_20230921_201941114.jpg

I'm still learning about lifepo4 batteries.

The cheap 20Ah batteries I bought seem to be perfectly happy in series, abd one of thr reasons why I bought these was because the listing showed that you could series them.

As you can see, the charge current was being cycled on and off:

BMS_cycling.png

The longer space came after I dropped the current from 5.1A (max my VPS will put out) to 2A, just to see what would happen. I'm not sure if this is typical battery behavior. I'll probably end up asking in another forum section.

I decided to stop here for the night.
 
I've had some help figuring out what's up with my batteries, and after a long, slow test overnight, everything is going well:

Shunt_reading_3.png

This was a very valuable learning experience, and I think I can operate the 3048 much more safely now.

I don't have any panels hooked up today. It's rainy and windy here in SE PA, and since I don't have a good way to secure the panels, they are put away. It's a shame, since it would be a very good day to see how they perform in overcast conditions, but I'm satisfied with completing the first test of my batteries.
 
Another update:

The batteries are pulling more than they are rated for! Yes, this is a very low draw test, but I'm still pleased.

Shint_reading_04.png
 
Hah! The power just went out. It's an odd time for that, unless a tree went down after being weakened by the storms we've been having. Granted, I don't have the battery capacity to really deal with this, as the estimated grid restoration time is in 6 hours, and who knows if that's really the case. But, this is certainly motivation to move things along.
 
Now that I've confirmed that everything is working as expected, I have to figure out how to run the wires from my panels to where I am going to stick my batteries and the 3048. Does anyone harken to know if a very clean way to run 10g wire down the side of a trailer? I can't go through the roof as there is no good path from the roof down to the pass through storage and I would rather make the penetration from underneath, since that's a much more sensible thing to do to keep the hole dry.

I also ordered a set of MC4 branch connectors and inline fuses. I will eventually build or buy a combiner box, but this will get be connected more easily and with less outlay than anything else at the moment.
 
Update time!

Stage one complete! PXL_20231008_165020652.jpg

I forgot to get a pic of the screen showing solar input, but, the 3048 is in the general area where it will live. PXL_20231008_134334844.jpg

PXL_20231008_142810307.jpg

The reason why it took so long to get to this point is that the factory wiring wasn't connected to the gland on the roof. I had to figure out which wires were run where, and that took a hit of poking around in all corners of my trailer. Then I also discovered that the gland wasn't even installed correctly. PXL_20231007_174135512.jpg

The installers didn't bother to cut a 4th piece of butyl tape! And they also didn't bother to connect the pigtails from the terminals to the wires, so I had to lengthen the pigtails and connect them myself. This is behind the microwave:

PXL_20231007_192009146.jpg


So now the panels are connected through the roof, though I haven't mounted them yet:
PXL_20231008_165141581.jpg

And I drilled a pass through:
PXL_20231008_161949053.jpg

Into the closet beside the bed so I can temporarily plug in the grid backup, run a chintzy extension cord (that will be replaced shortly with a more proper type) to let me charge my phone and power my alarm clock. I also ran the display for the shunt up through to make monitoring easier:PXL_20231008_164733277.jpg

Overall, I'm very pleased with how things are turning out. The next step will be mounting panels to the roof, and that will be exciting to complete.
 
Back
Top