diy solar

diy solar

Astrophography build

In the past, Giandel 300W Pure Sine Wave inverter worked great for me to charge laptop and other small stuff. at ~55 usd

all the phoenix ones are pure sine wave as far as i gather. excited to see where this solar powered sky observation project goes! ???
Guess I should have said a $20 inverter instead of a $200 inverter. I forgot we were talking such small loads.
 
Question is though, do any of those have a stupid audible speaker?
There is a low voltage "alarm" but I think it just flashes a light. No indication of an audible beep speaker in the manual, that I could find.


1647144762943.png
No beep. As far as I can tell.

Just green light fast double pulse.
 
By the way, if one installs the VictronConnect app, it's possible to mess around with all the settings on a virtual Phoenix inverter for free.

1647144946067.png

Tap "Demo Library" -> "Phoenix inverters" -> any Phoenix 12/AAAA model.

the interface will appear as if you were connected to one, and settings can be changed :)

(note: phoenix inverter doesn't come with a bluetooth adapter and will need an adapter to connect to bluetooth)
 
for the giandel, yes it beeps ?? ?and the voltage beep threshold cannot be adjusted.

1647145814173.png

1647145803303.png
 
Have one coming tomorrow. Will find out if it has an alarm on it. If not it will be a perfect fit.

Had some problems with the big printer that was printing out the case but made some adjustments to the settings and have it printing around 78 hours. Hopefully Amazon will show up early tomorrow with the other spools I ordered before the current spool runs out.
 
Good news. New inverter doesn't have an audible alarm, at least on power on which for this project is perfect.

It does draw 800ma of power though at idle with nothing plugged into it. 300w & a pure sign wave inverter. This is the one I went with:

Have most things modeled up and waiting to print on one of the printers. BMS mount is good. I'll add a spacer on each of the screw posts so it isn't sitting right on top of the mount and it will slide into the spacer/bracket for the top of the cells. Once that is printed I'll throw it in the acetone pan overnight and let the 2 pieces bond together.

Cell box is printing. Went ahead and changed spools before going to bed just to make sure it would still print. One of my spare ABS spools is actually blue and looks almost like the same color as the wrap on the cells (from what I can tell in the pictures anyway). I can always spray paint it, but really wont matter much since it wont be visible. The box will use 75% of a full spool so around .7kg of material.

Decided on going with Anderson PP for the solar input plug on the case even though I haven't made a decision on the panel yet. I can always get a cable to connect to something else if necessary.
 
Things are progressing. Here are some images:
box being printed so far
Front of the case
Side where the 120v incoming power is

I'll be putting some epoxy & sealant around the 120v strip. Waiting till I get everything else done though so I only have to do the epoxy once. This should be the only area where it doesnt have any kind of weather/dust proofing. The little bar above it is where the shelf on the inside is. All the outlets sit below the shelf as well.

The green picture is where the raspberry zero, arduino, relays and buck converter will go. It will mount on the inside to the back of the power switch.
 

Attachments

  • box printing.jpg
    box printing.jpg
    435.1 KB · Views: 2
  • case front.jpg
    case front.jpg
    522.8 KB · Views: 2
  • case side.jpg
    case side.jpg
    122.4 KB · Views: 2
  • raspberry box.png
    raspberry box.png
    236.7 KB · Views: 2
  • inside case.jpg
    inside case.jpg
    347.1 KB · Views: 2
In case anyone is wondering, here are a couple examples of what this will be used for.

Andromeda Galaxy (eventually will collide with our galaxy)
Rosette Nebula (5000 light years away from us)
 

Attachments

  • 20220227 - Rosette Nebula 112x30.jpeg
    20220227 - Rosette Nebula 112x30.jpeg
    294.7 KB · Views: 6
  • 20211008 - M31-D7200-49x30sec_iso 1600.jpg
    20211008 - M31-D7200-49x30sec_iso 1600.jpg
    310.6 KB · Views: 6
Here is the right side of the case. Nothing is permanently mounted right now. Using the display on the bench with my mockup of everything but it does fit & snap into place.
 

Attachments

  • case right.jpg
    case right.jpg
    170 KB · Views: 2
Here ya go.

That smudge in the Milky Way image (not the castle one) is Andromeda.
 

Attachments

  • Fort de Chartres State Historic Site 08-28-2021 D600 14mm 15sec f2.8 6000x4000.jpg
    Fort de Chartres State Historic Site 08-28-2021 D600 14mm 15sec f2.8 6000x4000.jpg
    167.1 KB · Views: 8
  • StarStaX_DSC_0363_00358-DSC_0025_00020_gap_filling signed.jpg
    StarStaX_DSC_0363_00358-DSC_0025_00020_gap_filling signed.jpg
    469.6 KB · Views: 8
  • 20211105 - Bismark Milky Way.jpg
    20211105 - Bismark Milky Way.jpg
    188.4 KB · Views: 8
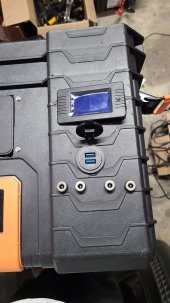
I am looking at building a battery bank for powering all my gear when out doing Astrophography but need some help with my wiring diagram. The question I have is around the battery monitor/shunt. Think everything else I am good and dont have any issues. I plan to use this battery monitor: https://www.amazon.com/Multimeter-Battery-MELIFE-6-5-100V-Multifunctional/dp/B09BQ4PHZ5

Do I have the wiring correct for this? It shows a power lead to the battery & to the load which is what is confusing me.

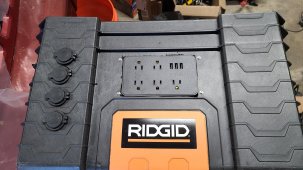
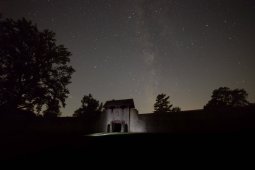
My plan is to build a 4s with 160ah lifepo4 from Docan after watching many of Will's videos with a Wonderer 30amp solar controller to be able to charge with solar panels during the day. I dont need all the power of a 2000wh battery bank each night so even if charging isn't great I should still be able to get through a couple of nights with enough power. Will have a small 300w inverter for charging my laptop. The fuse box will have all the output since everything used is 12v. Also putting in a switch to power all output off for when not in use, traveling,etc. I already have an arduino temp controlled fan as well.

Excluding when I am charging the laptop the power usage is pretty small at only 110wh depending on what gear I use at the time.

Thanks and welcome any feedback/input & corrections!

Just my $0.02 as a long time astrophotographer: get a DC to DC converter for the notebook.

Less items to transport when remote and no conversion losses. If you feel paranoid bring both, which I do for week long trips. But short one or two day travels I don't bring as much equipment with. At night the DC charger is always powering the notebook. I use anderson PP connectors on everything I use - including the laptop DC charger.

I built a 4S 280Ah battery pack last year and ran everything all week off grid at a star party in October without charging.
 
laptop is usb c charging only....let me know if you know of a DC-DC 160w charger for usb c. Each scope has their own computer which are already DC powered. I have a couple of smaller 240ah power supplies but with 1 scope, camera, computer & dew heaters they only last about 4 hours depending on how much the camera is cooling. I usually run 2 scopes. I only use the laptop to remote into the scope computers to setup the imaging sessions, check progress, and sometimes do live stacking. Plus that would just be an added expense every year when I replace my laptop. Most laptop mfg are dropping DC power ports also like they did with DVD drives. Having a small inverter or carrying around a small charger (which I do anyway) isn't that big of a deal. I sometimes have another laptop as a backup that is an older one that I can use or if someone needs to borrow one.

Running 2 scopes with their gear I need 900wh for an 8 hour session, plus a little more for just getting things setup and ready. Before starting this project I put together a full spreedsheet of all the equipment and what it's power draw was so I would know how much Wh I needed. Was going to go the commercial route but most dont have the DC plugs I wanted, were crappy or just too expensive. This will set me back less then the cost of a commercial 1000wh unit, excluding my time of course but I have plenty of that.

I dont pay for any of my 3d printing materials either so that makes costs a little better but even if I did it will be less then $30 in material for everything I am printing.

Budget has been to keep this as close or under $900 for the entire build. So far it is looking like that is possible. The 2 largest expenses were the cells & the BMS. Most of the small things like the 12v outlets, DC 2.1 outlets, wire I had already from other projects. All told I have spent less then $700 the past week on parts/materials and by the time I will be done I'll have something that can give me enough power for a couple of days without charging.

I would just use my generator and run it all night to power everything but most star parties dont allow them at night so might as well get a bigger battery. Later on if I find I need more Wh then I can replace the 160wh cells for something bigger and only need to redo the box they go in. Was tempted to go with 230ah cells but wanted to keep the costs as low as possible for now.
 
Not sure why you think you need a 160w charger for laptop, if its drawing even half that amount of power you need a new laptop. My old Dell core i7 latitude uses between 3-4A while running things.
 
It's a Dell Precision. When I am doing editing of videos/images, it will crank out the power. 8 core with dedicated gpu and it sucks down the power. Do I really have to have it? No, I could prob get by with a smaller charger, but it's what it comes with so why buy something I dont need. Laptop is only plugged in when I need to charge or if I am doing some live stacking and dont want to run the battery down.

It's not what I think I need, it's what the laptop comes with when you buy it. Dell engineers are way smarter then I am. Just at idle & trickle charging it uses 30w according to my TP-Link smart outlet.
 
Since a picture is worth more....this is recently. Quite time was just normal low usage, web surfing, normal every day stuff. spike up is when doing some light video work. Stabilizes but still why the charger is sized the way it is by Dell. If I do live stacking it will usually be around 100w.
 

Attachments

  • Screenshot 2022-03-14 130517.png
    Screenshot 2022-03-14 130517.png
    18.5 KB · Views: 5
Back
Top