diy solar

diy solar

Capacity testing two used batteries

Ah ha, no problem, these things happen. Factory defect or not, that's definitely the issue, and I'm certain I can fix it, should it be needed. I hope they say, we'll send you a new one, but feel free to keep the broken one, that way I can solder it up, and can have one for up at the cabin, save me remembering it, and have one for use at home.

I know what you mean about 50Ah, and two of them the same is just doubly frustrating, but I can't use them at my cabin, because they won't be matched with the others, and anyway, I don't really have the panel capacity to deal with four batteries at once, even if they were matched, but, there must be something I can do with them, right? I'll probably invent something to make use of them, lol.

Got them nicely matched again, and connected them in parallel for the long term float.

Here's the inside, clearly showing the fault. Otherwise it seems well constructed, as best I can tell.

Fault.jpg

Cheers

Sutty
 
Not that it really matters now, because at my cabin I have switched to a higher 24V set-up, with a series connection between my two new batteries, but I'm curious with regard to the life of the above batteries, which spent their working life in parallel. The load and the charger, same wires from the SCC, were connected to a single battery, probably using 4 sqmm, and the heavy load, my inverter, was connected to the other battery, though used infrequently. The interconnecting wires, were heavy gauge, same as to the inverter, but I couldn't say what, other than to say they were thick. Guessing, I'd say they are close to the new 35 sqmm ones I just purchased, and I wondered if I'd been doing it wrong all along? I probably did lots of things wrong, because I did very little reading, and basically just threw it together back then, but was this one of them?

What got me to thinking was I was just looking at my float set-up, and it occurred to me that the charge path for the second battery was different to that of the first. I also considered, with brand new, fairly short, 35 sqmm interconnects, at a float current of only around 0.2A it wasn't going to make a scrap of difference, but either way, I decided to move the charging wire to the diagonal, and realised I hadn't done this previously at my cabin, when much higher currents might have been involved, from time to time.

Should I have been doing this all along, for the life of my batteries, when I had them in parallel? I mean it looks like now they've aged equally, but it would be nice to know, if technically, this had been a mistake.

Here's my float set-up now, having just changed it, whilst I'm testing these decrepit batteries.

Float.jpg
 
The diagonal connection scheme in your picture is the correct way. Connecting both leads to a single battery will typically result in higher current to and from that battery.

Please consult link #5 in my signature. Somewhere around page 17 they discuss various proper paralleling methods.
 
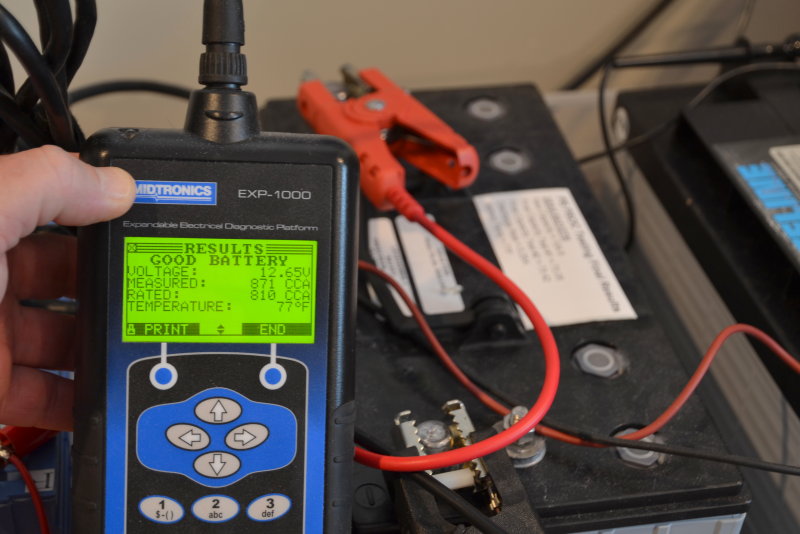
I have two retired 5 year old sealed lead acid batteries, 12V and 110Ah each, and I want to check the remaining capacity. One battery wouldn't initially take a charge, but I forced it with a little higher bulk, and a little higher float, overnight, before setting float back down to normal, and leaving it on float for a few days. First time off though, I used a normal car battery charger, and it didn't take a proper charge overnight, with the voltage plummeting as soon as I disconnected the charger. Now though, after a prolonged recovery charge, as described above, using my solar charge controller, it's been holding at near 13V for a few days, just very slowly going down, just as the other one did from the get go. Maybe it was soft sulphated, and it's now been 'fixed'?

Anyway, I now have them both sitting here at about 13V, and I'm wondering if they have anything like the capacity they did when new, but I'm not sure of exactly how to go about checking it.

I have one set up now, ready to go, with a car headlamp connected to the load of my solar charge controller, which will be well within spec for the load. I have the app available to measure the current, but I'm going to use my multi-meter to measure the voltage directly at the battery terminals, rather than trusting the SCC, and the app, because on trial runs, with this reasonable load, being delivered from the solar charge controller, there's quite a lot of volt drop causing the SCC to report low values. I also have a camera, looking at my volt meter, so that when taking a reading for current in the app, I can also keep an eye on the voltage at the same time, which I'll also make a note of.

Tests show the lamp will draw around 4.3 amps, and I can repeatedly take the actual value, whilst writing the time down, so I know how many Ah I've used, and can keep going for the whole day, say for 12 hours, or more if need be, by which time I should have used near half of the listed capacity. Or, terminate early, if I get too low a voltage. I'll take a reading every 5 minutes, for the first few, because I expect the current to fall off quickly, at the beginning, due to initial voltage sag, and then try to take a reading every 15 minutes, but may spread that out, if the current starts holding well, after the start. I'll then just multiply the current, by the fraction of the hour that has elapsed since the last reading, and keep a running tally, which I think should give me the Ah used.

My questions are this:
Is this plan a reasonable approach?
Is aiming for 50%, adequate for a test, or should I go deeper?
How do I know what 50% is, when it's under load, if I terminate early based on voltage? Early practice runs show a significant rebound, or recovery of the voltage, after a 24 hour rest.
Should I just set a target, underload voltage, of say 11.5V, and keep going until then, or is that too high to get the true capacity?
If the trick is to keep going until it's actually dead, voltage drops off a cliff, won't that harm the battery, or is it the only way to know the capacity for sure, and for just one full cycle would be worth it to find out?

I'm thinking I might have to do that, as remaining capacity by voltage seems to be all over the place on the internet, as far as I can see, with most saying to be sure you need the specifics for the battery from the manufacturer, but these are just some generic leisure batteries, so I'm not expecting to find that.

I'd be thankful to hear any thoughts you guys may have.
Are you certain you can't access the cells? Many sealed batteries have caps, they are just difficult to remove.

If you do gain access, then ensure electrolyte is covering plates and use a equalization charge after absorption. The idea is if any hard sulfation is present, the sulfation is blown off the plate and new lead is exposed.

If it was not sealed, personally I'd hook my DC welder to it and run thru the 5 minute on/10 min off procedure 5 times to not only remove hard sulfation but also to stir the electrolyte and eliminate stratification. If it still tested low capacity, then most of the lead is laying on the bottom and not on the plates. Welder is not for faint hearted but does work. Long equalization charge with a power supply works very well also but you don't get as much heating effect to expand plates.
 
The diagonal connection scheme in your picture is the correct way. Connecting both leads to a single battery will typically result in higher current to and from that battery.

Please consult link #5 in my signature. Somewhere around page 17 they discuss various proper paralleling methods.
Nice one. Thanks for pointing out the links. I hadn't noticed those.
 
Are you certain you can't access the cells? Many sealed batteries have caps, they are just difficult to remove.

If you do gain access, then ensure electrolyte is covering plates and use a equalization charge after absorption. The idea is if any hard sulfation is present, the sulfation is blown off the plate and new lead is exposed.

If it was not sealed, personally I'd hook my DC welder to it and run thru the 5 minute on/10 min off procedure 5 times to not only remove hard sulfation but also to stir the electrolyte and eliminate stratification. If it still tested low capacity, then most of the lead is laying on the bottom and not on the plates. Welder is not for faint hearted but does work. Long equalization charge with a power supply works very well also but you don't get as much heating effect to expand plates.

No, I'm not certain, and would try a bunch of things, in the spirit of experimentation, whilst not forgetting that they were only destined for the scrap yard anyway. I tapped at what is obviously the cover for the valve caps, with a big flat bolster chisel, before doing anything else, because I thought it would be interesting to look inside, but I didn't hammer at it very hard, because I thought if there were other, potentially less destructive methods, then I should try them first.

As it is, I'll see how much more capacity I can generate with this long float process, and if it's little to none, I'll bash the cover off, no matter how hard I have to whack it, on at least one of them, just out of curiosity, if nothing else. At the least it would be interesting to see exactly how these particular ones are put together, and what the state of the electrolyte and plates are now. If the electrolyte is low I'll top it off, take a reading, and also try the equalization voltage approach. If there's still little to no improvement, I'd be prepared to try the welder approach too.

I have an electric welder, so is there a thread where you have detailed how to carry this out? The current can be adjusted dramatically, for bigger rods, on mine, I presume all, so what setting do you go for, etc.

Of course if they come back quite well, with just the extended float, then I'll just use them.

Cheers for the further thoughts.

Sutty
 
This channel- I used the welder he mentioned in the description/comments.


Uncle Tony did this video and there are 2 followups.


Welder has to be DC, some of the inverter DC welders will not work. I ended up ordering 3 welders and returning 2, the one I use was one Sweet Project Cars listed in his description.
 
Thanks, good info. Not sure what mine is, but it's very old, though works well enough for welding still. I've watched those, but I'll bank the information, depending on what the result of my other activities proves to be, and whether or not I can get the tops off, if I have to.

As an aside, the float current has dropped way down to 0.10A, and may yet still drop lower? This implies to me that there's not much self discharge going on, with little effort required to keep them at 13.8V. Then again, they are being charged so gently now, across two quite large batteries, it's hard to imagine that it's doing anything significant, but I'm hoping to be surprised. Fingers crossed for next week.

.1A * 24h = 2.4Ah... about 2.4%/day/battery if you're looking at it in terms of self-discharge. SLA is not as bad as flooded at 1%/day loss, and not as good as AGM at 0.1%/day loss, so that's still a significant amount of input for these batteries.
 
Small update on the battery tester, having sent a few mails back and forth, they just said, return it using Amazon's return service. I started the process, and felt it was more onerous than just re-soldering the component, inside, which is what I've now done. Works perfectly, and reported 47% SOH, on both batteries, which is quite amazing, but my tests had determined them to be very similar, so maybe not.

I then put it on a very small AGM battery, that I used to have in my quad bike. That was also 5 years old, or thereabouts, and I had replaced it because when I would go to use the quad, it would often not start, and the battery had been horribly mistreated, in terms of very irregular good charges, so I assumed it would be failing. The test result was, battery good, recharge, with a CCA value surprisingly close to its original.

Having replaced it last year, it turned out I had the same issue with the new battery, and following a whole bunch of tests on the bike, it turned out it was the rectifier/regulator, which when replaced, restored the quad to proper operation. Since then I had suspected that the replaced battery would likely have been good all along, and the battery tester has now confirmed this.

Had I had this tester last year, it would have saved the cost of a new battery, because I would have looked elsewhere immediately. Now I have a useless, good, 12Ah battery, lol.

Looks like it will be very useful. Thanks for the recommendation sunshine_eggo.

Cheers

Sutty
 
Armed with the new battery checker, I have now checked the two old batteries, after two weeks of float, and there's been very little improvement, with the CCA value being way down. IR and CCA values are remarkably close, so they have aged equally. Whilst they may well have 50% capacity, as measured in the above tests, I figured I may as well try to get the best out of them, and decided to try the welder trick.

Before trying to knock the sealed tops off, I found an old flooded battery, being at least 20 years old, and thought, whilst not expecting to be able resurrect it, I can't make it any worse, or if I do, at least it won't matter. Dug out the welder, and measured the DC voltage. 0V, to which I thought, damn it. Stuck the meter on AC, and measured 42V, again thinking damn it.

Oh well, it would have been a fun experiment, to see what could have been done, but I'm not splashing out for a welder, specifically for this task, when I have a welder that works well enough for me, for the sort of rough and ready welding jobs I ever need to do. Still, thanks @Zwy for describing the process, and linking the videos, as I just said, it would have been fun to try.

Remains to be seen if the extended float has improved the capacity, but I perhaps won't get around to that for a while. At least I know now, based on the tests above, that not many measurments are required to get confirmation. As I mentioned in an earlier post, using my spreadsheet, gives almost the exact same value with just the first couple of readings, one in the middle, and the last couple. I'll probably add a few more, but it would seem there's no reason to go crazy.

I'll post back with the result, whether there is any improvement, or not, when I get chance to perform the test on each.

Cheers

Sutty
 
Small update on the battery tester, having sent a few mails back and forth, they just said, return it using Amazon's return service. I started the process, and felt it was more onerous than just re-soldering the component, inside, which is what I've now done. Works perfectly, and reported 47% SOH, on both batteries, which is quite amazing, but my tests had determined them to be very similar, so maybe not.

I then put it on a very small AGM battery, that I used to have in my quad bike. That was also 5 years old, or thereabouts, and I had replaced it because when I would go to use the quad, it would often not start, and the battery had been horribly mistreated, in terms of very irregular good charges, so I assumed it would be failing. The test result was, battery good, recharge, with a CCA value surprisingly close to its original.

Having replaced it last year, it turned out I had the same issue with the new battery, and following a whole bunch of tests on the bike, it turned out it was the rectifier/regulator, which when replaced, restored the quad to proper operation. Since then I had suspected that the replaced battery would likely have been good all along, and the battery tester has now confirmed this.

Had I had this tester last year, it would have saved the cost of a new battery, because I would have looked elsewhere immediately. Now I have a useless, good, 12Ah battery, lol.

Looks like it will be very useful. Thanks for the recommendation sunshine_eggo.

Cheers

Sutty
please don’t base anything on these battery testers they are junk! even the highest quality industry gold standard testers such as Midtronics are garbage. CCA has zero correlation to Ah capacity….

 
I read that, thanks. Makes a good deal of sense, in terms of our interest not really having much to do with the CCA ability, but in terms of what that tester will come most in handy for me, is in checking batteries for just that purpose. Having said that, if you charge the battery fully, and it still struggles to start your car in the cold, it's not usually hard to tell the CCA value is down to unacceptably low levels, lol. As I said in a previous post though, it may well have saved me buying a new battery for my quad bike?

Despite the article, and your comment, more or less stating that all such products are junk, I can at least say, from my limited tests, bad old, small batteries have high IR. Good small batteries have a middling IR. Bad big batteries have a middling or high IR, and good big batteries have a very low IR, so it's able to tell something, and even if it's not the actual IR, it is exactly repeatable, with good big batteries always being low, same value, etc, so it might be good for baseline comparison, as suggested by sunshine_eggo.
 
Last edited:
Back
Top