MaximusAnonus
New Member
Hi,
for my sanity sake please do help me confirm the correct order of actions for my packs.
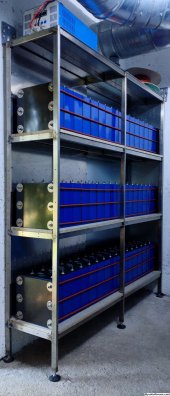
It's 3 packs of 16 cells each, on custom made stainless steel rack, shelves made of Cetris (essentially sawdust and concrete), end plates made from 15mm (1/2 inch-ish) Pertinax (FR-2? in the US?) with 1mm Pertinax plates (1/32 inch-ish) plates in between the cells. All held together with six M6 threaded rods per pack.
So right now it's all roughly assembled, NO compression is applied.
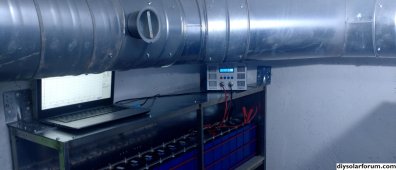
The cells in each pack are connected in parallel. Packs aren't connected together.
I will discharge the packs to 3.00V.
Then I will make final touches to makes sure the whole contraption is square and without any twist etc. And GENTLY "compress" the cells. "Compress" as in there will be no slack in the threaded rods and the cells won't move when pushed from the side etc.
After that's done I will charge the cells together to 3.65V.
Then I will disconnect the busbars, connect my new custom made busbars, balancing leads, connect the BMS, fuses etc. and it's all done.
Correct?
for my sanity sake please do help me confirm the correct order of actions for my packs.
It's 3 packs of 16 cells each, on custom made stainless steel rack, shelves made of Cetris (essentially sawdust and concrete), end plates made from 15mm (1/2 inch-ish) Pertinax (FR-2? in the US?) with 1mm Pertinax plates (1/32 inch-ish) plates in between the cells. All held together with six M6 threaded rods per pack.
So right now it's all roughly assembled, NO compression is applied.
The cells in each pack are connected in parallel. Packs aren't connected together.
I will discharge the packs to 3.00V.
Then I will make final touches to makes sure the whole contraption is square and without any twist etc. And GENTLY "compress" the cells. "Compress" as in there will be no slack in the threaded rods and the cells won't move when pushed from the side etc.
After that's done I will charge the cells together to 3.65V.
Then I will disconnect the busbars, connect my new custom made busbars, balancing leads, connect the BMS, fuses etc. and it's all done.
Correct?