diy solar

diy solar

Making busbars (melting copper)

Frank in Thailand

making mistakes so you don't have to...
Joined
Feb 17, 2020
Messages
1,676
Location
Thailand
For a while now I have enough copper, but they are not usable for busbars.

Copper wire, AC tubing, small parts.

I got the crazy idea to make my own busbars by melting copper.

And make molds out of clay.

While the instructions look simple enough... It ain't.

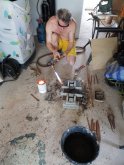
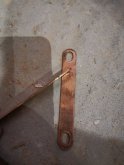
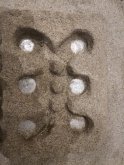
First attempt:
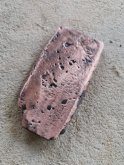
IMG_20200523_154515_copy_750x1000.jpg
Looking good at start.
Problem with clay...
It shrinks.
Any measurements are off.

Next attempt was with wood.
Make wooden board of the correct size, and put clay around it.
Sounds great, as wood stay the same shape.
Sadly, wood can't be released from clay even when dry, so I heated it up, wood burns, yes?

Now it's more clear to me why ceramics slowly heat up their oven.

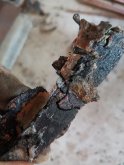
IMG_20200610_180801_027.jpg
All small parts everywhere.

I made 2, the next one went little better.

IMG_20200610_180815_124.jpg but cracks

IMG_20200610_180822_378.jpg

Only one looking good was the straight one.

IMG_20200610_180818_508.jpg

So I tried.
IMG_20200610_180825_736.jpgIMG_20200610_180806_231.jpgIMG_20200610_180832_091.jpgIMG_20200610_180828_805.jpgIMG_20200610_180836_427.jpg

Apparently you can't make 2 pours in one mold.
It doesn't connect.

My 10 pictures are used, up to next part
 
It wasn't possible to release the copper from the mold, I ended up smasing it.

After this, I decided to stop using clay, and go to iron.

I have a few left over chunks.
IMG_20200610_173008.jpg

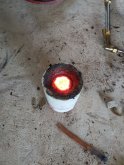
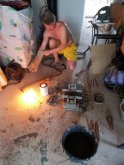
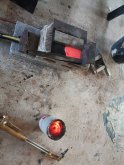
Watching videos showed me that it's good to put some oil on the iron, and pre-heat.

IMG_20200610_174036.jpg

IMG_20200610_174046.jpg

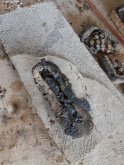
After pouring

IMG_20200610_174551.jpgIMG_20200610_174555.jpg

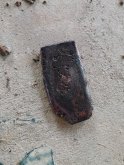
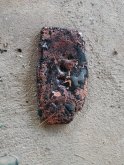
After cleaning:
IMG_20200610_174815.jpg

The size is not correct for any of my cells, too big or too small.

IMG_20200610_175054.jpgIMG_20200610_175239.jpg
IMG_20200610_175308.jpg

But large enough to fit over every cell that is needed.

I just need to solder a few side by side.
Cut out the rest, and melt it again what can't be used.

One busbar is 6mm thick.

This should be sufficient to handle 300A :)
 
Tomorrow I'll make a few more and solder them together to see how that goes.

After that, take the drill and make holes on the right places, and finished!!

For those who like to comment on my safety clothing...
Don't...

I have safety glove and also no illusions that if I get melted copper on it, I get burned.

No jeans except the special made ones will stop 1100 degrees Celsius.
If I would get burns, they would make the wounds dirty and hard to clean.

I am fully aware it is crazy hot, and I should not get in contact with it.

Any clothing not specifically made for this tasks are giving falce sense of safety.
 
Last edited:
Even if you get to some resemblance of a buss bar don't you think there might be different resistance between cells and making the bms work overtime. By looking at the copper round stock laying in the photos why not just pound the crap out of them with a hammer for a buss bar. o_O;)
 
You are confusing me.

A bus-bar is a flat bar of copper.

Factory does it more nice and flat, but materials is still copper.

The connection between the 2 cells will be a lot better for high loads then the standard ones, not even a mm thick.

IMG_20200610_202408.jpg

The copper parts you see are flattened AC tubes, sadly not all as straight as I like
Some are small, about 6 mm wide, making it impossible to drill a hole in them,
The other ones might,having 5 stacked on top of each other with the pressure of the weak thread in the cell??
NOT a good idea. Why do you think they are laying there, all nice flat??
Done that, been there, ain't going to work. (would be more easy)
The round bar you see, lightning rods, I've bought them new ans cheap!!
Apparently not pure copper, when I melt them they get sparkly.... :) look like Christmas candle.. lol

The pile of old copper now have second life.
Putting them in the trash eventually will do the same down the line, I like to re-use.

Together they will make one 6mm fat copper plate connecting all 8 cells.
(two times 3 152's and 2 times 280Ah, positive to the negative = series)

This 14 times, and half set for start and finish.

My experience with the (thicker) 1mm bus-bars from the 152A, they get warm, not hot, at 60A.

My 41 * 330w solar can give in theory 250-265A charge. I don't like them to get hot.

One flat copper plate will give the most possible even current divided connection with the 8 cells and can withstand most Amperage.

-> If someone have a good idea to optimise the connection between the flat aluminium terminators of the cells and the copper bus-bar, I really, really like to know.

For computer CPU's to optimise contact for heat transfer, people use heat paste as most flat things aren't really flat..
even a thin layer of toothpaste works for CPU better then nothing at all.

I know there is thermal grease, is that the best option?? Maybe solder-paste give better optimal contact??
Water would work perfect.. sadly it vaporises and doesn't stay.

Suggestions please :) (preferably with links to research)

edit after 15 minutes....: i'm an idiot sometimes... ? :sneaky: :eek:
My crucible is soft graphite.. !!
You scratch some out to make the hole you need that time..
Graphite is perfect conductor.
Mix with 25-30% conductive grease and apply finished! :)
 
Last edited:
Tomorrow I'll make a few more and solder them together to see how that goes.

After that, take the drill and make holes on the right places, and finished!!

For those who like to comment on my safety clothing...
Don't...

I have safety glove and also no illusions that if I get melted copper on it, I get burned.

No jeans except the special made ones will stop 1100 degrees Celsius.
If I would get burns, they would make the wounds dirty and hard to clean.

I am fully aware it is crazy hot, and I should not get in contact with it.

Any clothing not specifically made for this tasks are giving falce sense of safety.
Now that's DIY!!! I don't see an impressed emoji so I'll leave it at that...?
 
Don't you have a big ass excavator?
Can you do a 2 stage solution, 1) do your smelting magic to make your general blobby shape then 2) run over the blobs with your heavy machinery (preferably with the blobs sandwiched in between a set of harder metal plates. Maybe that would make the final product a bit easier to work with / longer / drillable?
 
Last edited:
Tiny, small excavator.. 0.8 tonnes.

I could try to smash it with the shovel, but that won't be an even force.

It is not that wobbly, biggest is 1 mm difference.
Grinder will be easier and faster.

If that doesn't work...
Smash!!
:)
 
I had worked with several foundries before I retired, and they use a special sand for castings. Best way for a "home caster" is to get a large block of candle wax, and carve out a pattern. Be sure to add a "pour sprue" and an "overflow vent" to your pattern. People have used sand from a hardware store, but it often doesn't work. Also, should use some type of form or container to hold your sand mold in place. (Sometimes, foundries will sell off some casting sand.)

If you plan to make a number of similar castings, you could male a wooden mold, and "cast" molten wax into your wood mold. Your wood mold MUST be sealed so the wax casting will come out. Modern industrial "Investment Casting" companies used expensive Steel Molds, and Ceramic Coating.

Years ago, MOTHER EARTH NEWS did a series of DIY articles, one of which was on Aluminum Casting. They even showed how to build a smelting furnace. The "Lost Wax" casting of Brass/Cooper dates back to ancient times, and DIY Aluminum casting techniques are the same as for Brass/Cooper.
 
Yeah,. I've read a lot about them.
I have a lot of bee wax, that I can make into a shape I need.

Making molds from clay is not my thing...did not work out...

For now I keep my job at pouring what I can.

I'll do some research on wax and molds.
Maybe it can work for me :)

Yes, it have been silent a few days, family always comes first :)

IMG_20200618_174111.jpg

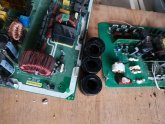
Reuse of old electronics, the coils are perfect copper.

IMG_20200618_173849.jpg

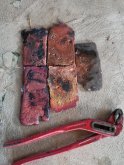
I now have 5 smaller parts:

IMG_20200618_174034.jpg

Tomorrow I'll make them "tight fit" and solder them together.

After that saw out what I need, drill the holes, maybe some "air holes" (to reduce the total copper used, as I can re-use, melt it again for the next batch

When I do my pouring, the copper is about 6 mm thick.

Quick cooling when red makes it "soft" almost as soft as lead.
The hammer and some muscle power do the rest
 
Last edited:
There are TONNS of videos on YouTube for melting copper, and nobody is using expensive oxyacetylene...

Many use styrofoam as a design PACKED inside a sand mold. The pour disintegrates the foam, and leaves the desired shape.
 
I've been reading up on lost wax and lost styrofoam casting.

That makes a whole lot more sense to do it. (y)

I made a horizontal syrofoam cutter to slice my 2 inch tick foam blocks into roughly 4 mm , and made the shape I like on paper.

Next step was to cut them out with vertical foam cutter.

That went quite OK.
I made 3 "bridges" on each parallel set to the other set.
The way I placed them, I can cut out and replace with ANL fuses.

Does it make sense to have set of fuses between each parallel set?
(Each step of the series)

300A (3x100A) is enough, it probably never pass the 200A.

The 3 connection between the parallel strings now will be about 4mm tick, 8mm wide, for sure capable of handling the 300A.

Between the individual cells I'm going to place a sheet of syrofoam.
Guess.. yes, about 4 mm thick :)

I've been studying some more on Lifepo4, and guess what?
Pillowing, or better, gassing, is relative normal behaviour.

What have as result that the cell looks like pillow.
It doesn't really have much impact on the capacity or cycle life.

It does look bad and is bigger.

Lifepo4 cells do Gass!!
During production there is a special section (like balloon) that captures this gassing that occurred most at the initial charge, and is sealed after this charge.
Apparently, this process takes time, Speeding it up can have result that not all gassing is captured, and in the first few charge cycles at the end user some pillowing can occur.

Also, faster charging give more gassing, too high voltage, and probably a few more reasons.

Compressing cells to eachother will make them look better (not pillowed)
The gassing still is there.
As it can't get away, the pressure rises, with it, the Gass turns into liquid again.

If the pressure is too high, the vent will burst, protecting, but also making the cell useless.

Compressing cells with a thin layer of syrofoam between them is in my opinion the best of both worlds.

It keeps the cells look nice and give some extra space for expansion before the vent will burst.

For solar panels all sellers only sell "tier 1", yet only 2% of total global panel production is really Tier 1.

I'm positive my cells are "A grade", or atleast " a grade" :)
By giving them some " China margin" space to expand if they feel the need probably will safe a few cells from bursting vents in the future.

My original design for the busbars did not include this extra space.

Learning something new each day!!

I'll post some pictures of the foam shapes soon.
 
So I'm going to say that so far - in materials - time - fuel - these are going to be the most expensive busbars in history ... LOL ... but I do think that once you get the right formula it will be fine ...

I of course just take the lazy way out - trip to Home depot - 6 ft of 3/4 inch copper pipe - lay pipe on concrete - lay wood on top of pipe - get one of the 3500's out here to roll over it a few times - remove wood - put pipe on top of wood - take 5 lb sledge and get all the aggression out of your body by beating the hell out of it - take grinder and cut pieces to length ... take drill and drill busbar holes .. and actually - they turn out to be pretty nice made to order busbars ...
Yes...
Sadly.. we don't have "home depot".

In the Netherlands I would have bought them at "Gamma" or buy some copper beam 10*4mm, 1 meter long.

Thailand, country side..
Nope.
Don't have!!
Copper tube is thin air-conditioning tube, really not tick enough at all.

For fuel? Not even a dollar!
Oxigen refill is 6 USD for 50L
LPG 6 USD for 15L (at the pump
I haven't used a liter yet.

Time wise... Yes, it takes time.
Harvesting the copper from old wire and coils already eats up hours..
Recycling!!
The end result will be good (y)

Wow that's pretty cheap actually .... so here in the states - or at least in southwest Texas Diesel is running at about $1.79 a gallon and unleaded about $1.59... good for the end-users -- terrible for us in the oil industry ...
 
Unleaded is here cheap, compared to The Netherlands, 2.55 USD for a gallon (3.78L)

In the Netherlands that same gallon is 7.40 USD

LPG is here cheap, propane tanks are widely used, out here, no gass pipes into the homes!!
Every household have 1 to 5 smaller and bigger tanks for making food.

The ones that don't have, use charcoal.
It's still used a lot, even by my wife.
Many food taste better on charcoal!!

(Also something people usually make their own, charcoal. "Finding" wood is free, buying charcoal is not.)
 
Picture time!!

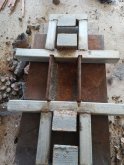
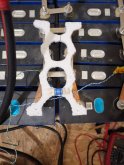
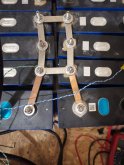
You can see the 3 "bridges" and one ANL fuse that can be used to replace the bridges.

Not sure yet if I'll ever use the fuses.
Is it overkill or wise additional security?

(Responses are appreciated :)
Not only a "yes/no" but a motivated "yes/no")

The top and bottom have extra space to "drill" a second hole.
(There will be holes in the syrofoam, if the mold works, no drilling needed!)
After tapping thread in there it's perfect place to connect the spaghetti wires for BMS.
To keep the busbars flexible, it's left and right, top and bottom.

With:
IMG_20200621_113835.jpg

Without:
IMG_20200621_113842.jpg
 
Picture time!!

You can see the 3 "bridges" and one ANL fuse that can be used to replace the bridges.

Not sure yet if I'll ever use the fuses.
Is it overkill or wise additional security?

(Responses are appreciated :)
Not only a "yes/no" but a motivated "yes/no")

The top and bottom have extra space to "drill" a second hole.
(There will be holes in the syrofoam, if the mold works, no drilling needed!)
After tapping thread in there it's perfect place to connect the spaghetti wires for BMS.
To keep the busbars flexible, it's left and right, top and bottom.

With:
View attachment 15851

Without:
View attachment 15852
How are the cells organized?
 
Back
Top