diy solar

diy solar

Making busbars (melting copper)

So it looks like some of the 200 and 280's may be mixed - which is fine ... but I'm wondering also
3* 152Ah and one 280Ah, all Eve cells
I could not find more 152's for normal pricing, 120,s was an option, same size housing, for the price 2* 120 I have now 280Ah.

And 16 in series.
Total 736Ah @51.2v
Roughly 37.5 kWh

I thought about making different battery banks, and then connect them together as aray.
My 3 inverter that work in parallel need to have the same battery array.

I didn't see any benefit, and make it one big battery.
The 150A smart and 250A Daly BMS can work together.
For now the 250 is back in China for repair, and the 150 not yet connect as apparently it needs a pre-charged inverter.

Last 2 week BMS less installation, I do monitor the cells and all are acting nice. Under 0.02 volt difference between the cells.
That is during usage.
Will get better after the busbar is ready :)

For the ANL fuses.. overkill, yes?

I have then, the idea was to use them for the solar panels.
Never got to it.
Then I thought: hey, maybe use there?

Better to use then for the panels, between the serial sets.

Or use them for decorating :)
 
I've finished my mold shape, and the casting sand.


I used 2 YouTube channels to learn about it
First one I found:

Interesting, but he talks about "Olfoundryman" giving him tips.

That guy (professional cater) is really amazing.
This is just one of the many videos he shares:

If you like to learn a bit about casting, really educational.

Years back I restored an old Fiat 600, one of the first water cooled fiat engines, actually made it into the racing Abarth model.
I needed an new manifold for my NOS carburator and paid an arm and a leg to have that thing made from aluminium (CNC)

If I knew back then how easy casting is, that would have saved me loads of time and money!

Previous pictures showed the shape.

I've burned some holes inside for the headless bolts and put it inside the sand as shown in de video's.IMG_20200622_174036.jpg

Ready to melt again 2 of the copper I have from the previous castings.
(Tomorrow or day after)

I hope one will be enough, but am afraid I'll need 2.

To get one block, it was already a ton of work to strip wires and cutting old coils.

Better just put the wire's on fire, burn of the plastic, and use grinder to open the coils instead of wire cutter..

Then time for mass production :)

I do have about 50 meters 16mm2 in smaller pieces, that's going to be the main source of copper.
 
I've finished my mold shape, and the casting sand.


I used 2 YouTube channels to learn about it
First one I found:

Interesting, but he talks about "Olfoundryman" giving him tips.

That guy (professional cater) is really amazing.
This is just one of the many videos he shares:

If you like to learn a bit about casting, really educational.

Years back I restored an old Fiat 600, one of the first water cooled fiat engines, actually made it into the racing Abarth model.
I needed an new manifold for my NOS carburator and paid an arm and a leg to have that thing made from aluminium (CNC)

If I knew back then how easy casting is, that would have saved me loads of time and money!

Previous pictures showed the shape.

I've burned some holes inside for the headless bolts and put it inside the sand as shown in de video's.View attachment 15914

Ready to melt again 2 of the copper I have from the previous castings.
(Tomorrow or day after)

I hope one will be enough, but am afraid I'll need 2.

To get one block, it was already a ton of work to strip wires and cutting old coils.

Better just put the wire's on fire, burn of the plastic, and use grinder to open the coils instead of wire cutter..

Then time for mass production :)

I do have about 50 meters 16mm2 in smaller pieces, that's going to be the main source of copper.

277206184.jpg
 

Attachments

  • 277206184.jpg
    277206184.jpg
    38.8 KB · Views: 1
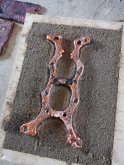
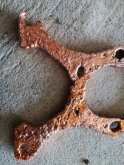
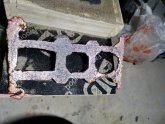
For a first try, not bad.

I used way too much copper, most of if is on the top :)

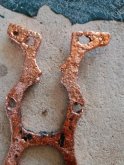
You can clearly see the structure of the foam, and I made a few of the holes too big.

I can't use, still happy with the results!

I love how shiny it stays!!
IMG_20200623_120335_copy_750x1000.jpg

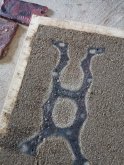
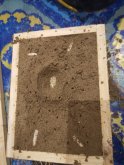
You can clearly see the black print in the sand.
IMG_20200623_120341_copy_750x1000.jpg

IMG_20200623_120407_copy_750x1000.jpg

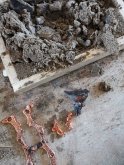
The large black chunk is too much copper.

IMG_20200623_120433_copy_750x1000.jpg
Detail pictures
IMG_20200623_120426_copy_750x1000.jpg

Overall, not bad for first try.

Now I need to smooth the foam with some wax and be more careful with the holes.
(Maybe better drill later)
 
Yes, I agree.
Drill later.

It's almost impossible to burn a correct size hole in the foam, if the pin is little too hot, the hole is double the size it needs to be :)

You don't know till you've tried!
 
Next mold is ready.

I probably overdid it again..

Lol.

It's quite some work to fill the mold, and melt the copper.

I stacked now 2 busbars with a layer of sand in between..

They are made more smooth using hot wax, also Ideal to correct some minor errors and fill the holes of the foam I already made holes in..

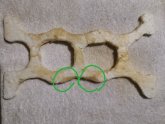
This is one that had to thick wall right, compared to left,.
You can see where I add the wax to make it thicker
IMG_20200623_215347.jpg
This one is work in progress, not yet smooth enough for pouring.

I hope the wax isn't too much.
We'll see soon enough!

Tomorrow one other pour.

It that doesn't workout, I'm switching over to "compressed" syrofoam.
It's little more dense and have smoother surface.

The YouTube videos showed better results with normal syrofoam.
Depends what your looking for!

(If the other one had all 3 bridges, simple grinder, Sandpaper and piece of glass would have made it smooth enough :) )


Keep you updated!
 
It took a few days for the update.

In short, the results with the wax where terrible.
I don't mind showing failed tries, but this is so bad, I won't even show it.

As a next step, also as I won't be using the ANL fuses, new design.

Why not, directly on the fine foam.
Sadly again. So so bad...

The channels may have been to thin, soil too wet, fine foam not suitable or the soil too wet.

That where again 2 failed.

Back to the syrofoam white bubbles :)

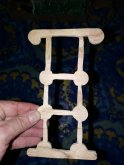
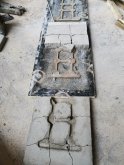
They where hard to cut, so I made the new shape first from wood and use it as a "stamp" and a hot knife to cut the foam.

Firs try, again, failure.

Second try, now with wider channels..
Better.
Not good.
Not as good as the fist one looked, atleast it have the hole shape!!
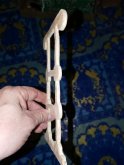
IMG_20200624_111345_copy_750x1000.jpgIMG_20200625_195737_copy_750x1000.jpgIMG_20200625_195727_copy_750x562.jpg

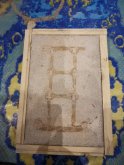
As I now have a rough shape of triplex wood, I'm going to spend some time to perfect this shape, and use it as form.

No lost wax or lost foam, but casting from "original".

It's now 2 or 3 mm too thick, not good / the best shape.

Good thing from casting from original,
I can use wax to repair irregularities, as the shape is not in the mold during pouring.

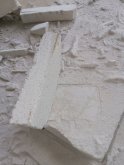
I do need a whole lot of talc powder to be able to release the original shape from the slightly sticky sand.
 
The sand needs to be PACKED over the mold, and kept tight during the pour.

Or the molten copper just floats up on top of the sand.
:)

I'm fully aware.

Fun fact:
Did you know sand can float??

If you have copper that have some sand pollution (like I now have), a little bit is encapsulated in the copper.
When you melt it, the sand floats on top, easy to scrape off.

I would not advise to use bare hands, it's + 1300 Celcius :LOL:


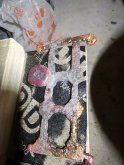
As you can see, I just overfilled the mold, the rest of the coper piled up.

This time it got into most of the corners, almost usable.

New one almost finished, (wood)

IMG_20200625_212101_copy_750x1000.jpg

IMG_20200625_212111_copy_750x1000.jpg

Still little too thick (6mm)
I like to bring it down to 4.

First stop at 5mm , make a casting, and see how this goes

If the casting is good, I have spare shape to use if the 4mm would be too thin.

Same step to 3mm

Sandpaper!!
(And scraping of a layer with sharp knife)
More thin breaks easily, especially using the knife.

Tomorrow make the mold without foam :cool:

With all the failures, cost for heating probably do add up.

@ghostwriter66 , it looks like your prediction of the costs to make is correct :)

Refill is cheap, getting to the town costs more on gasoline..
 
Last edited:
That took a few days and many, many attempts.

IMG_20200630_162528_943.jpg

IMG_20200630_162535_149.jpg
IMG_20200630_162538_551.jpg

The wooden shape have little bit round edges, making it really difficult to get out of the sand leaving clean imprint.

So I poured without clean imprint, you can see the problems at the edges.

Today I already filed for 2 hours by hand.

Angle grinder was used for rough Cleaning, and cutting the filling and air holes/tubes.
A bit of the worse rough edges was done with that same grinder, as copper is soft, and I don't want to cut too deep, the rest goes by hand.

I think 2 or 3 hours more and the first is finished!!

After this,things can go a lot faster.
A good heavy shape for the mold with clean clear sharp edges, should make good imprint.

For the pouring...
Originally you should use one filling hole and one or 2 air holes.

That didn't work out for me.

I now used 6, each hole could be used for air or filling.

Normally you should not pour in more then one hole.

For me I need to use 2 maybe next time 3 holes.
It doesn't flow deep enough

Probably too little copper getting too soon too cold.

I might end up making an furnace oven..
They aren't difficult to make.
2 tin cans, one bigger.
10 kg of plaster.

I have some iron I can cut and use as crucible.

As the heat will be more insulated, it will get a lot hotter and more easily to melt more metal.

With result I can do 2 or 3 molds at one time :)

First finish this one.

I'll make more step by step pictures to show the whole process.

Overall, happy with the results so-far!!
 
Long time no updates, that doesn't mean nothing happened...

Time for update!!

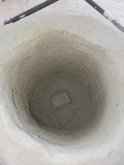
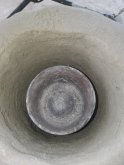
After all the trials, the small crucible was no more..

It was disposable kind and end of life.
So I watched some YouTube video and decided to build one..

I used the bottom of oxigen tank for crucible.

First try was with plaster, that didn't work out.
IMG_20200813_183046_451.jpg

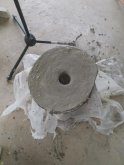
Next was using "y-Tong" bricks.

IMG_20200813_183028_184.jpg

And make th walls smooth with an inch of cement

IMG_20200813_183003_207.jpgIMG_20200813_183017_279.jpgIMG_20200708_124342_copy_750x1000_1.jpgIMG_20200708_124217_copy_750x1000_1.jpg

All good, it needs time to dry..

Rain season so that went slow..

After a month time to try!
 
Last edited:
During this month I made several attempts to make a good mold.
IMG_20200813_182924_507.jpg

Attempts, not successful..

IMG_20200813_182927_831.jpg

Maybe because did not let it dry long enough? Or no reinforcement?

After several tries I now hope to have the success mold.

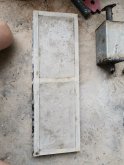
Reinforced cement/concrete using wax that will be melted and poured out.

I made 3 and plan to reuse them.
IMG_20200813_183724_copy_750x1000.jpg
I waited weeks to make sure they are dried and strong.

When they go in the oven to pre-heat to remove the wax, all last moisture will be gone.

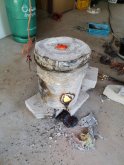
Time to fire up the furnace and meld some copper!!

IMG_20200813_182906_697.jpg

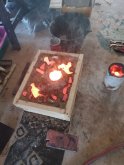
It heated up alright...
During a first trial run it got hot, crucible red hot, just not hot enough to melt copper.

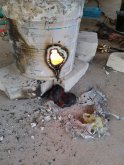
I made a second smaller hole in de side to feed oxigen, in flat angle so the flames would rotate around the crucible.

IMG_20200812_162650_copy_750x1000.jpgIMG_20200813_130522_655.jpg
IMG_20200812_162647_copy_750x1000.jpg

Apparently the oxigen made the flame so hot to burn a hole via the crucible, 1 inch concrete , y-Tong bricks and the iron bucket...

Needless to say that the melted copper can't be reused....

@ghostwriter66 , you where right.
This will be the most expensive bus-bar ever made... Lol

I don't want to do all the hassle again for making new furnace.
Also don't have the time to wait a month to dry.

So I purchased "real one"
Screenshot_20200813_101307_com.lazada.android.jpg
225 USD , 1600 watt,
Max 1100 Celcius and 2kg gold...
That will be 250cc..

my Bus-bar is little under 100 cc, enough volume .

I don't want to wait as my next set LiFePO4 arrived :)
Now there is 50 kWh power Storage.
Or 1016Ah @ 51.2v...

IMG_20200813_191604_848.jpgIMG_20200813_191558_550.jpg

The 3 smaller (152ah) cells are for different project.

Naturally, I've been doing different projects in between like the DIYBMS

I'll be making a post about this project soon.
 
Last edited:
Copper has a melting temp of 1085 °C so a 1100 °C furnace will have a hard time melting it.

Also, for 225 USD you can have a nice length copper stock to make busbars...
 
For 225 USD you can have a nice length copper stock to make busbars...
Might be, CNC 16* 6mm bus-bar in my designed shape probably will be more expensive :)

I would not have build/bought furnace if it's only use would be bus-bar.

At 1085 copper is completely liquid, 1100 will be fine.

I do guess it will take an hour or more before 1600 watt is capable of melting 250 cc copper.

LPG based was double the price.

DIY, to time restrictions, not possible.

Positive side, electricity is free :)
 
Why CNC? It's simple straight lengths, so you just need to cut some flat stock to the length and drill it ;)

Well, if you have lots of time and free copper to melt, do as you want ;)
 
You might be right.

Any connection is a possible weak spot, have it in one piece avoid this.

Problem is, local hardware store doesn't have copper bars, or even aluminium strips.
(Welcome to rural Thailand)

Alternative is online what is undeveloped in Thailand.

Online the copper needed to make the bus-bars for my 80 cells setup is about
Strips 5/8 wide, 1/8 thick 200 USD
5/8 by 3/16 is 285 USD

Total length needed is 1700 cm

Connection between each parallel cell at both ends, and naturally the 5 x to make series.

Connection between each cell can be 1.5 or 2 mm, for series I prefer 4.5mm or more.

50 kWh setup that can get 300A load (charge or discharge)

I have 1 cm space between each serie to compress the 5 cells (3* 152Ah, 2* 280Ah) together using aluminium strips and threaded rods.
This naturally increase the total amount of copper.

Also the 4mm foam between each cell add some.

1700 cm, about 12 USD per meter.
That adds up quickly.

I do have enough old copper.
Maybe my recycling urge gets the best of me :)

It is a lot more work then expected..

I contacted 4 companies to see if this order can be at lower costs.

I already have silver conductive paste* to make optimal connection between the terminals of the cells and coper.

If I do switch to beams, I need a few ml more.

* Normal way of installation for LiFePO4 cells in phone houses to keep working during brown outs.

I did some research on how the professionals do it..
It ain't cheap, 50 USD for 7ml
(Include transport)

I'm using China type, little cheaper, probably not as excellent.

Clean the terminals and copper till shinny, without any grease or protective layer.
Apply little bit of conductive paste and tighten the nuts.
(Never use normal bolts, but headless, as the twisting force easily kill the weak thread in the soft aluminium)

I'll let you know in a few days.

What does copper bus-bar cost in USA per meter?
 
Problem is, local hardware store doesn't have copper bars, or even aluminium strips.
(Welcome to rural Thailand)

But you can buy an electric furnace?

I have 1 cm space between each serie to compress the 5 cells (3* 152Ah, 2* 280Ah) together using aluminium strips and threaded rods.
This naturally increase the total amount of copper.

Also the 4mm foam between each cell add some.

Compressing the cells with foam inbetween is counter productive, and rigid busbars on top of that is a bad idea. I'd recommend either flexible busbars (copper braid) or rigid mounting of the cells (no foam inbetween). But I don't want to start a debate again on that subject so do as you want.
 
Yes, naturally electronics made in China are online available via shops like Lazada, Shopee and AliExpress.

So are the copper bus-bars.

Transport price is 2.50 USD for furnace or 50 cm of bus-bar.
34* 2.50 make the bus-bar from China 85 USD transport costs.

Local supplier doesn't have this accumulated.

If you are available to find local supplier (Udon Thani province), please let me know. I'm happy to drive and get it!!!
(Google can't find, not even in Thai.
Plain iron enough, several metal types? Nothing.
In the Netherlands it was so easy..)

I don't ask you to understand that not all countries are internet integrated like Netherlands or USA, or have all materials, just accept it.
I can't locally buy M6 headless bolts.

Getting M6 is already challenge, as they mix metrics and inches where ever they can.

Not uncommon to find a hardware store that have M6 bolts, but no nuts....
Welcome to rural Thailand..
Bangkok area is better, sadly 650km drive.

I am using the foam for the 152Ah cells.
The housing 170*173*45mm is used for anything between 120 and 152Ah cells.
Sadly the 152 are known to bloat.
(I didn't know when I bought)
And have several cells that are slightly bloated just by using them, while many aren't.

The reason to compress the cells is to prevent the other cells that did not bloat yet, to do so.

For the ones that are bloated, I think compression will give more problems then it would fix.
Giving them a foam layer will spread out the compression force.
If not, the "pointy" end will get all the force.

Alternative is to not compress at all, and just let the 152Ah cells do want they apparently need to do. (Bloat)

As they want to bloat the 4mm even might be too little.
(One cm between should be enough)

The Bloating after a few months usage is between 0 and 4 mm per cell (on each side)

The 280Ah don't bloat at all.

One might call it production error, or specification, I didn't know they will do.

Now there is no more stock (as the production of the 152Ah is stopped), I hear from sellers about the problems with the 152Ah.
Too many capacity in the housing.

Optical not so nice.
Capacity still is 152Ah.

If you have a better solution, I'm all ears !!!
Not sceptical, serious.
I'm working blind here, not much information to find on this exceptional situation.

Not using the 152Ah isn't really an option.
They are there, function, and I can't get my money back.
If they didn't function or have serious capacity loss...
But they don't, they just don't look nice. (And it's not lithium polymer!!)

I can't really make 2 battery packs of the 152 and 280 cells, and use them individually.

My 3 inverters are parallel connected and need single battery array.

In theory I can make one set of 152's and one set of 280's and connect them parallel to act as one array.

I don't see how that is different from having them already paralleled as cells.
If I'm mistaken there, please enlighten me!

I don't think 2*BMS will make difference on how paralleled cell will behave.

It will costs 2 BMS instead of one.
My DIYBMS is like the chargery, it needs external contactors/ relays.
That would be pricey to double them.
(And I think without real benefit)

Internal resistance never is equal between cells.
Mixing different capacities naturally makes it bigger.

Having them paralleled should make them "one" cell, flattering out the difference between each parallel set.

In the parallel set self the load is balanced between the cells, giving most equal charge and discharge possible.
It's not that one cell will take all the load, but it's divided by the 5.
The one with loweest internal resistance will have slightly bigger load, what is automatically compensated by the other cells who "charge" (or discharge) the one with least resistance.

That is my basic understanding of having cells in parallel.
Even with same brand/type/ manufacturing date the cells will have different internal resistance.

Having them also in series to get higher voltage, still will give difference between each parallel set.

For now my highest load was 120A. (@ 736Ah)
Even starting at 30A (S16 setup, 304Ah) the 152ah cells started to bloat a little.
They just do :-(

As they do I need to live with this.
And make best possible setup for my installation.

My house won't move, doesn't have vibration.
They aren't compressed for this reason.
Stopping the bloating is.

Is that wise???

Or just better give them the space they like to use and accept that they do?

Added benefit would be additional space for airflow to keep the cells cooler.

(That is a concern of me.
Having a 30 cm compact cell block will have problems to release the heat.
During charge/discharge the temperature of the cells will rise.
Center cell probably will be 5 degree warmer then the outside cell.

At start temperature of 30 degrees Celsius (during rest) will this be an issue for lifespan?)

The plan of compressing the cells was made at the start of noticing some bloating.
Now, 10 weeks later, about 1/3 of the cells are bloated.
Between noticing that it isn't flat to a "full" 4 mm on each side.

Uncharted Territory here..

Cells that are produced with pushing the limits of capacity density too far...
They will bloat if not compressed.
Unknown what will happen if they are compressed!!!

Google doesn't provide any answers!

I hope you forum members do!
(That does definitely include you @BiduleOhm )
 
Last edited:
Back
Top