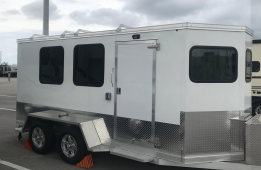
So I have a 16' aluminum cargo trailer conversion. I have roughly 168" to utilize long ways and 81.5" across.
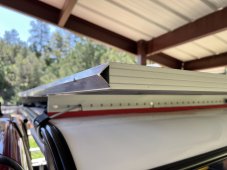
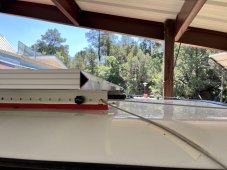
I have 4 roof racks that are identical to this photo and bolt into the side of the trailer.
I need to mount 4 405w Jinko panels to the roof. I am trying to decide the best method of mounting to the racks. The panels are 79' x 39.5'
This leaves very little space on either side of the trailer, regardless of the direction in which I mount the panels.
I am confused as to how to do it, though. I can do Z brackets(8 per panel) and drill them into the aluminum roof racks. However, I would much rather not have to drill into the racks dozens of times.
Some sort of U bolt system sounds best, but I can't quite figure out how I would go about doing that. Or maybe some aluminum angle mounted perpendicular to the roof racks which encases the whole rectangle of 4 panels. That requires drilling into the racks as well, so maybe that is inevitable.
Given that there is 4" roughly from the edge of the roof rack to the straight bar due to the angle, the racks are technically about 74" of straight bar, and the panels are either 79' regardless of the direction I put them. So U bolting the panels long ways to the racks won't quite work. I need a different idea. Any help? Thanks all.


