I would be careful. I think it's possible for some of the JB to ooze up even though you took precautionary steps.. Not saying it will happen and I don't know. Personally I would not recommend putting a nut on until it is fully cured.Replaced socket and nut and retightened to let set.
You are using an out of date browser. It may not display this or other websites correctly.
You should upgrade or use an alternative browser.
You should upgrade or use an alternative browser.
JB Weld versus Loctite for grubscrews
- Thread starter fafrd
- Start date
Nice idea if your plan is to mix up a big batch of JB Weld and secure all of your terminals in one session, but too much overhead if doing one or two terminals at a time as I am...
McMaster-Carr
McMaster-Carr is the complete source for your plant with over 595,000 products. 98% of products ordered ship from stock and deliver same or next day.www.mcmaster.com
I think there are another couple options to explore including using something small than a toothpick such as a paper-clip to apply less at a time as well as seeing whether you can apply a large enough volume to the bottom of the grubscrew to fill the threadspace and ooze out of the top (which will be easy-peazy, if possible).
Well first, I want a nut on the grubscrew to assure it is oriented vertically.I would be careful. I think it's possible for some of the JB to ooze up even though you took precautionary steps.. Not saying it will happen and I don't know. Personally I would not recommend putting a nut on until it is fully cured.
And second, since I can easily remove and inspect on whatever schedule I deem necessary, I’m not overly-concerned about additional material oozing out before it has set - the socket is well back from the thread hole and any additional material that oozes out before the 6-hour set time will easily be removed and cleaned up.
And lastly, being careful to avoid bubbles as I have should mean there is little reason for additional material to ooze out. If trapped gas is under pressure, that can result in additional material oozing out over time, but I was pretty careful to apply the JB Weld from the bottom-up, which should mean that once the grubscrew has been threaded to the bottom and the last dose of pressure allowed to equalize (which takes less than a minute), there is no remaining force to cause additional material to ooze out over time...
It’s now been over 90 minutes and because of your post, I just removed the nut and checked again - no change (we’re now 1/3rd of the way to the set time).
My loctite oozed as a result of charge/discharge ... and it may not have been trapped air pushing it around. Anyway, I would do a complete discharge and then a charge, and then disassemble and make sure no more has oozed out (all of this after curing of course). Cuz I had a lot of loctite UNDER my busbars after a discharge & charge (and I waited 24 hours for it to cure; albeit without proper primer) 
Well that’s certainly a cautionary tale - do you think expanding cells put enough pressure against the thin bottom of the terminal to reduce volume of the thread cavity?My loctite oozed as a result of charge/discharge ... and it may not have been trapped air pushing it around. Anyway, I would do a complete discharge and then a charge, and then disassemble and make sure no more has oozed out (all of this after curing of course). Cuz I had a lot of loctite UNDER my busbars after a discharge & charge (and I waited 24 hours for it to cure; albeit without proper primer)
At this point, I already glued my grubscrew in and it was bottomed (so pressing against the bottom of the M6 hole). So I’m going to let it cure a full 24 hours before stressing and at that point I’ll probably charge that first cell to 3.65V in my little jig to make sure nothing breaks (don’t see how I can get any more oozing at that point because the JB Weld should be rock-solid after 24 hours).
Loctite is a bit more of a mystery than epoxy as far as hardening - the fact you still had oozing after 24 hours means it obviously had not fully hardened (crystalized?) by that point...
Of course, before I can charge that cell I’ll need to glue a grubscrew into the other terminal...
Did any of you end up purchasing those hollow dowels with sandpaper glued onto the end? That seems like the best way to clean off the terminal surface after all the messy work is done and before final assembly...
Hedges
I See Electromagnetic Fields!
- Joined
- Mar 28, 2020
- Messages
- 21,480
I would be careful. I think it's possible for some of the JB to ooze up even though you took precautionary steps.. Not saying it will happen and I don't know. Personally I would not recommend putting a nut on until it is fully cured.
Perhaps nylon nut would work as an insurance policy - probably wouldn't bond well to JB Weld.
McMaster-Carr
McMaster-Carr is the complete source for your plant with over 595,000 products. 98% of products ordered ship from stock and deliver same or next day.
Did any of you end up purchasing those hollow dowels with sandpaper glued onto the end? That seems like the best way to clean off the terminal surface after all the messy work is done and before final assembly...


Although, I prefer random motion of sandpaper so as not to cut concentric grooves.
Did any of you end up purchasing those hollow dowels with sandpaper glued onto the end? That seems like the best way to clean off the terminal surface after all the messy work is done and before final assembly...

Binford Tools
Binford Tools is a hardware and power tool manufacturing company from Home Improvement. Along with sponsoring Tim Taylor's show, Tool Time, a common occurrence involved Tim showcasing an overpowered version of one of Binford's products (usually the "Binford 6100"), often leading to disaster. The...
ArthurEld
Solar Wizard
My cells that were used before the loctite was completely cured did the same as cinergi's.
For some reason the charging seemed to draw out the loctite on to the terminal.
I had ring terminals on at the time.
It also for the most part stopped current flow.
But the ones that I used after 36 hours of cure didn't do that.
The rest of mine will get the full 72 hour cure before use.
For some reason the charging seemed to draw out the loctite on to the terminal.
I had ring terminals on at the time.
It also for the most part stopped current flow.
But the ones that I used after 36 hours of cure didn't do that.
The rest of mine will get the full 72 hour cure before use.
If you just paint the surface of the terminal with Vaseline or something similar, nothing will stick to the terminal surface and it will clean off very easily.Perhaps nylon nut would work as an insurance policy - probably wouldn't bond well to JB Weld.
Perhaps nylon nut would work as an insurance policy - probably wouldn't bond well to JB Weld.

McMaster-Carr
McMaster-Carr is the complete source for your plant with over 595,000 products. 98% of products ordered ship from stock and deliver same or next day.www.mcmaster.com
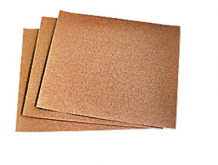
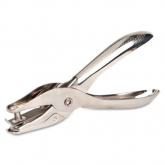
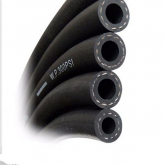
View attachment 36578 View attachment 36577 View attachment 36576
Although, I prefer random motion of sandpaper so as not to cut concentric grooves.
Good point - so that means what (once a grubscrew is in place)? Just using a small piece of fine-grit sandpaper and working your way around the grubscrew by hand?
ArthurEld
Solar Wizard
I tried making one but had trouble getting the sandpaper to stick to the bottom.

Binford Tools
Binford Tools is a hardware and power tool manufacturing company from Home Improvement. Along with sponsoring Tim Taylor's show, Tool Time, a common occurrence involved Tim showcasing an overpowered version of one of Binford's products (usually the "Binford 6100"), often leading to disaster. The...homeimprovement.fandom.com
I did it by hand with 220 grit. It wasn't horrible but I will avoid that task from now on.
So yeah, I think the only explanation for additional oozing during charging is that the expanding cell also places enough pressure on the terminal bottom to push it upwards slightly and reduce volume of the thread cavity...My cells that were used before the loctite was completely cured did the same as cinergi's.
For some reason the charging seemed to draw out the loctite on to the terminal.
I had ring terminals on at the time.
It also for the most part stopped current flow.
But the ones that I used after 36 hours of cure didn't do that.
The rest of mine will get the full 72 hour cure before use.
That and the fact that Loctite Red remains fluid after 24 hours...
I tried making one but had trouble getting the sandpaper to stick to the bottom.
I did it by hand with 220 grit. It wasn't horrible but I will avoid that task from now on
I have not made mine yet but a little silicone on the bottom of what ever you are using for a dowel and some weight for a couple hours will stick the sand paper for sure. to get off just use silicone remover from permatex.
Meaning what? No more cleaning/sanding necessary since you’ve improved your process?I tried making one but had trouble getting the sandpaper to stick to the bottom.
I did it by hand with 220 grit. It wasn't horrible but I will avoid that task from now on.
Are you doing anything to remove oxide before final assembly?
loctite is an anaerobe. it only cures in the absence of air. If you have a puddle in the bottom of the terminal hole it will never cure just like it doesnt cure in the bottle.So yeah, I think the only explanation for additional oozing during charging is that the expanding cell also places enough pressure on the terminal bottom to push it upwards slightly and reduce volume of the thread cavity...
That and the fact that Loctite Red remains fluid after 24 hours...
Not understanding.loctite is an anaerobe. it only cures in the absence of air. If you have a puddle in the bottom of the terminal hole it will never cure just like it doesnt cure in the bottle.
You mean a filled cavity with no air present will cure hard while a partially-filled cavity with some air (or a bubble under a grubscrew) will never cure?
Hedges
I See Electromagnetic Fields!
- Joined
- Mar 28, 2020
- Messages
- 21,480
I never did understand how lack of air made something cure.
The middle of the drop or what's deeper in the bottle experiences absence of air. Only the surface should remain liquid; all the rest should harden.
If curing is triggered by contact with an "activated" surface, that I could understand.
Crazy glue - "instantly bonds skin" - yea, it was developed as an alternative to sutures.
ArthurEld
Solar Wizard
I'm not going to get loctite all over the terminals again. I won't worry about pulling the studs perpendicular.Meaning what? No more cleaning/sanding necessary since you’ve improved your process?
I will just put the studs in. Wipe up any excess that comes out with a rag damp with acetone.
The loctite keeps coming out for at least a few hours so the terminals need to be wiped multiple times with a rag damp with acetone.
Wait 72 hours
Then just buff with scotchbrite
Nothing other than above but I put on noalox every time after I clean the terminals.Are you doing anything to remove oxide before final assembly?
I don't understand why you had different results than most of us. My studs are still tight and I checked under the busbars and nothing oozed out. I am thinking maybe you got a bad batch. I didn't use primer either.My loctite oozed as a result of charge/discharge ... and it may not have been trapped air pushing it around. Anyway, I would do a complete discharge and then a charge, and then disassemble and make sure no more has oozed out (all of this after curing of course). Cuz I had a lot of loctite UNDER my busbars after a discharge & charge (and I waited 24 hours for it to cure; albeit without proper primer)
I'm not going to get loctite all over the terminals again. I won't worry about pulling the studs perpendicular.
I will just put the studs in. Wipe up any excess that comes out with a rag damp with acetone.
The loctite keeps coming out for at least a few hours so the terminals need to be wiped multiple times with a rag damp with acetone.
Wait 72 hours
Then just buff with scotchbrite
What is it that alleviated your concern about that (assuring the studs were vertical)?
I’ve worked out this solution using an M6 nut and an M6 socket largely motivated by your concern with this issue. Have you convinced yourself that all of your threads have been cut vertical and you don’t need to be concerned with any mechanical adjustments before the Loctite cures?
Nothing other than above but I put on noalox every time after I clean the terminals.
Got it - thanks.
Solarfun4jim
Solar seduced :-)
Yeah, thats exactly what i did. As soon as i had the terminal face lightly sanded, i put a fine smear of noalox on right away, before doing anything else.I'm not going to get loctite all over the terminals again. I won't worry about pulling the studs perpendicular.
I will just put the studs in. Wipe up any excess that comes out with a rag damp with acetone.
The loctite keeps coming out for at least a few hours so the terminals need to be wiped multiple times with a rag damp with acetone.
Wait 72 hours
Then just buff with scotchbrite
Nothing other than above but I put on noalox every time after I clean the terminals.
The more I learn about Loctite, the happier I am about my decision to go with JB Weld...In the case of Loctite --- hopefully every one is making sure the contents of the tube is mixed up thoroughly --Loctite seems to separate inside the tube more than anything else I've seen--the bigger bottles can be shaken much easier
Solarfun4jim
Solar seduced :-)
If i was doing these cells again, it would be a straight choice between JBweld or conductive silver epoxy. Wouldn't consider anything else now.The more I learn about Loctite, the happier I am about my decision to go with JB Weld...
Similar threads
- Replies
- 21
- Views
- 2K
- Replies
- 41
- Views
- 3K
- Replies
- 1
- Views
- 177


