


You are using an out of date browser. It may not display this or other websites correctly.
You should upgrade or use an alternative browser.
You should upgrade or use an alternative browser.
What material to use in between prismatic cells
- Thread starter atti
- Start date
Mike Jordan
Solar Enthusiast
- Joined
- Jun 15, 2020
- Messages
- 414
I used a piece of flexible cutting board. I cut it a little tall to double as balance lead management. Worked better than I expected. My wife never even wondered what happened to it ?

I use the Ikea Finfordela chopping boards.
2pack for $1.49. You can cut 4 pieces from 1 pack of 2 (=2 each sheet)
 www.ikea.com
I like the idea of having them higher than the cells in the middle and run the balance wires through them!
2pack for $1.49. You can cut 4 pieces from 1 pack of 2 (=2 each sheet)
Products
Browse our full range of products from dressing tables to complete modern kitchens. Click here to find the right IKEA product for you. Browse online and in-store today!
I like the idea of having them higher than the cells in the middle and run the balance wires through them!
Mike Jordan
Solar Enthusiast
- Joined
- Jun 15, 2020
- Messages
- 414
The extra height for organization, worked better than I expectedI use the Ikea Finfordela chopping boards.
2pack for $1.49. You can cut 4 pieces from 1 pack of 2 (=2 each sheet)
Products
Browse our full range of products from dressing tables to complete modern kitchens. Click here to find the right IKEA product for you. Browse online and in-store today!
I like the idea of having them higher than the cells in the middle and run the balance wires through them!
TomC4306
Solar Obsessive
I used very thin simple cardboard. The grayish cardboard (probably has a name) that backs most tablets (old fashioned paper tablets). Many of the signs that we work with daily come from the manufacturer's separated with sheets of it.
I just use drawer liner like this.
Sojourner1
Itinerant
Evertime this subject comes up I've always thought that liner would be perfect with the aluminum cells.I just use drawer liner like this.
Resilient Polyurethane Foam Sheet which has been discussed in another thread. Advantage to this is that it handles the expansion/contraction of the cells for you if you care about that since cell manufactures state you get increased lifespan of the cells with proper compression (but this has been hotly debated if it is worth doing this). Over time the drawer liner foam mentioned will likely become stuck in a compressed state.
If you are relying on a foam to do double duty of insulating between cells and managing compression then without a doubt, at present, that would be the best option.Resilient Polyurethane Foam Sheet which has been discussed in another thread. Advantage to this is that it handles the expansion/contraction of the cells for you if you care about that since cell manufactures state you get increased lifespan of the cells with proper compression (but this has been hotly debated if it is worth doing this). Over time the drawer liner foam mentioned will likely become stuck in a compressed state.
From the website in the link:
"Even after extended compression, these high-performance polyurethane foam sheets and strips bounce back to shape faster than any other foam we offer."
There is no specified recovery time and there is no specified long term plastic deformation spec. What is not said on the website is if it is compressed to 25% for the rated 11 psi for 1 year is there any permanent deformation? what about 5 years? The website says that it requires 11psi to compress it to 25% but does not say if that pressure is maintained or if it relaxes at all over time.
Having said all that and as I said above, if you are relying on the foam between cells to manage compression it is probably the best material we are aware of ATM.
For me personally, because my application is mobile and there is a high probability that at times I will make a substantial current draw on the battery while I am in motion through the use of a recovery winch. The pressure being maintained on the battery must be constant, it can not loosen up and allow any movement for any period of time. The winch draws 500 amps and if I winch for 10 minutes out of 20 and the foam has been compressed for 5 years, will it react fast enough to maintain pressure on the cells to prevent movement while I am winching and the vehicle is in motion? I have no way of knowing for sure. It has been said that this kind of foam is used by vehicle manufactures, which is promising, but without the recovery specs, Im only going to rely on material between cells to prevent electrical contact and mechanical isolation. and rely on springs to maintain clamping force over SOC.
The drawer liner is a soft material that prevents sliding so when under compression it helps to hold the cells and fixture as a solid block. That feature for me is why I opted to not use things like the cutting board material that does not "stick" to the cell and prevent sliding, You are relying on compression alone to keep the cell from moving in relation to other cells.
chrisski
Solar Boondocker
- Joined
- Aug 14, 2020
- Messages
- 5,192
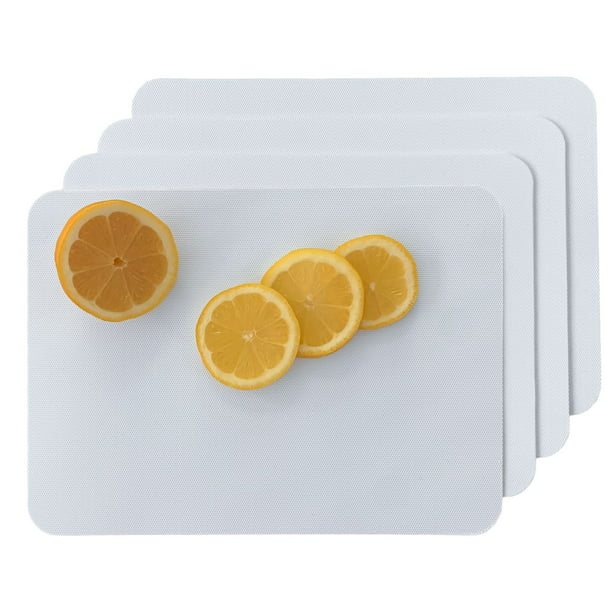
I am building my cells into a battery over the next week. I am using a cutting board sandwiched in 1mm Neoprene a sheet on either side. This is what I am using:
That is 11 X 17 and with that I could cut out two Eve 280 cells. One pack also came with enough sheets to do two 8S batteries.
The neoprene is rather pricey. I got mine here:

For my Eve cells, it took two or three 48” rolls.
I spent a lot of time looking to see what’s the best and someone suggested the material that circuit boards are made of, but that is not available locally and also expensive for shipping when going online. I’m not sure my solution with neoprene sandwiching a cutting board is the bast, but that’s what I will try.
Amazon.com: YEXPRESS 15 Pack Plastic Cutting Board Mats, Frosted Clear Flexible Kitchen Cutting Board, Plastic Placemats Table Mats, 17 x 11 Inches: Home & Kitchen
Online shopping for Kitchen Knives & Accessories from a great selection of Cutlery Sets, Specialty Knives, Sharpeners, Cutting Boards, & more at everyday low prices.
www.amazon.com
That is 11 X 17 and with that I could cut out two Eve 280 cells. One pack also came with enough sheets to do two 8S batteries.
The neoprene is rather pricey. I got mine here:
Neoprene Fabric Remnants 1mm, 2mm, 3mm, 5mm Scuba Waterproof Wetsuit Material | eBay
1mm, 2mm, 3mm, & 5mm Neoprene Fabric. • 1mm, 2mm, 3mm, & 5mm Thickness. • COLORS Available: Black / Black, Pink / Black, Turquoise / Black, Cow Print / Black, Camouflage / Black, Red Hawaiian / Black, Navy Blue / Black, Red / Black, Gray / Black, Purple / Black, Pink / Black, Yellow / Black...
www.ebay.com
For my Eve cells, it took two or three 48” rolls.
I spent a lot of time looking to see what’s the best and someone suggested the material that circuit boards are made of, but that is not available locally and also expensive for shipping when going online. I’m not sure my solution with neoprene sandwiching a cutting board is the bast, but that’s what I will try.
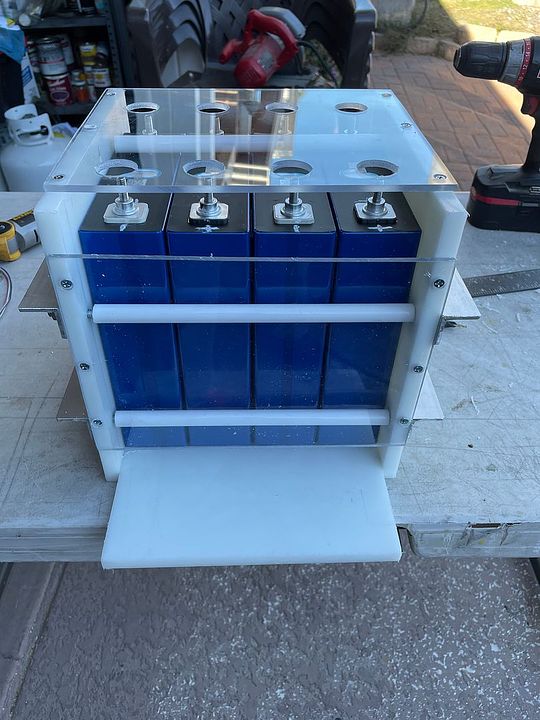
I will be using VHB tape with compression rods thru starboard.
This build is the shiznit:

 diysolarforum.com
This build is the shiznit:
560ah 12v Battery with Clean, Modern Case
This is my first post here, but I wanted to share my DIY battery bank. This forum and Will's videos were so helpful that I wanted to share a few things I learned, as well as a few things I created that I haven't seen before (specifically the asthetics of the case). I'd also appreciate any...
diysolarforum.com
Kapton tape is also easy to use, relatively cheap and easy to find. The real use for it is to mask of portions of circuit boards during manufacture to prevent solder from sticking when run through a wave solder. This means it also has high heat resistance. Here is an example, but of course it can be much cheaper if you are willing to wait and order from China.Thanks for the input guys, I would go for the drawer liner as it is cheap and does the job of insulation. Would have preferred polycarbonate sheets but they are expensive and would also risk scratching the surface.
1 Mil Kapton Tape (Polyimide), 3" x 36 yds: Electrical Tape: Amazon.com: Industrial & Scientific
1 Mil Kapton Tape (Polyimide), 3" x 36 yds: Electrical Tape: Amazon.com: Industrial & Scientific
smile.amazon.com
Also available as peel and stick sheets (great if you have a paper cutter).
Amazon.com: Gizmo Dorks Kapton Tape Polyimide for 3D Printers and Printing, 9 x 12 inches, 10 Sheets per Pack : Industrial & Scientific
Amazon.com: Gizmo Dorks Kapton Tape Polyimide for 3D Printers and Printing, 9 x 12 inches, 10 Sheets per Pack : Industrial & Scientific
smile.amazon.com
Ordered white cutting board mats here: https://www.ebay.com/itm/334131406675?var=543137963324
Unfortunately they didn't arrive in time - I wanted to get my pack built, so I used VHB tape. Super happy with how it worked out.
Someone mentioned they thought the 3M tape was too permanent, however a piece of mono-filament fishing line does a good job of cutting right through adhesive tape - that's how you get unwanted body trim off a car or truck.
I like that the tape immobilizes the cells for mobile use, insulates the cases from each other, plus provides a little cushion in compression.
The boards finally did arrive and they're really nice - so there's one in the kitchen and one in the motorhome galley. LOL
I think they would have worked out really well, and would surely have used them had I had them on hand.
VHB instead...and I put a sheet of 1/8" rubber on the bottom:
Last edited:
featherlite
Solar Enthusiast
Browneye,Ordered white cutting board mats here: https://www.ebay.com/itm/334131406675?var=543137963324
Unfortunately they didn't arrive in time - I wanted to get my pack built, so I used VHB tape. Super happy with how it worked out.
I think they would have worked out really well, and would surely have used them [cutting boards] had I had them on hand.
I just ordered four Eve 280Ah prismatic cells (with the aluminum cases) and need to build a 4s1p box like yours. What you have done looks great to me.
1. If you had it to do over, would you use both the thin cutting boards and VHB tape between your cells, or just the cutting board?.
2. Where did you source, and what is the material you used to build your compression box?
3. Did you use a torque wrench to tighten the nuts on the end of your threaded rod, and if so, how many pound of torque did you apply?
Thank you for your help!
Browneye,
I just ordered four Eve 280Ah prismatic cells (with the aluminum cases) and need to build a 4s1p box like yours. What you have done looks great to me.
1. If you had it to do over, would you use both the thin cutting boards and VHB tape between your cells, or just the cutting board?.
2. Where did you source, and what is the material you used to build your compression box?
3. Did you use a torque wrench to tighten the nuts on the end of your threaded rod, and if so, how many pound of torque did you apply?
Thank you for your help!
I would use just the cutting boards. The foam tape is fine, but they really stick. It seems like you could cut them apart with a piece of fishing line, but I tried that on another component and it was pretty tough going.
Once you apply a little pressure with the compression rods - don't over do it - they're not going anywhere anyway. I just snugged them down a bit, not too tight. This isn't the place to wrench them down hard - you're looking for about 12psi compression on the cells. It's more of a fixture to HOLD them, to keep them from puffing, not to squeeze them hard.
With the cutting board material you could disassemble easily to replace a bad cell or rearrange them for troubleshooting.
I got surplus StarBoard from Paragon Plastics in Santa Ana, CA. I don't know if they ship or not. But there are some amazon sellers that have cut panels at a reasonable cost as well. Various colors too. I may well have used gray plastic had they had some on hand. It cuts and shapes just like wood. But you must know that melting point is about 275* F, whereas plywood is good to about twice that before it burns. I don't plan on having any fires in my rig. LOL Also be careful with screws into starboard - it does not have the holding power of plywood. And if you screw down lexan like I did, most craftsman will recommend a buttonhead screw without a countersunk screw and hole - this latter cracks much easier. Lexan is about five times stronger than acrylic though.
After the pack was built I was informed that bare copper lugs on aluminum was a bad combination for galvanic corrosion. So I replaced the main leads with tinned copper terminals. And I tapped the bus bars for the bms sensor leads instead of putting the ring terminals under the nuts. Also sourced exact fitting aluminum washers to increase the contact area under the bus bars, that thread is here, my posts start about #188. Member @triplethreat may be able to sell you a handful of them - he bought a box of fifty from McMasterCarr:
Improving Contact Area on Welded Stud Pads
If you are getting up to 200amps then it might be worth it if done right. Have you just got 4 cells in series? 8 cells, running 24V system with inverter, but 200A would be really really pushing it. In an RV/offroad truck, btw.
diysolarforum.com
I did not use a torque wrench on the studs, but I have a lifetime of turning wrenches and a good feel. I was going to buy one, but they were $40 and I figured I would use it once, and the spaced it out, and when reassembling I still didn't have one on hand. So by feel. I do recommend you got an inch-pounds torque wrench to ensure you get them tight enough without stripping or breaking the studs. Plenty of horror stories around here with ruined cells.
Actually, one of my cells came with the terminal un-tapped. That's, right, no threads. But I've tapped enough thread holes and I had a M8 I could grind down (the hole is shallow) and got it tapped to install the SS grub screw - locktited it in and marked it.
If you overtighten you'll pull the aluminum threads right out of the socket.
Otherwise I'm thrilled with the way it turned out, and it's working exceedingly well.
triplethreat
Solar Enthusiast
- Joined
- Oct 12, 2021
- Messages
- 129
I do have some of the washers left, but I'll warn/advise anyone that is thinking about contacting me about them. The washers worked out to 50¢/each, but the cheapest shipping I could find brought the total up to about triple or more than the cost of the washers alone....a couple of folks declined when they found out the cost to get 8 washers to their house.
Similar threads
- Replies
- 8
- Views
- 348
- Replies
- 22
- Views
- 1K
- Replies
- 7
- Views
- 354
- Replies
- 1
- Views
- 319
- Replies
- 5
- Views
- 167