Is anyone else on the forum having these problems and/or actually received a real fix?
My original bus bars were unusable due to the threaded inserts being poorly installed, deeply recessed, and coming out of the bar with very minimal torque. Signature Solar was responsive and I received replacement bus bars from them.
The bad news is these replacements possibly even worse than the original, unusable bars.
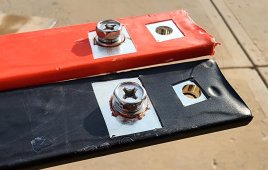
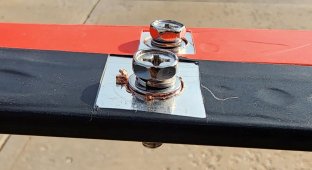
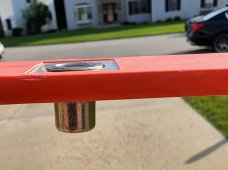
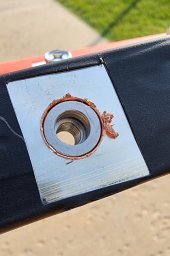
On these replacements, some of the threaded inserts are crooked (again), some are set into the bar very deep (again), some are sticking out, and most have large burrs remaining from the drilling process which will keep any connections from seating flat or having good contact area. I've attached some pictures trying to show some of these issues. Really, the quality on these is completely terrible! These electrical connections need to be safe and secure.
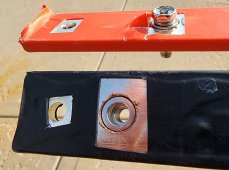
My original bus bars were unusable due to the threaded inserts being poorly installed, deeply recessed, and coming out of the bar with very minimal torque. Signature Solar was responsive and I received replacement bus bars from them.
The bad news is these replacements possibly even worse than the original, unusable bars.
On these replacements, some of the threaded inserts are crooked (again), some are set into the bar very deep (again), some are sticking out, and most have large burrs remaining from the drilling process which will keep any connections from seating flat or having good contact area. I've attached some pictures trying to show some of these issues. Really, the quality on these is completely terrible! These electrical connections need to be safe and secure.