diy solar

diy solar

Post your Ground Mount Setup

Cool I was just about to defend my normal hammer drill since it chews thru bricks like chewing gum after reading these post and it turns out its not a normal hammer drill...

M18 18V Lithium-Ion Brushless Cordless 1 in. SDS-Plus D-Handle Rotary Hammer​


Its a rotary hammer drill :)

Ive never seen anything like the difference this tool made. I'm going to make a youtube vid in a few days when I drill some more holes into a brick wall with it showing the difference of a normal drill using the same bit as drill with the rotary hammer drill.

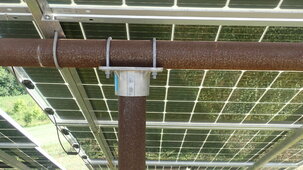
I spent 2 damn hours trying to drill a small hole in a brick wall trying to install the cover kit for the mini split I installed last week using a masonry bit and a normal drill. I then found I had a bit that small for the sds plus the hammer drill needed. I drilled 7 holes in 60 seconds of actual time drilling after switching over.

I literally couldn't get the drill up to full speed before the hole was made.
It was like magic in comparison.
 
I grew up in the Welsh valleys where many houses were built of Beaufort bricks which were known to be one of the hardest in the world, the US shipped something like 40,000 of them from wales to NYC for the foundations of the Empire State building. Tradesmen hated them as trying to fix anything to them was nearly impossible even .22 nail guns would just bounce off(many accidents) old hammer drills wouldn't even dent them never tried rotary hammer but even a heavy duty one I would guess would still take its time.
 
I really like this.

In my future is a "lean two" that is going to be on the side of my shop, I was thinking....hay I could make the roof out of solar panels, then store the brush cutter, finish mower and all that jazz under there.
Same thought.. I built a lean to tractor barn earlier this year before I started to get interested in DIY solar .. last week a storm blew the corrugated metal roof off so now I need to rebuild .. already have a solid pole barn frame .. I'll beef up the structure and convert to a solar panel frame ..
 
Here's some adjustable wooden frames I put together. The first one I did is made of non-treated wood, since I couldn't find the pressure treated 2x2's that day and impatiently bought wood anyway. But I sprayed it down with wood sealer spray. The second one is treated wood. We'll see how each holds up... I might put plant shelving on the lower tiers.

I will probably scale these up and add cross bracing for a few 400W panels I will soon add.
 

Attachments

  • IMG_4926.jpeg
    IMG_4926.jpeg
    462.4 KB · Views: 40
  • IMG_4927.jpeg
    IMG_4927.jpeg
    434.4 KB · Views: 39
  • IMG_4928.jpeg
    IMG_4928.jpeg
    464.5 KB · Views: 42
  • IMG_4929.jpeg
    IMG_4929.jpeg
    368.8 KB · Views: 40
Got four more panels in. I ordered four 100W Grape Solar panels from Signature Solar yesterday (Well, effectively yesterday - I ordered them on Wednesday at 11:15PM, and processed and shipped on Thursday morning) and they were delivered today. I plan on buying four more later on. In the future (2025?), I want to buy 16 more, but if I buy these all at once, I'm going to drive to Signature Solar and pick them up, due to the cost of shipping.
 

Attachments

  • IMG_20240628_163808923_HDR.jpg
    IMG_20240628_163808923_HDR.jpg
    754.7 KB · Views: 18
Just finished the first of two Eg4 Brightmount racks. Digging the holes for the 6x6 posts was by far the worst part. I’m amazed at how rigid these things are! Supposed to be in the 90’s this weekend, perfect weather to start the next one.

View attachment 226183

I still don't understand how that is supposed to have any torsional strength between the square metal foot with four screws, and top of the wooden post.

Looks like Archimedes and his lever, to me. While it may not move the Earth, I think it could certainly pull out the screws. Especially after posts have aged a while.

I want to see struts from lower front edge of frame to another point on the post. Ideally near the base, but relocatable would support adjustable tilt.
They are adjustable tilt but I’ve locked them in at 30°, I’m not interested in moving them once they’re done. Eg4 actually specs they be mounted on concrete piers, I chose wood posts. The feet are attached with 6” structural screws. They’re not going anywhere.

IMG_7843.jpeg
 
I have two Eco-Worthy trackers, added a second after a Tornado near miss picked up one of my big panels and tossed it and hail took it out. 120mph winds and golf ball + sized hail destroyed my roof and skylight, but the tracker and panels were unscathed. So one has 3-365w panels fueling my Bluetti AC300 filling it up by 1pm to 100% from 25% each night. The 2nd one has 5-200w BourgeRV N type bi-facial panels feeding a MPP Solar 2424LV and 2-EG4 24v batteries. Need to upgrade my 2424 as it is clipping the solar input to 635w when it should be 800+ like my other one produces. Notice I do NOT have an additional panel or battery running the trackers… I use an outdoor lighting wire back to my Bluetti 12v output to power the 3 big panel tracker and same wire to a fuse box off my 2424 to power the other one. VERY efficient solar cut my charge time almost in half! Highly recommend these trackers after our big ass storm, unscathed.
 

Attachments

  • IMG_0100.png
    IMG_0100.png
    205.8 KB · Views: 25
  • IMG_9954.jpeg
    IMG_9954.jpeg
    326.5 KB · Views: 29
  • IMG_9955.jpeg
    IMG_9955.jpeg
    371.1 KB · Views: 30
  • IMG_9956.jpeg
    IMG_9956.jpeg
    365.9 KB · Views: 30
  • IMG_9957.jpeg
    IMG_9957.jpeg
    271.4 KB · Views: 26
  • IMG_9958.jpeg
    IMG_9958.jpeg
    388.2 KB · Views: 28
Got two of these custom mounts but what a pain. Final five will be fixed vertical and much simpler to construct and far cheaper.

View attachment 217706
Couple lessons learned:

a) having only one bolt in each rotator on the end to "lock" the rotating panels into the I-beams does not prevent the wind from lifting them up in the slot and pivoting the panels around that one single bolt

b) getting your design drawings engineered does not mean an engineer will tell you this fact

lift.jpg

The center I-beam has a bracket that keeps the horizontal assembly from being lifted. But both ends were lifted up like this pivoting around the bolt. They were in the position shown in the post I'm replying to before the wind grabbed them. The wind coming from the back must have lifted and pushed (causing the angle to decrease). Just a little hand pressure put them back to normal and the assembly slide to the bottom of the slot. A small ratchet strap on each end will keep it from being lifted (and then rotated) in the future until I can have something a bit nicer manufactured.
 
I chose wood posts. The feet are attached with 6” structural screws. They’re not going anywhere.

Wanna Bet??? 💲💲💲🪟🪟🪟

The mechanical advantage provided to allow wind to pry out those screws looks horrendous.


If you're not a gambling man, you could take out an insurance policy in the form of diagonal braces/struts, cutting the stress on screws into wood by a factor of 10 or more.
 
The feet are attached with 6” structural screws. They’re not going anywhere.
I'm with @Hedges on this(don't bet but the odds are badly stacked against you) the stress on the end grain will likely end in failure after a few seasons of expansion and contraction. From an engineers point of view, I would have some end caps made with corresponding bolt holes to the anchors bolt them together and slide it over the pole with a single coach bolt through the cap and timber long grain to hold it down.
 
Wanna Bet??? 💲💲💲🪟🪟🪟

The mechanical advantage provided to allow wind to pry out those screws looks horrendous.


If you're not a gambling man, you could take out an insurance policy in the form of diagonal braces/struts, cutting the stress on screws into wood by a factor of 10 or more.

So if I attach brackets to the face of the posts in this area, that would help?

support.jpg
 
Wanna Bet??? 💲💲💲🪟🪟🪟

If you're not a gambling man, you could take out an insurance policy in the form of diagonal braces/struts, cutting the stress on screws into wood by a factor of 10 or more.
Yeah that mount is originally shipped with the expanding style bolts meant for concrete, and the concrete bases referenced in the manual are massive pads, like 20"x20" in order to achieve passing structural integrity (although I think most people get away with a 12" sonotube).

The constant expanding/shrinking of the wood due to moisture and temperature changes will give this a limited lifespan.
 
So if I attach brackets to the face of the posts in this area, that would help?

View attachment 226262
In short yes, it should greatly reduce the force on the top bracket but it's only reducing the odds there's still a bet that after a few years a strong wind might rip the top bracket off.
If you just get some angle to go over the top bracket and fix to the side of the post (long grain/edge grain) you can use self-taping screws into the top bracket it really won't go anywhere .
Or even some straps fixed either side of the post over where the bracket screws into the post.
 
When I was considering the bright mounts I was looking into something like this, but put on top of post and mount on top of that.
 

Attachments

  • IMG_5563.jpeg
    IMG_5563.jpeg
    96.5 KB · Views: 17
When I was considering the bright mounts I was looking into something like this, but put on top of post and mount on top of that.
That was what I suggested earlier it would greatly increase the strength of the fixings and likely give a little more weather protection to the posts
 
Considering the leverage and wood grain, I bet you could just lift a corner of the array and rip that mount out with your hands.

When I was considering the bright mounts I was looking into something like this, but put on top of post and mount on top of that.
Very smart idea. You could also epoxy this piece on to the top of the post. Drive some screws in before the epoxy cures. Then bolt the array on top. Easy
 
Took a while to find these as you want a flat bottom for mount to attach to and plate welded on all four sides. That’s been in my Amazon save list since I’ve found them.
 
Last edited:
Considering the leverage and wood grain, I bet you could just lift a corner of the array and rip that mount out with your hands.
Yes I really doubt much force is needed with the weight of the panels also all that force is being balanced on a very small area even mounting in concrete with those screws you'd likely snap the heads off, hence why they are supplied with hefty expansion bolts.
Very smart idea. You could also epoxy this piece on to the top of the post. Drive some screws in before the epoxy cures. Then bolt the array on top. Easy
Epoxy is a bit like a tattoo, it seems like a good idea at the time but its extremely painful to remove at a later date.
I would just bolt the mount to the cap and fix the cap to the post with a bolt drilled through at the center of the cap just over an inch from the bottom, those caps look to have two fixing holes personally I'd drill a single one in the center and use a bolt or just use screws in the existing holes as drilling two holes would significantly lower the durability of the post more than likely.
 
So if I attach brackets to the face of the posts in this area, that would help?

View attachment 226262

It would help a considerable amount.
Increased the distance from fulcrum to screw under tension from 3" to 10" for the case of wind from behind, and changed the angle of pull.
Wind from the front, the end-grain screws are under compression + shear, and the bracket will be screwed into side grain.

Thru-bolts would get away from thread grip issue, but that is probably OK with side grain.

You could relocated existing bracket to side, for up to vertical square tube.
I would prefer screws through center of 4x4 rather than 3/4" from edge, but could be OK.

Watch materials for compatibility, of course. Your screws likely coated for the application. I used plain 2x4 and galvanized screws to make supports for a deck while putting new footings under it, and they rusted heavily.

My two concerns were the extreme leverage, and the way I see end grain separate.
Something wrapped around the end to hold it together could help.
Maybe heavily coat the ends to reduce weathering.


I would rather those legs connected much further down the post, like 2' away from the top.
See what happens if you remove the upright struts entirely and bolt brackets together directly (I think they will be able to slide sideways.) Or cut upright down to a few inches long.
This should make the fulcrum much farther from the strut.

If it was a big array I would want two rows of posts, but yours is probably small enough that you can get away with one. Basically the area of a fence.
 
I think I would be using long lag screws and some post mounts like you see in the hardware store for deck legs except upside-down. Wrap the post with them and leave bolt threads exposed. Invert this mount and put a bolt through it with washers. Then you can put a boxend inside the thing and bold down your mount securely. They have a hundred different variations on the shelf and catalog of hundreds more that can be special ordered. I can't find the version I am thinking of exactly, but it has extended sides that go down the post about 8 inches on all 4 sides. Is meant for decks that are in the air in windy/earthquake areas to hold the legs firmy to the concrete, but would work great for this


1720022768190.png
 

diy solar

diy solar
Back
Top