diy solar

diy solar

JB Weld versus Loctite for grubscrews

Well, I managed to complete 4 terminals (2 cells) in a single session today, but it is slow going and I’m not sure trying to do too many terminals with one batch of JB Weld is a good idea.

You want the JB Weld to be as liquid as possible so the the torque required to get to ooze out of the threads is as low as possible.

Even though the set time is 4 hours and the JB Weld was still soft when I threaded the final (fourth) terminal, I have the suspicion it was not completely as liquid as it was for the first terminal and I believe I had to apply more pressure to thread that last grubscrew.

And because of that + that last terminal was one of the deepest I’ve seen so far (5-1/2 turns to bottom), I believe I may have pierced the bottom of that terminal.

If anyone has any insight into what happens when you pierce the bottom of a terminal and/or what test allows you to determine if a terminal has been pierced, I’m all ears and have started a new thread on that question here: https://diysolarforum.com/threads/how-do-you-know-when-you’ve-pierced-a-terminal-bottom-on-an-eve-280ah-cell.18161/
 
The bottom of that Aluminum terminal would have to be awfully thin to go through it with such little bit of torque -- I would think as bad as the threads are in these terminals they would pull out first
 
The bottom of that Aluminum terminal would have to be awfully thin to go through it with such little bit of torque -- I would think as bad as the threads are in these terminals they would pull out first
I finally thought of a way to measure the torque I’m applying through my little ~3” long Allen Head wrench - two back-back nuts on a grubscrew allowed my to see how much torque I could apply by hand with that little 3” Allen Head wrench and it is just over 20 inch-lbs.

In case anyone decides to follow in my footsteps with JB Welding-in grubscrews, I’ll say it works quite well but is slow going.

I tried to do 4 terminals (2 cells) with one ‘batch’ yesterday and believe that was too much. Even though I was through less than 1/2 of the 4-hour ‘set time’ of the JB Weld, I believe it had become more viscous (less liquid) by the time I was applying to the last terminal and I feel like I had to apply more pressure to get the grubscrew to bottom-out (and may have burst through the terminal bottom in the process - still unclear).

Today I did 2 terminals / 1 battery with a single batch and that was more manageable. The last turn goes very slowly (~1/16th turn every 1-2 minutes) but as long as JB Weld continues to ooze out of the thread at the top, you know that you have not pierced the terminal bottom and that more thread length is getting glued in place.

I tested my second terminal following 48 hour cure today and it also took 45 inch-lbs of torque without issue.

So I’m happy with the strength and effectiveness of glueing in SS grubscrews with JB Weld but it sounds like it is much more effort than using Loctite Red.

I’m going to plod through the rest of my cells using JB Weld, but if I ever have a new set to deal with, I’ll probably just use Loctite Red to secure in SS grubscrews right out of the box...
 
Another update in case anyone else considers the same course.

I JB Welded-in the partially-stripped thread today. I used enough JB Weld on the bottom of the terminal as well as the bottom of the grubscrew to be confident I’d used enough to ooze out of the top, and I was well rewarded.

That thread turned more easily than any of the other non-stripped terminals that I have JB Welded, so it definitely was looser and had more empty volume once threaded than an unstripped terminal.

I easily got a nice bead of JB Weld oozing out around the entire circumference of the grubscrew at the top of the terminal and bottomed the grubscrew without needing to come anywhere near my maximum finger torque of ~20 inch-lbs.

So I’m feeling I’ve repaired that partially-stripped thread about as effectively as possible with JB Weld and will be interested to see whether it can take 35 inch-lbs now despite the 4 stripped threads (it stripped the top 4 threads of just over 30 inch-lbs before). There were a total of 4-3/8th threads to bottom in that terminal, so somewhere between 3/8ths and 1 full pristine/unused thread at the bottom followed by 3-3/8ths to 4 full stripped threads towards the top (with some remaining thread still visible in the sidewalls).

I glued both threads with one batch and ran into a similar issue with the second thread. That thread bottomed dry after 5 full turns but once the JB Weld was added, I ran into heavy resistance after only 4 turns. I pushed the torque pretty much to the limit of what I can apply by hand (~20 inch-lbs from an attempt to measure with a torque wrench).

I went a total of 3 5-minute intervals, waiting then checking whether I could thread any further and/or whether additional JB Weld had oozed out at the top and after basically not changing over that period, decided to call it quits and cleaned it up.

Either I once again lost track when I was counting turns or made a mistake at the beginning when I measure turns-to-bottom dry, but I decided an intact terminal engaging one less thread than possible was a lesser evil than piercing the terminal bottom.

The fact that it was precisely 1 full thread less than I had expected means that it’s very likely that there were only 4 threads available from the start or that I had actually turned 5 full threads when I had though I’d only turned 4 full threads.

In any case, the two messages I have are:

1/ seems as though the terminal bottom is able to withstand a full 20 inch-lbs, at least when that bottom is what remains after tapping 4 full threads (and possibly 5 - I’ll check how many grubscrew threads remain exposed once all of these terminals have cured).

2/ if using the ‘measure threads to bottom dry then force grubscrew to bottom with JB Weld’ approach, it’s really easy to make a mistake and get lost (especially when doing more than one thread at a time). I’m going to start double and triple-checking from now on and also keeping more frequent progress notes to see if I can avoid a repeat of this mishap over the remaining terminals...

But as far as repairing / recovering a partially-stripped thread, I’m reasonably confident that JB Weld will prove to be The Bomb (that partially-stripped thread was much easier to JB Weld a grubscrew into than all the non-stripped threads so far...).
 
Either I once again lost track when I was counting turns or made a mistake at the beginning when I measure turns-to-bottom dry, but I decided an intact terminal engaging one less thread than possible was a lesser evil than piercing the terminal bottom.

The fact that it was precisely 1 full thread less than I had expected means that it’s very likely that there were only 4 threads available from the start or that I had actually turned 5 full threads when I had though I’d only turned 4 full threads.

Measure height above terminal, compare to the others. Is is 1mm higher?

 
Measure height above terminal, compare to the others. Is is 1mm higher?

Yeah, that’s exactly what I plan to do, but probably on all cells at once and only after they have fully cured...

(And instead of using a caliper, I’m just going to count net turns to 35 inch-lbs).
 
Well, after all of this effort, I’ve got a disappointing update for this morning: the partially-stripped thread repaired with JB Weld did not hold.

It started rotating at a bit over 20 inch-lbs and sheared-off the one remaining full thread at the bottom as well as a thin layer of aluminum from the sidewall of the 4 partially-stripped threads above that.

Perhaps it would have held better if I had prevented rotation using an Allen Head wrench, but overall, when I see how easily this failed, I don’t feel that bad and am happy that I discovered this sooner rather than later (after the battery was built).

So I’ll be exploring the joys of Helicoils to repair this thread.

The other non-stripped thread on that cell took 45 inch-lbs and I think I am going to continue to stress all JB Welded threads at that level.

When I see how that thread failed, I believe it may not be the JB Weld but the shallow number of threads that is to blame. That thread was the shallowest one I have encountered yet, only tapped about 4-5/8 threads deep. The entire remaining partially-stripped threads sheered off by rotation and I’m not sure intact threads would have fared Andy better.

Looking at how this partially-stripped thread failed, I don’t see any reason why JB Weld should perform any better than Loctite Red and believe either of them is only going to deliver a satisfactory level of strength with a full number of ~5 intact threads.

So first, after this experience, I’m not optimistic that there is any way to salvage stripped threads with glue / thread-gripper, at least if the underlying number of threads is substandard.

And second, knowing that Loctite Red is likely much easier to apply than JB Weld, I’m thinking of switching to that for my remaining threads...

The real question for me will be what I do if I discover any other substandard threads. Do I attempt to tap them deeper? Just Loctite them in, stress to 45 inch-lbs and use a Helicoil if they pull out?

Once you know you’ll need to deal with one Helicoil anyway, the extra work for dealing with one or two more seems minor...
 
I think that you are right about needing to hold the stud with an allen wrench while assembling.

Probably the combination of twisting and pulling force is what ruins them.

Thanks for all your experimentation.
 
I think that you are right about needing to hold the stud with an allen wrench while assembling.

Probably the combination of twisting and pulling force is what ruins them.

Thanks for all your experimentation.
Yeah, I’ve been stress-testing the threads without an Allen head wrench but may start to use one, at least for any other terminals with less than 5 full threads.

The fact that ArtherEld has successfully tested his Loctite Red’ed threads to 40 or 45 inch-lbs without needing an Allen Head wrench pretty much proves the aluminum threads themselves are able to withstand that level of torque without that level of ‘assistance’...
 
Well, after all of this effort, I’ve got a disappointing update for this morning: the partially-stripped thread repaired with JB Weld did not hold.

It started rotating at a bit over 20 inch-lbs and sheared-off the one remaining full thread at the bottom as well as a thin layer of aluminum from the sidewall of the 4 partially-stripped threads above that.

Perhaps it would have held better if I had prevented rotation using an Allen Head wrench, but overall, when I see how easily this failed, I don’t feel that bad and am happy that I discovered this sooner rather than later (after the battery was built).

So I’ll be exploring the joys of Helicoils to repair this thread.

The other non-stripped thread on that cell took 45 inch-lbs and I think I am going to continue to stress all JB Welded threads at that level.

When I see how that thread failed, I believe it may not be the JB Weld but the shallow number of threads that is to blame. That thread was the shallowest one I have encountered yet, only tapped about 4-5/8 threads deep. The entire remaining partially-stripped threads sheered off by rotation and I’m not sure intact threads would have fared Andy better.

Looking at how this partially-stripped thread failed, I don’t see any reason why JB Weld should perform any better than Loctite Red and believe either of them is only going to deliver a satisfactory level of strength with a full number of ~5 intact threads.

So first, after this experience, I’m not optimistic that there is any way to salvage stripped threads with glue / thread-gripper, at least if the underlying number of threads is substandard.

And second, knowing that Loctite Red is likely much easier to apply than JB Weld, I’m thinking of switching to that for my remaining threads...

The real question for me will be what I do if I discover any other substandard threads. Do I attempt to tap them deeper? Just Loctite them in, stress to 45 inch-lbs and use a Helicoil if they pull out?
Your holes with threads left should be fine with just loctite. I'd wait 48 hours minimum before using and clean up the excess a few times with acetone. Loctite will come out for a few hours so you have to keep wiping it until no red gets on the rag.
Once you know you’ll need to deal with one Helicoil anyway, the extra work for dealing with one or two more seems minor...
It's easier once you've done it. The hardest part is grinding off the tap and drill. Even that isn't very hard because you don't want them to cut in the center.
 
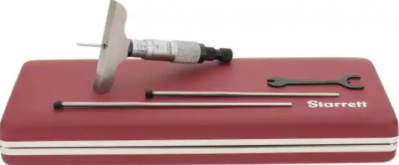
I bet that tool looked exactly the same 100 years ago. Even the box


Edit: dug up a picture
View attachment 37235
Earlier in my career, a good bit of my time was spent reviewing the supply chain and manufacturing processes of lots of different companies. Starrett headquarters stands out as one of the most memorable site visits. Not because it was some high tech highly automated factory with robots, but it felt like taking a step back in time. The headquarters in MA has been in the same building since the late 1800's and you could just feel the history. As a guy who appreciates high quality tools, it was really cool and a little sad. At the time, you could see the company struggling to balance the high end side of their business (extremely high quality products, some still made in the US) against the tide of lower cost and decent quality tools made in Asia (which they also sell). Really good people from what I recall.
 
Your holes with threads left should be fine with just loctite. I'd wait 48 hours minimum before using and clean up the excess a few times with acetone. Loctite will come out for a few hours so you have to keep wiping it until no red gets on the rag.

It's easier once you've done it. The hardest part is grinding off the tap and drill. Even that isn't very hard because you don't want them to cut in the center.
I have a friend whose a biker and has some spare M6 Helicoils he’s offered to lend me.

From what you’ve written above, sounds like I’m going to need to destroy the stock tap and should decline...

I know I can circle back to check your Deligreen thread - is that the best place to see the steps you followed to successfully insert a Helicoil?
Rather than trying to grind down a regular tap, I'd recommend getting a bottom tap that is designed for what you are trying to do.

 
I have a friend whose a biker and has some spare M6 Helicoils he’s offered to lend me.

From what you’ve written above, sounds like I’m going to need to destroy the stock tap and should decline...

I know I can circle back to check your Deligreen thread - is that the best place to see the steps you followed to successfully insert a Helicoil?
You can use his tap to start the threads. Then it will be easier to get the flat bottom tap started.

Well look at that, somebody made a resource - https://diysolarforum.com/resources/heli-coils-for-fixing-stripped-threads.162/
 
I said those Starrett micrometers still look the same. I have no idea where they are made.
They were the more expensive option when I was buying machinist tools. I inherited my fathers tools.
I worked for my father when I was young and he had the same tool box then with the same tools. I enjoy using them.
 
You can use his tap to start the threads. Then it will be easier to get the flat bottom tap started.

Well look at that, somebody made a resource - https://diysolarforum.com/resources/heli-coils-for-fixing-stripped-threads.162/
Thanks a fantastic document - thanks for making that effort.

The only small aspect I’m not understanding is his you removed the tang at the end - the YouTube video I found was thru-hole, so he just had to push the tang through.

With the tang resting against the bottom of the cell, how did you remove it?

And the other question I have for you is if you were using a Helicoil to attach a permanent M6 grubscrew, when would you use Loctite Red? Both on the Helicoil when it is installed and again when the grubscrew is threaded (and the Helicoil has cured)?
 
There is no thread locker or glue used with hilicoils. You won't need loctite and it will be stronger than the holes with loctite.
But you could loctite it if you want to. I'm nut sure what would happen if you tried to take it out.

I had to use a pointy rod to get the tang out. It took a little moving it back and forth but it let go and came out.

I mentioned leaving some taper on the tap so it's easier to start and so it cuts better. But that causes a taper in the helicoil so the screw will be tight at the bottom. I think that that is fine.
 
Back
Top