As long as the cells get top balanced, your objective is achieved. People like to play with settings, but balancing below 3.4v is counterproductive.How much benefit is there to doing this with new higher Ah batteries verses just building the 16s pack with a 2A active BMS and hooking it up to the SCC and letting it do its thing over time (however long that might take)?


You are using an out of date browser. It may not display this or other websites correctly.
You should upgrade or use an alternative browser.
You should upgrade or use an alternative browser.
Top Balancing "How to"
- Thread starter snoobler
- Start date
John Frum
Tell me your problems
- Joined
- Nov 30, 2019
- Messages
- 15,230
That depends on your particular set of cells.How much benefit is there to doing this with new higher Ah batteries verses just building the 16s pack with a 2A active BMS and hooking it up to the SCC and letting it do its thing over time (however long that might take)?
It also depends on your bms and/or active balancer.
Also depends on how you cycle your batteries.
As long as the initial charging voltage can be limited to avoid over volt at the cell level this method is perfectly fine IMO. No issues with mine.How much benefit is there to doing this with new higher Ah batteries verses just building the 16s pack with a 2A active BMS and hooking it up to the SCC and letting it do its thing over time (however long that might take)?
For all the time and trouble that is posted about top balancing, this method could well be superior. Of course if the cells are delivered at a very different state of charge this could again take a long time. I suspect commercial battery makers are not top balancing in parallel.
If the top cell loses 2ah and the bottom cell gains 2ah I see a 4ah net change between the top and bottom cells.In theory you can do this. In practice, it can take a very long time. If you have a 2A balance current, that's probably 2A moved, which I believe is implemented as a 2A draw from high cell, then 2A dump to low cell, or 1A net current, on one cell at a time.
TorC
Solar Enthusiast
- Joined
- Jan 13, 2022
- Messages
- 514
Thing is, it takes 2A for, say, 1s from the top cell, then dumps the power it collected at 2A for 1s. I suppose you could argue it's still 2A balance, because the two cells approach each other in SoC at 2Ah/hr.If the top cell loses 2ah and the bottom cell gains 2ah I see a 4ah net change between the top and bottom cells
OK and my example assumed an accumulated 2 amps for a full hour. When one has lost 2 the other has gained 2.
If one is 267 and the other is 275 there is 8 difference.
After transferring 2 one is at 269 and the other is 273 with just 4 difference.
If one is 267 and the other is 275 there is 8 difference.
After transferring 2 one is at 269 and the other is 273 with just 4 difference.
Just in case people have not had benefit of viewing Steve at Overkill's battery building manual...
Appendix C: About Cell Balancing
In Section Section 2.3 , we asserted that each battery cell must be top-balanced separately, before assembling
the battery pack.
Here, we will prove why.
Q: But Steve, doesn’t the BMS have a built-in balancer?
A: Yes, the BMS has a built-in balancing function. HOWEVER no, it is not capable of doing an initial balance
on new cells.
The balancer works by connecting a tiny bleed resistor (see Figure C.1 below) to the cells with the highest
voltage, and the excess energy in those cells turns into waste heat. This is a slow process. The intention is that
the BMS can maintain the balance on the cells as they slowly drift over their lifetime.
A batch of new cells needs to be top-balanced before they can be expected to charge properly as a battery
pack.
Q: Why?
A: Because of the nature of the LiFePO4 voltage curve. At the top end of a charge cycle, the cell voltage spikes
quickly, and charging must be stopped to prevent damage to the cells. If one cell is at a higher state of charge,
(in terms of amp-hours or coulombs), even by a small amount, it will spike while the other cells are still in the
"bulk" phase of their charge cycle (See Figure C.1 below). On the linked graph, the red line is the highest
cell, which triggers a "cell overvoltage" alarm before the pink/green cells get to a full charge. The BMS must
then disconnect to protect the high cell, and the battery pack will be at a lower voltage than expected. You
want all the cells to spike up at the same time, and the only way this can happen is for them to be well
balanced.
Q: OK, so how would one go about top-balancing their cells?
A: There are several ways to manually balance cells, depending on what equipment you have access to:
The best way in my opinion, is to use a regulated power supply to charge the cells to 3.65 volts each. The cells
would be connected in parallel as a single cell and charged together (without the BMS), then re-assembled
into the series-connected pack with the BMS. Will Prowse demonstrates in this video:
Cheapest way: Connect a load to the high cell in your pack to quickly bleed off the excess energy. I tried this
method using a random car light bulb with some alligator clips on the leads. (see Figure C.3 below) You need
to watch the cell voltages closely because it’s easy to go too far.
What does NOT work is the old recommendation of connecting your new cells in parallel and letting them
passively equalize for hours or days. This does not work because of the flat charge curve. They are at almost
the same voltage even if they are far apart in state-of-charge. Basically the cells don't know that they aren't
balanced unless you can push them into the very top end of the charge cycle.
Q: What about cell matching?
A: Cells have a certain internal resistance. Grade-A cells are tested at the factory to confirm that their internal
resistance is acceptable, usually <1 milliohm. If your battery pack is made of grade-B cells or cells of different
ages or if they have been damaged before, then they are not matched. Mismatched cells will quickly become
unbalanced when the pack is cycled. This is one reason why you should pay for good grade-A cells.
I bought 4 of the very cheapest low grade garbage cells from Aliexpress (See Figure C.4 below), just for
experimenting. I balanced them several times, but after even 1 cycle of charging and discharging, they are way
out of balance. This is because they are not matched at all. Some cells have a high internal resistance, so they
get hotter than the better cells, and this puts them at a lower state of charge. If you are trying to use crappy
cells like this, you will only be able to charge them up to ~80% to avoid constant cell over-voltages. This might
be good for a big cheap solar storage bank, but it can cause big problems for a pack that you cycle daily, or
use with large loads.
Q: I’m still not convinced.
A: Here’s a real-world scenario that happened. A vendor in China that won’t be named shipped four 280Ah
LiFePO4 cells to a customer in Florida. This vendor was nice enough to email a video of the battery voltages
being measured before they were shipped. Here were the voltages, screen-captured :
● Cell 1: 3.3298V
● Cell 2: 3.2999V
● Cell 3: 3.3281V
● Cell 4: 3.3269V
Measuring Cells Like This Doesn’t Mean Much
From this info, we can work out that the cell delta is 29.9 millivolts. No need to top-balance these cells, right?
They’re almost identical, right? The customer figured as much, because he didn’t top-balance them. He was
in a hurry. Here was the output from the BMS iPhone app during the initial bring-up of the pack, after less
than 1/2 hour of charging::
Figure C.6: The effects of a badly-balanced cell
Steve’s advice to the customer, thinking that these might be crappy cells, was to top-balance the batteries.
The customer did so, and reported that three of the cells took approximately 7.5Ah, but cell #2 charged for
over a day, and when it was finished took a total of around 140 Ah. With that, we can work out a timeline of
what happened:
1. The supplier from China shipped three of the batteries at 90% charge, and one battery at 50% charge.
This should never happen. But it happened.
2. The supplier’s reassuring video of the cell voltages didn’t mean anything. Recall that LiFePO4 battery
discharge curves are extremely flat. This means that the capacity can vary wildly, but the voltage
won’t change much. We can actually see in the measurements from the vendor that the delta was 30
millivolts. Consulting the discharge curve for the battery above, a 30 millivolt delta (which we saw in
cell #2) can mean as much as a 40% state of charge difference.
3. During the battery pack bring-up, the cell overvoltage protection kicked in on cell #1, and cut off the
charging current. This happened because the cells were not balanced.
4. Steve recommended a top-balance, which was done, taking over a day at a charge rate of 10 amps.
After the pack was reassembled, the cell delta was around two millivolts (much better). The battery
successfully discharged down to its cutoff limit, and charged back up to 100% with no issue.
This, dear reader, is why you top balance. Don’t trust voltages when working with LiFePO4 batteries. When
it comes to vendors, the rule is: Trust, but verify . Verify by top-balancing.
Figure C.7: LiFePO4 battery discharge curves are extremely flat
If anyone needs or wants the figures and illustrations just ask and I'll capture and post them.
You can also download the whole manual from Overkill Solar.
The moral of the story is, TOP BALANCE YOUR CELLS BEFORE ASSEMBLING THEM INTO A BATTERY.
Appendix C: About Cell Balancing
In Section Section 2.3 , we asserted that each battery cell must be top-balanced separately, before assembling
the battery pack.
Here, we will prove why.
Q: But Steve, doesn’t the BMS have a built-in balancer?
A: Yes, the BMS has a built-in balancing function. HOWEVER no, it is not capable of doing an initial balance
on new cells.
The balancer works by connecting a tiny bleed resistor (see Figure C.1 below) to the cells with the highest
voltage, and the excess energy in those cells turns into waste heat. This is a slow process. The intention is that
the BMS can maintain the balance on the cells as they slowly drift over their lifetime.
A batch of new cells needs to be top-balanced before they can be expected to charge properly as a battery
pack.
Q: Why?
A: Because of the nature of the LiFePO4 voltage curve. At the top end of a charge cycle, the cell voltage spikes
quickly, and charging must be stopped to prevent damage to the cells. If one cell is at a higher state of charge,
(in terms of amp-hours or coulombs), even by a small amount, it will spike while the other cells are still in the
"bulk" phase of their charge cycle (See Figure C.1 below). On the linked graph, the red line is the highest
cell, which triggers a "cell overvoltage" alarm before the pink/green cells get to a full charge. The BMS must
then disconnect to protect the high cell, and the battery pack will be at a lower voltage than expected. You
want all the cells to spike up at the same time, and the only way this can happen is for them to be well
balanced.
Q: OK, so how would one go about top-balancing their cells?
A: There are several ways to manually balance cells, depending on what equipment you have access to:
The best way in my opinion, is to use a regulated power supply to charge the cells to 3.65 volts each. The cells
would be connected in parallel as a single cell and charged together (without the BMS), then re-assembled
into the series-connected pack with the BMS. Will Prowse demonstrates in this video:
method using a random car light bulb with some alligator clips on the leads. (see Figure C.3 below) You need
to watch the cell voltages closely because it’s easy to go too far.
What does NOT work is the old recommendation of connecting your new cells in parallel and letting them
passively equalize for hours or days. This does not work because of the flat charge curve. They are at almost
the same voltage even if they are far apart in state-of-charge. Basically the cells don't know that they aren't
balanced unless you can push them into the very top end of the charge cycle.
Q: What about cell matching?
A: Cells have a certain internal resistance. Grade-A cells are tested at the factory to confirm that their internal
resistance is acceptable, usually <1 milliohm. If your battery pack is made of grade-B cells or cells of different
ages or if they have been damaged before, then they are not matched. Mismatched cells will quickly become
unbalanced when the pack is cycled. This is one reason why you should pay for good grade-A cells.
I bought 4 of the very cheapest low grade garbage cells from Aliexpress (See Figure C.4 below), just for
experimenting. I balanced them several times, but after even 1 cycle of charging and discharging, they are way
out of balance. This is because they are not matched at all. Some cells have a high internal resistance, so they
get hotter than the better cells, and this puts them at a lower state of charge. If you are trying to use crappy
cells like this, you will only be able to charge them up to ~80% to avoid constant cell over-voltages. This might
be good for a big cheap solar storage bank, but it can cause big problems for a pack that you cycle daily, or
use with large loads.
Q: I’m still not convinced.
A: Here’s a real-world scenario that happened. A vendor in China that won’t be named shipped four 280Ah
LiFePO4 cells to a customer in Florida. This vendor was nice enough to email a video of the battery voltages
being measured before they were shipped. Here were the voltages, screen-captured :
● Cell 1: 3.3298V
● Cell 2: 3.2999V
● Cell 3: 3.3281V
● Cell 4: 3.3269V
Measuring Cells Like This Doesn’t Mean Much
From this info, we can work out that the cell delta is 29.9 millivolts. No need to top-balance these cells, right?
They’re almost identical, right? The customer figured as much, because he didn’t top-balance them. He was
in a hurry. Here was the output from the BMS iPhone app during the initial bring-up of the pack, after less
than 1/2 hour of charging::
Figure C.6: The effects of a badly-balanced cell
Steve’s advice to the customer, thinking that these might be crappy cells, was to top-balance the batteries.
The customer did so, and reported that three of the cells took approximately 7.5Ah, but cell #2 charged for
over a day, and when it was finished took a total of around 140 Ah. With that, we can work out a timeline of
what happened:
1. The supplier from China shipped three of the batteries at 90% charge, and one battery at 50% charge.
This should never happen. But it happened.
2. The supplier’s reassuring video of the cell voltages didn’t mean anything. Recall that LiFePO4 battery
discharge curves are extremely flat. This means that the capacity can vary wildly, but the voltage
won’t change much. We can actually see in the measurements from the vendor that the delta was 30
millivolts. Consulting the discharge curve for the battery above, a 30 millivolt delta (which we saw in
cell #2) can mean as much as a 40% state of charge difference.
3. During the battery pack bring-up, the cell overvoltage protection kicked in on cell #1, and cut off the
charging current. This happened because the cells were not balanced.
4. Steve recommended a top-balance, which was done, taking over a day at a charge rate of 10 amps.
After the pack was reassembled, the cell delta was around two millivolts (much better). The battery
successfully discharged down to its cutoff limit, and charged back up to 100% with no issue.
This, dear reader, is why you top balance. Don’t trust voltages when working with LiFePO4 batteries. When
it comes to vendors, the rule is: Trust, but verify . Verify by top-balancing.
Figure C.7: LiFePO4 battery discharge curves are extremely flat
If anyone needs or wants the figures and illustrations just ask and I'll capture and post them.
You can also download the whole manual from Overkill Solar.
The moral of the story is, TOP BALANCE YOUR CELLS BEFORE ASSEMBLING THEM INTO A BATTERY.
Interesting and relevant, but I do believe he's also discussing in general terms and assuming the use of a more traditional passive BMS.Just in case people have not had benefit of viewing Steve at Overkill's battery building manual...
Appendix C: About Cell Balancing
In Section Section 2.3 , we asserted that each battery cell must be top-balanced separately, before assembling
the battery pack.
Here, we will prove why.
Q: But Steve, doesn’t the BMS have a built-in balancer?
A: Yes, the BMS has a built-in balancing function. HOWEVER no, it is not capable of doing an initial balance
on new cells.
The balancer works by connecting a tiny bleed resistor (see Figure C.1 below) to the cells with the highest
voltage, and the excess energy in those cells turns into waste heat. This is a slow process. The intention is that
the BMS can maintain the balance on the cells as they slowly drift over their lifetime.
A batch of new cells needs to be top-balanced before they can be expected to charge properly as a battery
pack.
Q: Why?
A: Because of the nature of the LiFePO4 voltage curve. At the top end of a charge cycle, the cell voltage spikes
quickly, and charging must be stopped to prevent damage to the cells. If one cell is at a higher state of charge,
(in terms of amp-hours or coulombs), even by a small amount, it will spike while the other cells are still in the
"bulk" phase of their charge cycle (See Figure C.1 below). On the linked graph, the red line is the highest
cell, which triggers a "cell overvoltage" alarm before the pink/green cells get to a full charge. The BMS must
then disconnect to protect the high cell, and the battery pack will be at a lower voltage than expected. You
want all the cells to spike up at the same time, and the only way this can happen is for them to be well
balanced.
Q: OK, so how would one go about top-balancing their cells?
A: There are several ways to manually balance cells, depending on what equipment you have access to:
The best way in my opinion, is to use a regulated power supply to charge the cells to 3.65 volts each. The cells
would be connected in parallel as a single cell and charged together (without the BMS), then re-assembled
into the series-connected pack with the BMS. Will Prowse demonstrates in this video:
Cheapest way: Connect a load to the high cell in your pack to quickly bleed off the excess energy. I tried this
method using a random car light bulb with some alligator clips on the leads. (see Figure C.3 below) You need
to watch the cell voltages closely because it’s easy to go too far.
What does NOT work is the old recommendation of connecting your new cells in parallel and letting them
passively equalize for hours or days. This does not work because of the flat charge curve. They are at almost
the same voltage even if they are far apart in state-of-charge. Basically the cells don't know that they aren't
balanced unless you can push them into the very top end of the charge cycle.
Q: What about cell matching?
A: Cells have a certain internal resistance. Grade-A cells are tested at the factory to confirm that their internal
resistance is acceptable, usually <1 milliohm. If your battery pack is made of grade-B cells or cells of different
ages or if they have been damaged before, then they are not matched. Mismatched cells will quickly become
unbalanced when the pack is cycled. This is one reason why you should pay for good grade-A cells.
I bought 4 of the very cheapest low grade garbage cells from Aliexpress (See Figure C.4 below), just for
experimenting. I balanced them several times, but after even 1 cycle of charging and discharging, they are way
out of balance. This is because they are not matched at all. Some cells have a high internal resistance, so they
get hotter than the better cells, and this puts them at a lower state of charge. If you are trying to use crappy
cells like this, you will only be able to charge them up to ~80% to avoid constant cell over-voltages. This might
be good for a big cheap solar storage bank, but it can cause big problems for a pack that you cycle daily, or
use with large loads.
Q: I’m still not convinced.
A: Here’s a real-world scenario that happened. A vendor in China that won’t be named shipped four 280Ah
LiFePO4 cells to a customer in Florida. This vendor was nice enough to email a video of the battery voltages
being measured before they were shipped. Here were the voltages, screen-captured :
● Cell 1: 3.3298V
● Cell 2: 3.2999V
● Cell 3: 3.3281V
● Cell 4: 3.3269V
Measuring Cells Like This Doesn’t Mean Much
From this info, we can work out that the cell delta is 29.9 millivolts. No need to top-balance these cells, right?
They’re almost identical, right? The customer figured as much, because he didn’t top-balance them. He was
in a hurry. Here was the output from the BMS iPhone app during the initial bring-up of the pack, after less
than 1/2 hour of charging::
Figure C.6: The effects of a badly-balanced cell
Steve’s advice to the customer, thinking that these might be crappy cells, was to top-balance the batteries.
The customer did so, and reported that three of the cells took approximately 7.5Ah, but cell #2 charged for
over a day, and when it was finished took a total of around 140 Ah. With that, we can work out a timeline of
what happened:
1. The supplier from China shipped three of the batteries at 90% charge, and one battery at 50% charge.
This should never happen. But it happened.
2. The supplier’s reassuring video of the cell voltages didn’t mean anything. Recall that LiFePO4 battery
discharge curves are extremely flat. This means that the capacity can vary wildly, but the voltage
won’t change much. We can actually see in the measurements from the vendor that the delta was 30
millivolts. Consulting the discharge curve for the battery above, a 30 millivolt delta (which we saw in
cell #2) can mean as much as a 40% state of charge difference.
3. During the battery pack bring-up, the cell overvoltage protection kicked in on cell #1, and cut off the
charging current. This happened because the cells were not balanced.
4. Steve recommended a top-balance, which was done, taking over a day at a charge rate of 10 amps.
After the pack was reassembled, the cell delta was around two millivolts (much better). The battery
successfully discharged down to its cutoff limit, and charged back up to 100% with no issue.
This, dear reader, is why you top balance. Don’t trust voltages when working with LiFePO4 batteries. When
it comes to vendors, the rule is: Trust, but verify . Verify by top-balancing.
Figure C.7: LiFePO4 battery discharge curves are extremely flat
If anyone needs or wants the figures and illustrations just ask and I'll capture and post them.
You can also download the whole manual from Overkill Solar.
The moral of the story is, TOP BALANCE YOUR CELLS BEFORE ASSEMBLING THEM INTO A BATTERY.
I might be wrong (I often am), but in my mine the end result should be similar if top balancing first or just hooking up a battery w/o top balancing and letting an active balancer do it's job. But yes, that "end" result could take quite a long time if the batteries are initially at a significantly different SOC, especially in a higher Ah pack with many cells.
Right or wrong, I agree initial top balancing makes the most sense. The downside is having to purchase a regulated power supply (assuming most folks don't have one kicking around). All these "it's just another $50-$100" items add up pretty quick. But if a $80 investment means potentially getting 40% more output from a $2500 battery, I suppose that's money well spent... Or possibly wait weeks for an active balancing BMS to earn its keep.
Just in case people have not had benefit of viewing Steve at Overkill's battery building manual...
Appendix C: About Cell Balancing
In Section Section 2.3 , we asserted that each battery cell must be top-balanced separately, before assembling
the battery pack.
Here, we will prove why.
Q: But Steve, doesn’t the BMS have a built-in balancer?
A: Yes, the BMS has a built-in balancing function. HOWEVER no, it is not capable of doing an initial balance
on new cells.
The balancer works by connecting a tiny bleed resistor (see Figure C.1 below) to the cells with the highest
voltage, and the excess energy in those cells turns into waste heat. This is a slow process. The intention is that
the BMS can maintain the balance on the cells as they slowly drift over their lifetime.
A batch of new cells needs to be top-balanced before they can be expected to charge properly as a battery
pack.
Q: Why?
A: Because of the nature of the LiFePO4 voltage curve. At the top end of a charge cycle, the cell voltage spikes
quickly, and charging must be stopped to prevent damage to the cells. If one cell is at a higher state of charge,
(in terms of amp-hours or coulombs), even by a small amount, it will spike while the other cells are still in the
"bulk" phase of their charge cycle (See Figure C.1 below). On the linked graph, the red line is the highest
cell, which triggers a "cell overvoltage" alarm before the pink/green cells get to a full charge. The BMS must
then disconnect to protect the high cell, and the battery pack will be at a lower voltage than expected. You
want all the cells to spike up at the same time, and the only way this can happen is for them to be well
balanced.
Q: OK, so how would one go about top-balancing their cells?
A: There are several ways to manually balance cells, depending on what equipment you have access to:
The best way in my opinion, is to use a regulated power supply to charge the cells to 3.65 volts each. The cells
would be connected in parallel as a single cell and charged together (without the BMS), then re-assembled
into the series-connected pack with the BMS. Will Prowse demonstrates in this video:
Cheapest way: Connect a load to the high cell in your pack to quickly bleed off the excess energy. I tried this
method using a random car light bulb with some alligator clips on the leads. (see Figure C.3 below) You need
to watch the cell voltages closely because it’s easy to go too far.
What does NOT work is the old recommendation of connecting your new cells in parallel and letting them
passively equalize for hours or days. This does not work because of the flat charge curve. They are at almost
the same voltage even if they are far apart in state-of-charge. Basically the cells don't know that they aren't
balanced unless you can push them into the very top end of the charge cycle.
Q: What about cell matching?
A: Cells have a certain internal resistance. Grade-A cells are tested at the factory to confirm that their internal
resistance is acceptable, usually <1 milliohm. If your battery pack is made of grade-B cells or cells of different
ages or if they have been damaged before, then they are not matched. Mismatched cells will quickly become
unbalanced when the pack is cycled. This is one reason why you should pay for good grade-A cells.
I bought 4 of the very cheapest low grade garbage cells from Aliexpress (See Figure C.4 below), just for
experimenting. I balanced them several times, but after even 1 cycle of charging and discharging, they are way
out of balance. This is because they are not matched at all. Some cells have a high internal resistance, so they
get hotter than the better cells, and this puts them at a lower state of charge. If you are trying to use crappy
cells like this, you will only be able to charge them up to ~80% to avoid constant cell over-voltages. This might
be good for a big cheap solar storage bank, but it can cause big problems for a pack that you cycle daily, or
use with large loads.
Q: I’m still not convinced.
A: Here’s a real-world scenario that happened. A vendor in China that won’t be named shipped four 280Ah
LiFePO4 cells to a customer in Florida. This vendor was nice enough to email a video of the battery voltages
being measured before they were shipped. Here were the voltages, screen-captured :
● Cell 1: 3.3298V
● Cell 2: 3.2999V
● Cell 3: 3.3281V
● Cell 4: 3.3269V
Measuring Cells Like This Doesn’t Mean Much
From this info, we can work out that the cell delta is 29.9 millivolts. No need to top-balance these cells, right?
They’re almost identical, right? The customer figured as much, because he didn’t top-balance them. He was
in a hurry. Here was the output from the BMS iPhone app during the initial bring-up of the pack, after less
than 1/2 hour of charging::
Figure C.6: The effects of a badly-balanced cell
Steve’s advice to the customer, thinking that these might be crappy cells, was to top-balance the batteries.
The customer did so, and reported that three of the cells took approximately 7.5Ah, but cell #2 charged for
over a day, and when it was finished took a total of around 140 Ah. With that, we can work out a timeline of
what happened:
1. The supplier from China shipped three of the batteries at 90% charge, and one battery at 50% charge.
This should never happen. But it happened.
2. The supplier’s reassuring video of the cell voltages didn’t mean anything. Recall that LiFePO4 battery
discharge curves are extremely flat. This means that the capacity can vary wildly, but the voltage
won’t change much. We can actually see in the measurements from the vendor that the delta was 30
millivolts. Consulting the discharge curve for the battery above, a 30 millivolt delta (which we saw in
cell #2) can mean as much as a 40% state of charge difference.
3. During the battery pack bring-up, the cell overvoltage protection kicked in on cell #1, and cut off the
charging current. This happened because the cells were not balanced.
4. Steve recommended a top-balance, which was done, taking over a day at a charge rate of 10 amps.
After the pack was reassembled, the cell delta was around two millivolts (much better). The battery
successfully discharged down to its cutoff limit, and charged back up to 100% with no issue.
This, dear reader, is why you top balance. Don’t trust voltages when working with LiFePO4 batteries. When
it comes to vendors, the rule is: Trust, but verify . Verify by top-balancing.
Figure C.7: LiFePO4 battery discharge curves are extremely flat
If anyone needs or wants the figures and illustrations just ask and I'll capture and post them.
You can also download the whole manual from Overkill Solar.
The moral of the story is, TOP BALANCE YOUR CELLS BEFORE ASSEMBLING THEM INTO A BATTERY.
Or you could just get a BMS that tapers charge current to match balancing capacity when one cell reaches balancing voltage.
The only disadvantage of not top balancing is loss of capacity. With a decent BMS you will gain 1% capacity/day. If your cells have a 30% delta in SOC, that is a month to full. If you want it faster, without dismantling the pack you can individually charge the cell(s) that are preventing you getting your desired capacity.
The real moral of this story is it is false economy to buy a cheap BMS. This story will unfold on this forum in the next few years.
Hedges
I See Electromagnetic Fields!
- Joined
- Mar 28, 2020
- Messages
- 21,553
Or you could just get a BMS that tapers charge current to match balancing capacity when one cell reaches balancing voltage.
Well, BMS itself can't to that. It can only measure current & voltage, and request current & voltage.
This would require charge controller to communicate with BMS and perform that function.
Otherwise, charge controller set to a fixed voltage above knee of the curve and below maximum. So long as cells aren't too far apart, this would slow charging and allow balancing to occur.
Horsefly
Solar Wizard
Well, to anyone who bought an Orion, REC, Batrium, or TAO BMS... Almost anything else is pretty inexpensive, and might be even "cheap".Tell us why Overkill bms is “cheap”.
")
MisterSandals
Participation Medalist
The primary BMS overcharge setting is at the cell level. For that, 3.65V is the standard safety number.What about BMS's overcharge setting, does it matter it is 14.08v or 14.60v?
Abruptly cutting off charging at 14.08V (3.52Vpc) is too low for a BMS.
And most importantly, you should control your charging with your charge controller, which is why its called a charge controller.
Hedges
I See Electromagnetic Fields!
- Joined
- Mar 28, 2020
- Messages
- 21,553
I am going to charge the 4s battery to a maximum of 14.08V to maximize cycle life. Is it worth making 3.52v or 3.6v as the top balance?
What about BMS's overcharge setting, does it matter it is 14.08v or 14.60v?
You want to top balance once to a higher voltage. 3.65V is reasonable.
You want SCC to stop charging at a voltage below where BMS disconnects, and below what causes any cell to run up too high.
Maybe 3.6V per cell?
With SCC set to 14.08V, average 3.52 per cell.
Charging comes through the victron dc/dc converter where the set 14.08v.
But what about that top balance does it really matter if it's made of 3.52v or 3.6v?
If you top-balance to 3.52, then charge to (average) 3.52, i.e. 14.08V, some cells will diverge and run.
Thanks for the answers Mr.Sandals and Hedges. So I make top Balance 3.65v, I set typical bms settings like 14.6v overcharge disconnect, but I charge the package with 14.08v.
You will figure it out eventually, but the lower your charge voltage, the more likely you are to charge with lower current when your battery gets nearly full. That isn't a bad thing, it does give the cells a chance to get saturated more, but if you have a limited amount of daylight hours (assuming solar charging) you can run into problems. The closer your battery voltage and charge voltage is, the lower the current.
For now, I only charge with the boat's outboard motor and shore power, later I may connect solar power.You will figure it out eventually, but the lower your charge voltage, the more likely you are to charge with lower current when your battery gets nearly full. That isn't a bad thing, it does give the cells a chance to get saturated more, but if you have a limited amount of daylight hours (assuming solar charging) you can run into problems. The closer your battery voltage and charge voltage is, the lower the current.
Yes. Although if you like 14.4-14.5 is fine to tighten it up a bit but leave some headroom.Thanks for the answers Mr.Sandals and Hedges. So I make top Balance 3.65v, I set typical bms settings like 14.6v overcharge disconnect, but I charge the package with 14.08v.
MisterSandals
Participation Medalist
Good question, both are theoretically 100% SoC. But 3.6V is more topper than 3.52V... Maybe you can teach us something new.But what about that top balance does it really matter if it's made of 3.52v or 3.6v?
42OhmsPA
What's in a title?
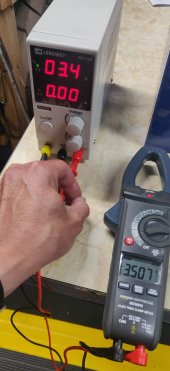
Remember. Always verify your power supply voltage.
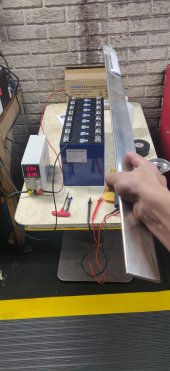
So I have 16 more of these to balance up... Talk me out of laying my buss bar material across the studs with all 16 in parallel and charging them up. I'd put some weight on top of each section of aluminum for good contact.
... As I was typing, I'm thinking my buss bar stock is going to be to thick and a pain to assemble everything in pack form
Attachments
curiouscarbon
Science Penguin
- Joined
- Jun 29, 2020
- Messages
- 3,018
might work, don’t bump it ? not sure the contact will be consistent from cell to cellRemember. Always verify your power supply voltage.
So I have 16 more of these to balance up... Talk me out of laying my buss bar material across the studs with all 16 in parallel and charging them up. I'd put some weight on top of each section of aluminum for good contact.
... As I was typing, I'm thinking my buss bar stock is going to be to thick and a pain to assemble everything in pack form
connecting them all in series with BMS and then charging at a higher voltage is my favored way.
then, if any cell goes out of wack, the BMS will just disconnect and save the cells from damage.
after the pack is fully charged, individually top off any cells that are behind
food for thought
good luck with the buildA proper connection requires some clamping force. If the bar stock is just laying on the terminal, that's not a good connection.
FilterGuy
Solar Engineering Consultant - EG4 and Consumers
For reasonably low-current top balancing, the connection between the bar stock and the pads is not critical. It only needs to be good enough to take on the current you are top balancing with. If one of the connections is slightly higher resistance than the others that cell will charge slower, but as the others reach full charge they will stop taking current. Eventually, the cell with the higher resistance will get full and as the current drops toward zero, the voltage across the resistive connection will drop toward zero as well. When they all stop taking current, they will all be at the same voltage.
Having said that, I would never do what is being suggested. Murphy is alive and well and I am confident he would cause me, my wife, or maybe even a stray cat to bump the bar stock and cause a short.
Having said that, I would never do what is being suggested. Murphy is alive and well and I am confident he would cause me, my wife, or maybe even a stray cat to bump the bar stock and cause a short.
Similar threads
- Replies
- 34
- Views
- 1K
- Replies
- 4
- Views
- 799
- Replies
- 1
- Views
- 609
- Replies
- 258
- Views
- 16K