diy solar

diy solar

Solar house generator I started DIY back in 2000 - My path from Trace to Xantrex (on FLA battery) to XW Pro inverters on Tesla Model S batteries

continuing improvement on Array 4 with This Old House saga

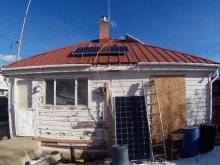
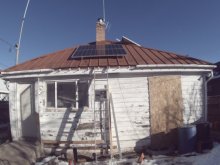
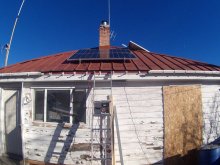
Temporary position for these 2 panels on the wall for the winter. They will go up on the western roof next spring. For now, needed them high enough so they wouldn't be covered by snow (if and when we get some - we are in extreme drought conditions at the moment).
This was taken at 4PM MST and you can see how the fence has shadowed them, effectively turning them off for the night.

But at 12:30 PM (highest generation period) these two panels, while in full sun, reached 580watts of output. 2 - 355w panels

Tied, for now, into the new array 4 combiner
Peak production for the entire system touched 4.7kw near 1PM
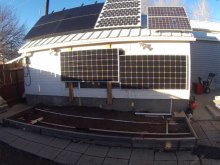
winter  position on south wall.JPG

Setup to add new pigtails to another module tomorrow morning - only have a couple of hours a day before going to work online

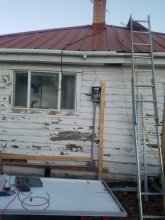
Notice the horizontal then vertical conduit that goes from the crawl space to the combiner box on the wall.
On the other size of that wall is a staircase going to the basement, and I had been worried the conduit wouldn't fit before the top most stair, but I had a good 4 inches of space to install it.

(It will be great to get that wall covered with new siding)
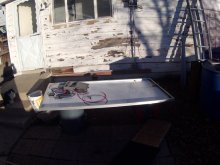
adding pigtails to module and combiner box.JPG

Here is the combiner/disconnect box. Placed high on the wall because a deck will be built adding height to the floor, to the box will be at normal height once that deck is built

More 2x4s coming to be added on top of this wall along with 1.5" insulation. Then the conduit will be covered with siding

To the right of the combiner box I will also place, temporarily, 2 panels facing west for array 4.
These 4 plus the 2 on the roof will bring the panel count total to 6, which is also the number of panels on array 2 and 3 as well.
When that is done, total power will be in the 5.7wk range @ 24 volts

Both arrays 2 and 3 face south, while this array 4 will have the 2 facing south and 4 facing west

Also news, I ordered my 5th Tesla Model S battery today which will bring me up to 25kwh of battery storage
and hopefully reduce those early morning "grid connection" events as the battery SoC declines.
Later, battery 6 will be acquired as well
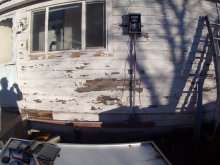
array 4 combiner box.JPG
 
Last edited:
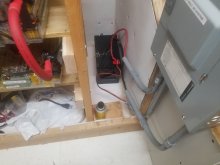
Put up enough panels and you won't need to paint the siding, because it won't be visible.

Like the B&W cat, BTW!


"Also news, I ordered my 5th Tesla Model S battery today which will bring me up to 25kwh of battery storage"

5 teslas burning.jpg

A 5-alarm fire?
 
Put up enough panels and you won't need to paint the siding, because it won't be visible.

Like the B&W cat, BTW!


"Also news, I ordered my 5th Tesla Model S battery today which will bring me up to 25kwh of battery storage"

View attachment 29156

A 5-alarm fire?

ROFLOL

isn't that what failing painted walls are good for? what's a couple more screw holes?

and I didn't notice the cat, good eye - she loves me when I sit on the steps to rest, as she meows loudly for "rubs and scratches"
neighbor's cat, but likes us better - we have a fence protected backyard and no dogs can get in

I also do not run my teslas stacked on their roof - at least that is what was spelled out in the marketing pamphlet
 
Last edited:
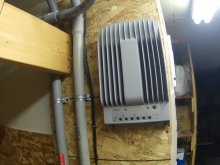
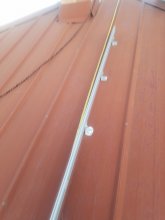
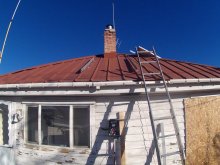
Got 1 panel rail screwed into joists on the west roof

one more rail to mount to the left, then install the 2 panels - well after I get some pigtails installed

20201205_163225.jpg

got that one up just as the sun set behind the Mt Timp to the west, around 4:30

Also started positioning 2x4s on the wall

20201205_163312.jpg

20201205_163450.jpg

only 22.5 kwhs today because I forgot to turn the water heater division breaker on, so with the diversion on, I can generate another 5 kwhrs
 
Standing seam metal roof, but you're putting screws through it instead of clamping on to the standing seams?

1607229585909.png
 
More images of solar on "This Old House" of mine - front part built in 1930. Rear addition built in 1947
40' wide and 100' deep lot. Trying to maximize the space that I have.
Two days ago, in this abnormal clear and sunny weather, I generated 27.86 kwhrs, including the water heating diversion load, once the batteries filled up. Yesterday I forgot to turn the water heating breaker on, and I produced 22.6 kwhrs
27.86 is the highest production I have every had including summer time. Indicates more panels online have helped

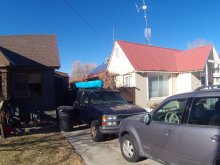
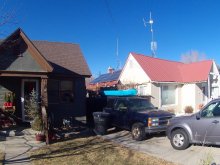
Pictures looking WNW from the front of the house, showing how little of Arrays 2 and 3 are visible to the street.

Also shows some of the final siding appearance that the back will look like when complete.

Thirdly, that east facing roof where I want to eventually place 4 more 310w panels to capture morning sun.
This roof is steeper than the southern one.

Array 3 and 4 from front of house A.JPG

A couple more steps to the south

Array 3 and 4 from front of house B.JPG
 
Last edited:
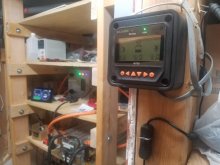
Wow! I really enjoyed reading your story.
You’ve inspired me to do something similar. Please let me know if you ever decide to sell your Trace SW4024 inverter and I’ll give you my contact info as I’m interested in buying another one.

I currently have one and could use another as either a back-up or to combine them for 240 volt.

Thanks for sharing your story. It was very helpful and informative.
 
HURRAH shortest day of the year has come and is leaving!

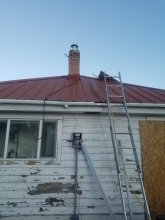
last panel for the year installed today and producing watts

P1000002.JPG

BTW that chimney is more fragile than I thought, most of the mortar is becoming just sand - Next spring it is coming down


More of "This Old House" on solar continues......

P1000003.JPG


and battery #5 being installed - upgrades from 20kwh of storage to 25kwh. On the way to 100kwh, eventually


tesla number 5.JPG

To the right in the last pic, you can see the last of my Lead Acid batteries, used in my 12v HAM solar system (completely separate from the whole house system). Those T-105s are on their LAST legs, resting voltage of 12.2 volts at night after accepts many amps of charge during daylight hours. The goal is to replace them with a 190ahr LiFePo battery. Soon, very soon. Yep, soon
 
Last edited:
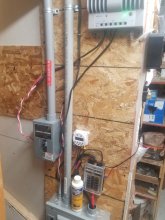
Looks like fuse per cell in battery packs.
What chemistry? Any fire issues, in which case what do you do about the possibility?
 
Looks like fuse per cell in battery packs.
What chemistry? Any fire issues, in which case what do you do about the possibility?
yes there is a fuse per cell

Yes there is a possibility of fire if they are operated OUTSIDE of their parameters (thermal: too cold, too hot, voltage: overcharge and the like)
but these batteries are protected by the Jack Rickard (may he rest in peace) Tesla Battery monitor and protector, which utilizes the standard Tesla BMS controllers on each module. Jack and team reversed engineered the HW and comm protocols that control these batteries. He believed that Tesla knows how to implement a great BMS, so used it, with a custom upper layer controller


I covered these issues and what I am using to protect the system, in earlier posts

info from EVTV.ME where I bought my "protector"


Battery Chemistry: Lithium Nickel Cobalt Aluminum Oxide (NCA) LiNiCoAlO2 cathode with carbon/silicon anode.
 
Last edited:
Run like hell!
lol

most definitely if not properly protected, for sure
examples of individuals who utilized standard chargers and rely on manual processes to protect the batteries has existed (possibly no longer) - and manual processes fail - then bad things happen.

I don't go any where near those edges
 
Last edited:
kept checking voltage on the main pack and on the new battery until the mains declined to 22.5v (which was the voltage of the new one) and then I flipped the INVERTER bypass switch and disconnected the inverter from the house. Then proceeded to swap in the new one into the pack and it fit perfectly at 22.5v.

All's good
 
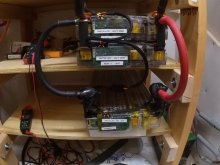
Number 5 battery installed and storing power - the bottom single module

P1000005.JPG

In the above picture there is the control cable, capable of plugging into 2 battery modules. Since I have an odd number (5) this 2 plug cable only uses 1 of the plugs. The last one contains a terminating loopback connector. The buss is an "out" and "back" wire and requires the loopback terminator

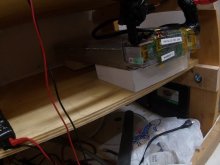
Below is again the number 5 battery. In order to give it some height, I used two old computer books as blocks to raise it up
When I get number 6 battery I will take out the books, and place number 6 on top of number 5

P1000006.JPG

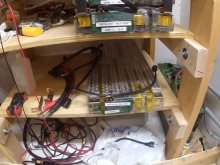
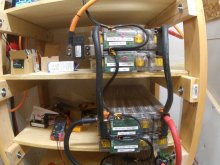
Below are my first 4 modules. They are using a 4 module cable to plug into the green BMS boards, that also has an extension plug. That extension plug allows the 2 module cable to be plugged into the first cable. That allows for 5 modules (like I have now) or 6 modules (in the future) to be controlled

P1000004.JPG

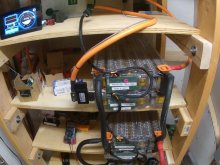
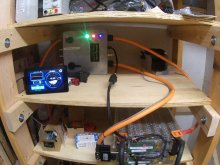
looking down on the top 2 modules, the orange NEG and POS connecting cables, that go to the Battery controller (in silver)
Also seen again is the Raspberry Pi gauge device

P1000003.JPG

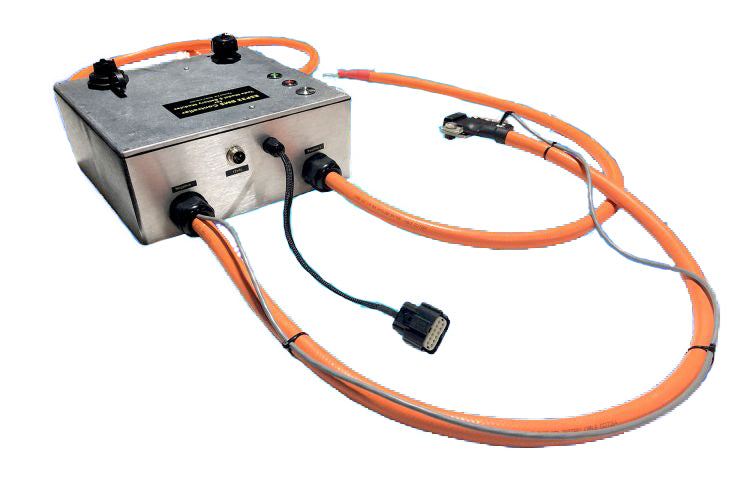
And here is the ESP32 battery controller board

Blue POWER light, turns on upon power up sequence beginning
8 seconds after power on then:
Red NEGATIVE CONTACTOR engaged
8 more seconds then
Green POSITIVE CONTACTOR engaged


P1000002.JPG

Below is a 4 modules buss cable. No extension. This cable is placed on the last 4 modules on the buss
I took this one off and put on the extension 4 modules cable + the 2 module cable

P1000007.JPG

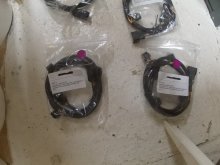
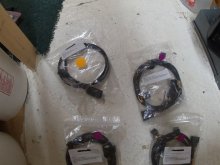
Lower row and right most top row of cables, each allowing for 4 modules per cable.
I have a total of 4 of these, plus the termination 4 module cable
5 times 4, can provide for 20 modules.


P1000008.JPG

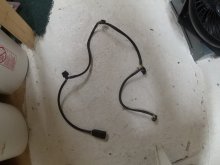
left cable is a simple 4 ft extension in case I have to place the controller further away from the battery pack

P1000009.JPG
 
Last edited:
Thank you for this excellent thread Dougbert, I have 8 of the Battleborns in my RV and just picked up 4 Tesla modules (with more to come) that I'm planning on putting into my RV or into an off grid place I'm building just outside of Las Vegas (in Arizona). I've been debating which BMS to use for the Tesla's and your post have helped explain a lot. The thing that appeals to me the most is the way we can add new modules so easily, worth the price right there.

(RIP Jack, you're dearly missed)

73
Jen
KB6JEN/VE7OTH
good for you!

dougbert
w1dug
 
In the event some had not seen the origination of the Rasberry GUI that Jack is now selling, it was originally designed by a Congressman who Jack joked in one of his videos that he sucked up to for the source code (although I'm sure Jack licensed it etc..) and improved (go to the 3:40 mark in this video)

Anywhooodles, here is the 4 part series that the congressman did, neat to see it's beginnings, (note he used a Tesla car image rather than a battery module on the fuel gauge) and I love the name, "Crash Dash".

Part one:

Part two:

Part three:

Part four:

Jen
 
Thanks Jennifer, looks like you got the bug as well now.....

I also ordered Tesla battery #6 last night from a place in New York
The battery comes from a car which was totaled, but had had its battery replaced under warranty. So this modules is a factory replacement one. He estimates under 50,000 miles on it

I try to get the model year and mileage on each module so I can keep track of their individual life cycles

dougbert

PS Happy New Year all!


The days are getting longer............................
 
Last edited:
Thank you for this excellent thread Dougbert, I have 8 of the Battleborns in my RV and just picked up 4 Tesla modules (with more to come) that I'm planning on putting into my RV or into an off grid place I'm building just outside of Las Vegas (in Arizona). I've been debating which BMS to use for the Tesla's and your post have helped explain a lot. The thing that appeals to me the most is the way we can add new modules so easily, worth the price right there.

(RIP Jack, you're dearly missed)

73
Jen
KB6JEN/VE7OTH


Are you leaning toward the Jack-in-the-Box controller? Love mine

As I get each new battery at $1200, the price of the Jack ESP32 controller gets LOWER per kwh of storage

With my new incoming Battery #6, that will provide me with 30kwh of storage

Buying a Simplify battery 3.8kwh at $2900, I would have to buy 8 Simplifys to equal my 30kwh at a cost of $23,200

With the Tesla controller $3600 and 6 @ $1200 I have put out $10,800 - more than half the cost

With that difference I can get 10 more teslas and have 70kwh of storage for the same price as 8 Simplifys

Don't get me wrong, the lithium batteries on the market are great, but my wallet is not that deep
 
Last edited:
A fast service delivery came today that I didn't expect until next week

I replaced these 10 year old golf cart T105 batteries from my 12v solar system (HAM, backup lights to the backup house system, etc)
They have been great batteries. I used them camping with solar for several years, they sat on the front of our popup trailer. Then I brought them downstairs to run this system for the past, mmm, 6 years. They are very depleted, but were giving their final umph. Resting voltage was 11.2 volts

10 year old batteries for 12v system.jpg

with new AGM

yeah, yeah, I know, but at this moment the old ones were 11.2 volts and they power the aux contactors from the main arrays for the house. I needed a NEW battery now. What I want is a 190ah LiFePo battery but they are some $675. I used that money instead for Tesla battery number #6, which is more important right now

SO $193 for the following

New 100ah AGM battery for 123 system.jpg

Coupled with the EPEVER is showed here as well

New 40a EPEVER controller.JPG

MT50 display/controller for the EPEVER
and below that is the recently added rocker switch for the 12v LED rope string for secondary light source

MT50 display and 12v LED rocker switch.jpg

breakers and fuse box for the 12v circuits

the white controller is a DC timer relay controller. I use that to engage the 4 big DC contactors (one for each array) prior to sunrise and disengage after sunset. Have to adjust the start/stop times a few times through the year

It engages a relay to source 12v from the new battery that becomes the source to engage the contactors and the diversion load system
I use this so that the diversion and contactors are not ON when the sun is down

12v system controls -timer and fuse panel.jpg

Outside are 3 100w panels (each 20+ years old) providing the solar current to run this system
My goal is to also update and replace the old panels with 2 new panels, 200watts each, providing some 25amps of future charging
 
Last edited:
Thanks Jennifer, looks like you got the bug as well now.....
Yup, the trick is to have the bug without burning your house down..lol Some may find the EVTV system expensive and "oh it's all open source" but as someone who works in the software dev field, I can relate to the work they all put into the system and it's a cheap price to pay to be able to sleep at night without sniffing for smoke all night long. At present I'm running 8, 100ah Battle Born lithiums and it's a good feeling knowing that internal BMS is there.
 
Are you leaning toward the Jack-in-the-Box controller? Love mine
Yes, for exactly the reasons you stated, the ability to simply plug in additional modules is priceless... that's a huge plus. How long did you have to wait for the BMS or do they have some built and in stock? After learning of Jack's passing I was waiting a bit to see if they were going to keep the place up and running or shut it down (no more support), nice to see it looks like they're still going strong.
 

diy solar

diy solar
Back
Top