


You are using an out of date browser. It may not display this or other websites correctly.
You should upgrade or use an alternative browser.
You should upgrade or use an alternative browser.
Solar house generator I started DIY back in 2000 - My path from Trace to Xantrex (on FLA battery) to XW Pro inverters on Tesla Model S batteries
- Thread starter dougbert
- Start date
dougbert
Solar Addict
priorities joe, needed to swap the batteries and modernize my storage plant
Battery Info
bought the Teslas from ebay: Search Tesla Model S battery module
Cost was $1000 (several sellers, I keep watching until I found a good price)
shipping $150
Utah tax $64
Tesla attributes:
22.1 v nominal
55 lbs
250 amph
5 kwh
the L16 Lead Acid cell attributes:
2v nominal
112 lbs
1100 amph
2.2 kwh
$417 new today
dougbert
Solar Addict
We have a storm coming through today and tomorrow, not much sun
One thing this morning is the different feelings/thoughts I have now as I watch the SoC meter for the Teslas approaching 50%.
I never drew my LA battery down that low before. I am preparing to watch the Teslas go down to 10% before the grid
kicks in and fully charges it back up
Gotta love these Tesla batteries
dougbert
dougbert
Solar Addict
Since last night I have been checking all things concerning this install because it is change that can bit you
I found 1 major issue, which was a loose connection that was very hot 175C, negative lead. Had a nut that was loose.
Infant mortality is something to always watch for.
I found 1 major issue, which was a loose connection that was very hot 175C, negative lead. Had a nut that was loose.
Infant mortality is something to always watch for.
dougbert
Solar Addict
UPDATED PLAN OF RECORD (POR)
Phase 1 Tasks: (COMPLETE)
Phase 1 Tasks: (COMPLETE)
- Array #1: I adjusted 2 of the 3 rails of panels to the same plane as the 3rd one as it has shorter legs, so now I get rid of the that pesky shadow of column 2 over column 3 (DONE)
- Also, since I have the new Conext SCC on array #1 now ($515), I spent some time on the dry roof turning array #1 into a 48v array from the old 24v setup. Instead of 6 circuits to the 12 panels, I now have 3, with 3 spare circuits just laying in the harness for now. I will unwind them later and use 2 of the circuits for the remaining 4 panels. (DONE)
- Have Conext SCP ($215) installed but not powered - have to wait for inverter to be installed (DONE)
- Conext Number 2 SCC ($507) is in flight to be delivered sometime next week, then will install it. Once installed, then I will a have far better way to harvest ALL solar generation data in a precise manner. (DONE)
- Conext Gateway ($435) is installed and working. Can monitor the power plant at my desk at home or at work. Well the generation portion that is. (DONE)
- Bought 2 more new 310w solar panels for array #1 ($450) (DONE)
- Refactor wiring on Array 1, cleaner and more code compliant (DONE)
- Refactor Ground Protection system from old implementation to the Conext Charge Controller implementation (DONE)
- Current around 1400+ watts in Array 1 and in Array 2, total around 2800 watts
- Run wire from combiner box (already installed) to input breaker ($60) DONE
- Buy and Install new Array 3's Charge Controller - wire it up ($500) BOUGHT
- Buy and install mounting hardware (rails, stands, etc - about $600) to support 10 panels
- Buy two panels to begin with, then 2 more ($900) 4 panels will give 1200 watts
- Misc parts for battery stack ($900) DONE
- Save money for Jack Rickard's "Jack in a Box" battery controller $(2600) DONE
- and save more $$ again to get 2 Tesla batteries ($2440) - Price is coming down for these DONE
- build the rack for holding 6 to 10 pairs of Tesla batteries - for the future additions ($100) DONE
- run them in 24v configuration using existing inverter DONE
- got 3rd battery $1220 DONE
- sold the 12 LA cells for $1200 enough to buy 4th Tesla DONE
- order 4th battery
- Rewire solar array 2 to 48v (can do this prior to ordering inverter)
- Buy 15kw inverter (Segineer) From Jack Rickard's EVTV store $3300
- rewire battery for 48v
- reprogram charge controllers
- grow to 9.3 kw of panels - 3 arrays of 3.1kw each - 10 panels per array
- grow to 60kwh and more of storage with 6 pairs of Tesla batteries - $2000 per 10kwh of batteries (2 batteries)
- Array 4 maybe
Last edited:
dougbert
Solar Addict
I have been adjusting charging parameters
There are 5 devices that require adjustments:

Using the naming of my inverter, I previously used Float mode, where once a day the inverter would sync with the grid perform a final charge on the battery. With the Tesla's I am now using Low Battery Voltage transfer (LBX) where when the battery voltage reaches specific value, the inverter switches from inverting to Grid connected, running the loads from the Grid AND charging the battery
I have set LBX to be 19.2 volts
In addition there is a Low Battery Cut In (LBCIN) value (set to 24.4v) when the battery charging stops, and the Grid drops, then the
inverter returns to inverting from the battery
My batteries were are 100% and dropped to 35% when it reached LBX and took 15 hours to do so.
Recharging back to 90% took 4 hours with 1.9kw to 2.5kw feeding the battery. It took 17kwh to recharge to 90%, where I set as my max
Only generated 4.4 kwh by solar today due to heavy clouds, smoke from the utah fires and dust caused by the winds of a cold front
There are 5 devices that require adjustments:
- ESP32 Battery Controller
- Trace SW4024 Inverter
- Array 1 Charge controller
- Array 2 Charge controller
- Array 1 AUX Control line

Using the naming of my inverter, I previously used Float mode, where once a day the inverter would sync with the grid perform a final charge on the battery. With the Tesla's I am now using Low Battery Voltage transfer (LBX) where when the battery voltage reaches specific value, the inverter switches from inverting to Grid connected, running the loads from the Grid AND charging the battery
I have set LBX to be 19.2 volts
In addition there is a Low Battery Cut In (LBCIN) value (set to 24.4v) when the battery charging stops, and the Grid drops, then the
inverter returns to inverting from the battery
My batteries were are 100% and dropped to 35% when it reached LBX and took 15 hours to do so.
Recharging back to 90% took 4 hours with 1.9kw to 2.5kw feeding the battery. It took 17kwh to recharge to 90%, where I set as my max
Only generated 4.4 kwh by solar today due to heavy clouds, smoke from the utah fires and dust caused by the winds of a cold front
Last edited:
dougbert
Solar Addict
Really good day, with 18.1 kwh generated, and we did NOT connect to the grid. Reached 92% battery full before sun was down enough to reduce production

had some clouds around noon to one PM, but great production.
4th tesla battery is enroute.
and I need more generation
dougbert
had some clouds around noon to one PM, but great production.
4th tesla battery is enroute.
and I need more generation
dougbert
dougbert
Solar Addict
This post is a technical discussion of charging patterns of a Lead Acid battery (what I just removed) and the Tesla battery packs. So if it doesn't make sense, that is okay.
If you wish to read on, be forewarned
I swapped batteries last weekend, and have been tweaking charging parameters of the 3 types of devices that monitor and charge the Tesla
I have found the voltage and current over several days interesting to read and ponder
The following is the daily charging of the old Lead Acid battery pack

Along the bottom is the time of day from 12AM to Midnite
The Green line is the amount of Current (electrons) flowing FROM the solar panels. This current flows into the batteries AND into loads of the house after being converted from DC to AC
The Blue line is the Voltage of the battery.
If you notice the "Square peak" of the blue line, that is the daily top off charge from the grid to the battery (BULK/ABSORPTION Phases) followed by a constant FLOAT charge on the most right
On the left of the chart is the blue line going up and down which represents various loads going ON and OFF during the morning hours (Frig, Freezer, water pump, etc)
Then as the sun comes up the green line starts to rise as the sun rises and moves toward over head until a maximum time of 12 noon to 1PM
The ups and downs of the green and blue lines are clouds coming over and shading the solar panels
On this day I generated (produced) 15kwh of energy and bought 10kwh for a total of 25kwh consumed by the house that day
Less clouds, more generation. The day before I had less clouds and produced 18kwh and bought 6kwh for a total of 24kwh that day
Now here are 4 days this past week with the Tesla batteries (dates at the top of the charts)

I have changed the mode of operation with these. Instead of daily charging of the battery, I use what is called Low Battery Transfer or Battery Priority mode, where the grid is ONLY connected to when the battery reaches a low voltage of 18.8v. When that occurs, the grid is connected to, loads from the house are powered by the grid and the grid powers a battery charger to charge the battery. Any solar produced also helps power the house and charge the battery. When the grid connects is solely based on when the battery reaches the low trigger point
(NOTE: The goal is to increase the battery storage - more Tesla batteries - and add solar panels, to the extent that the grid does NOT re-connect, thus become self sufficient in solar electric generation)
During the above day the grid was not used at all, rather the house was totally powered by the battery and the solar panels
Notice the early morning falling of the blue Voltage line until 8AM when the sun started to charge the system. Voltage increased until 4PM to 5:30PM and then dropped
Current rises in a nice bell shaped curve, again peaking between 12noon and 1pm
These tesla batteries do not go up and down like the Lead Acid ones - they seem more stable
This day's generation was 18.2kwhs and 1kwh bought from the grid (Electrical range is not on the solar battery - straight from the grid)
Here is the next day

In this picture, the batteries are low at 6AM and trigger a grid recharge again
Again at 8AM the sun starts to generate current
The Grid finishes just after 9:15AM and the solar panels continue to charge the system
A couple of clouds cross over, noted by the drops of current
This day's generation was 17kwh and 14kwh bought from the grid
Next day The 4th

No grid this day at all
Some clouds around 11AM
Nice bell shaped curves for both voltage and current
This day's generation was 18.8kwh produced, NO GRID at all
And today's shot

Grid came on shortly after 5AM and lasted until nearly 9AM
Then around 12noon, the battery reaches FULL and the voltage remains constant until after 5PM, with currently going up and down due to again various loads coming on and off (Frig, freezer, microwave, toaster, etc)
Today's generation, around 13.4kwh
From this data, with daily sunny skies, the batteries are being grid re-charged every other day, more or less. When the 4th tesla battery is added, that will change the grid re-charge cycle rate.
so that's it for what it is worth to any who got this far and are interested in the charging dynamics.
Bottom line for me: These Teslas are very worth the effort and the cheapest Lithium batteries per kwh of storage out there
BUT you need to research and learn and do come cutting edge of DIYer solutions
dougbert
If you wish to read on, be forewarned
I swapped batteries last weekend, and have been tweaking charging parameters of the 3 types of devices that monitor and charge the Tesla
I have found the voltage and current over several days interesting to read and ponder
The following is the daily charging of the old Lead Acid battery pack
Along the bottom is the time of day from 12AM to Midnite
The Green line is the amount of Current (electrons) flowing FROM the solar panels. This current flows into the batteries AND into loads of the house after being converted from DC to AC
The Blue line is the Voltage of the battery.
If you notice the "Square peak" of the blue line, that is the daily top off charge from the grid to the battery (BULK/ABSORPTION Phases) followed by a constant FLOAT charge on the most right
On the left of the chart is the blue line going up and down which represents various loads going ON and OFF during the morning hours (Frig, Freezer, water pump, etc)
Then as the sun comes up the green line starts to rise as the sun rises and moves toward over head until a maximum time of 12 noon to 1PM
The ups and downs of the green and blue lines are clouds coming over and shading the solar panels
On this day I generated (produced) 15kwh of energy and bought 10kwh for a total of 25kwh consumed by the house that day
Less clouds, more generation. The day before I had less clouds and produced 18kwh and bought 6kwh for a total of 24kwh that day
Now here are 4 days this past week with the Tesla batteries (dates at the top of the charts)
I have changed the mode of operation with these. Instead of daily charging of the battery, I use what is called Low Battery Transfer or Battery Priority mode, where the grid is ONLY connected to when the battery reaches a low voltage of 18.8v. When that occurs, the grid is connected to, loads from the house are powered by the grid and the grid powers a battery charger to charge the battery. Any solar produced also helps power the house and charge the battery. When the grid connects is solely based on when the battery reaches the low trigger point
(NOTE: The goal is to increase the battery storage - more Tesla batteries - and add solar panels, to the extent that the grid does NOT re-connect, thus become self sufficient in solar electric generation)
During the above day the grid was not used at all, rather the house was totally powered by the battery and the solar panels
Notice the early morning falling of the blue Voltage line until 8AM when the sun started to charge the system. Voltage increased until 4PM to 5:30PM and then dropped
Current rises in a nice bell shaped curve, again peaking between 12noon and 1pm
These tesla batteries do not go up and down like the Lead Acid ones - they seem more stable
This day's generation was 18.2kwhs and 1kwh bought from the grid (Electrical range is not on the solar battery - straight from the grid)
Here is the next day
In this picture, the batteries are low at 6AM and trigger a grid recharge again
Again at 8AM the sun starts to generate current
The Grid finishes just after 9:15AM and the solar panels continue to charge the system
A couple of clouds cross over, noted by the drops of current
This day's generation was 17kwh and 14kwh bought from the grid
Next day The 4th
No grid this day at all
Some clouds around 11AM
Nice bell shaped curves for both voltage and current
This day's generation was 18.8kwh produced, NO GRID at all
And today's shot
Grid came on shortly after 5AM and lasted until nearly 9AM
Then around 12noon, the battery reaches FULL and the voltage remains constant until after 5PM, with currently going up and down due to again various loads coming on and off (Frig, freezer, microwave, toaster, etc)
Today's generation, around 13.4kwh
From this data, with daily sunny skies, the batteries are being grid re-charged every other day, more or less. When the 4th tesla battery is added, that will change the grid re-charge cycle rate.
so that's it for what it is worth to any who got this far and are interested in the charging dynamics.
Bottom line for me: These Teslas are very worth the effort and the cheapest Lithium batteries per kwh of storage out there
BUT you need to research and learn and do come cutting edge of DIYer solutions
dougbert
dougbert
Solar Addict
I did do the following cost comparison to SimpliPhi batteries and my Teslas
Battery controller from Rickard cost me $3500, including assembly parts
then
1 Tesla battery $1200
5kwh each
24volts, I need 2 batteries for each iteration of growth
Above I mapped out the cost of battery storage from 5 to 50 kwh, factoring in the cost of batteries and the controllers.
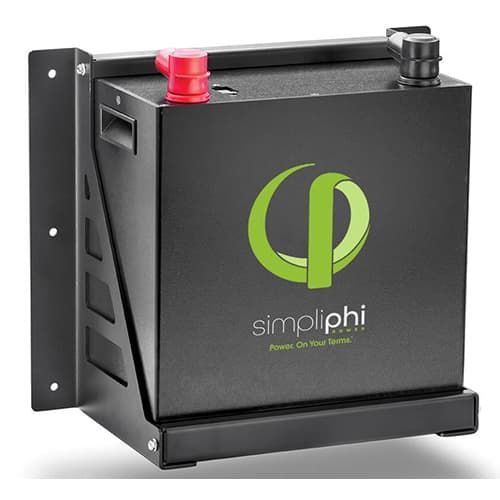
I don't know the cost of Fortress batteries (I would like to see them if you can provide it), but I have looked at Simpliphi batteries.
Simpliphi batteries come with 3.8kwh capacity and current cost is $2800 from invertersupply.com
They come 48v so acquiring one at a time is possible
 www.invertersupply.com
The new batteries are great and hope to use some in the future
I am aiming to have 5-7 days of batteries storage without sun (snowy, cloudy days in the winter during a snow storm)
The one question I will have to answer in the future is just how much storage is needed. I will have to live it to find out
dougbert
Battery controller from Rickard cost me $3500, including assembly parts
then
1 Tesla battery $1200
5kwh each
24volts, I need 2 batteries for each iteration of growth
| Item | Cost | Cost per 1 kilowatt-hour | Amount of storage | ||||
| Battery controller | $3500 | 0 | |||||
| 1 battery @$1200 |
| $940 |
| ||||
| 2 batteries@2400 | $5900 | $590 | 10kwh | ||||
| 4 batteroes@4800 | $8300 | $415 | 20kwh | ||||
| 6 batteries@7200 | $10700 | $356 | 30kwh | ||||
| 8 batteries@9600 | $13100 | $327 | 40kwh | ||||
| 10 batteries@12000 | $15500 | $310 | 50kwh |
Above I mapped out the cost of battery storage from 5 to 50 kwh, factoring in the cost of batteries and the controllers.
I don't know the cost of Fortress batteries (I would like to see them if you can provide it), but I have looked at Simpliphi batteries.
Simpliphi batteries come with 3.8kwh capacity and current cost is $2800 from invertersupply.com
They come 48v so acquiring one at a time is possible
SimpliPhi PHI-3.8-24-60 - Inverter Supply
Shop for SimpliPhi PHI-3.8-24-60 at Inverter Supply for best prices online. SimpliPhi PHI-3.8-24-60, SimpliPhi, PHI-3.8-24-60, Battery 3.8kWh LFP (Lithium Iron Phosphate) 24 volt with 80A disco and BMS UL-1973, SimpliPhi Batteries
| Battery count | Cost | Cost per 1 kilowatt-hour | Amount of storage |
| 1 batteries | $2800 | $736 | 3.8kwh |
| 2 batteries | $5600 | $736 | 7.6kwh |
| 3 batteries | $8400 | $736 | 11.4kwh |
| 4 batteries | $11200 | $736 | 15.2kwh |
The new batteries are great and hope to use some in the future
I am aiming to have 5-7 days of batteries storage without sun (snowy, cloudy days in the winter during a snow storm)
The one question I will have to answer in the future is just how much storage is needed. I will have to live it to find out
dougbert
dougbert
Solar Addict
4th Tesla Battery arrived today soooooooooooo.....
I charged it by itself, to get it to match the other 3 batteries
and then connected them all up
I am rating each one at 225 amp-hrs so I have a total of 900 amp-hrs @ 23volts which gives 20.7kwh-hr capacity
with a price of just about $8500 or so. That includes the batteries and the Rickard ESP32 controller from www.evtv.me. Nice.
I can scale to 20 or 22 batteries in the space where the shelves are. 100-110 kwhr
To get about the same storage (20kwh) with SimpliPhi (5 batteries at $2690 each - updated price at different store) as mentioned above would be around $13,450 (from www.solar-electric.com). Yet there is a practical upper limit on how many that can be added
Last edited:
Since I prefer 48v I would go with 4 of these for 20 kwh at around $5000 cost:

 diysolarforum.com
Hopefully I will get mine by the end of summer and can report how it works. I will not be building as big a system as you though, just one battery for now.
Thanks for sharing, I have followed this thread from the start and like the updates.
100 Ah LiFePO4 @ $1250 usd. 48v nominal
Let me start by saying that I have an affliction where I read almost every post on this forum. I then wander down various paths following up on what I find interesting. I recently came across this company on one of my rabbit hole trips and I cannot remember the thread where I found this...
diysolarforum.com
Hopefully I will get mine by the end of summer and can report how it works. I will not be building as big a system as you though, just one battery for now.
Thanks for sharing, I have followed this thread from the start and like the updates.
dougbert
Solar Addict
Since I prefer 48v I would go with 4 of these for 20 kwh at around $5000 cost:
100 Ah LiFePO4 @ $1250 usd. 48v nominal
Let me start by saying that I have an affliction where I read almost every post on this forum. I then wander down various paths following up on what I find interesting. I recently came across this company on one of my rabbit hole trips and I cannot remember the thread where I found this...
Hopefully I will get mine by the end of summer and can report how it works. I will not be building as big a system as you though, just one battery for now.
Thanks for sharing, I have followed this thread from the start and like the updates.
thanks for the read and please offer any insights you gain and/or concerns where I might be making a mistake. After I finally get the NEW 48v inverter, I too will be able to switch from 24v to 48v. Will just need to rewire the batteries from 1S4P to 2S2P
I do love the fact that we have so many options today vs 20 years ago. I feel like a kid in a candy store these days compared to back then AND much, much cheaper too. From $4.50 per watt down to 50 cents per watt or so for solar panels. More value in inverters (240v standard, vs 120v back then) and other processing equipment AND monitoring status - so wonderful
Last edited:
dougbert
Solar Addict
I definitely can tell the effect that 4th battery has had. Prior my battery would discharge down to 30% SoC over night while this morning SoC was 54%. Around 25% SoC is when the Grid kicks in. Next step is adding more panels. Array 3 is ready for me to hook up the CC. I have 4 mounting rails on order as well. When they get in, then it is a matter of pulling down the old thermal panel, and mounting the mounts.
THEN pick up 3 more NEA panels and doing some panel arranging and will have another 900 watts of generation with ability for more panels available.
THEN pick up 3 more NEA panels and doing some panel arranging and will have another 900 watts of generation with ability for more panels available.
dougbert
Solar Addict
Update on the different patterns of battery usage
With the old Lead Acid batteries, I would operate off of them 18 hours a day from midnite to 6pm, allowing the sun to perform the charging for the most part. At 6PM I had the grid reconnect and finish off charging the batteries to 100%. This ensured the battery was full and charged.
With the Tesla, I am operating in Battery Priority mode where the inverter is running the house from the battery all the time, while the sun performs the charging operations. BUT if the battery gets too long (19volts) the inverter connects to the grid, powers the house loads and does a 2.7kw battery charge on the batteries. When this happens is whenever the battery is low, and is usually in the morning timeframe like 6am or so
here is the electric utility chart of my consumption over the past month.
I swapped the batteries on June 27th and enabled Battery Priority mode on June 30th.
July 2nd was the first day it did not connect to the grid. Same on July 4th

notice days when I purchase 0, 1, 2 kwhs (My range is electric is not on the solar circuits) and we survived the day totally by energy within the battery and daily solar charging
I MOST definitely need more panels. The GOAL is to reduce to zero, the number of days the system re-connects to the grid to recharge a low battery
FWIW
dougbert
With the old Lead Acid batteries, I would operate off of them 18 hours a day from midnite to 6pm, allowing the sun to perform the charging for the most part. At 6PM I had the grid reconnect and finish off charging the batteries to 100%. This ensured the battery was full and charged.
With the Tesla, I am operating in Battery Priority mode where the inverter is running the house from the battery all the time, while the sun performs the charging operations. BUT if the battery gets too long (19volts) the inverter connects to the grid, powers the house loads and does a 2.7kw battery charge on the batteries. When this happens is whenever the battery is low, and is usually in the morning timeframe like 6am or so
here is the electric utility chart of my consumption over the past month.
I swapped the batteries on June 27th and enabled Battery Priority mode on June 30th.
July 2nd was the first day it did not connect to the grid. Same on July 4th
notice days when I purchase 0, 1, 2 kwhs (My range is electric is not on the solar circuits) and we survived the day totally by energy within the battery and daily solar charging
I MOST definitely need more panels. The GOAL is to reduce to zero, the number of days the system re-connects to the grid to recharge a low battery
FWIW
dougbert
dougbert
Solar Addict
Sold the 12 Lead Acid 2v 1100amph batteries for my asking price, $1200. Included the 11 4/0 interconnecting cables
that paid for the 4th tesla battery
that paid for the 4th tesla battery
dougbert
Solar Addict
rewriting my Plan of Record
Step 1:
Buying 1 more panel (NEA 310w - $240) tomorrow, and putting that up in Array 1, where a panel destined for Array 2 currently is.
Here is array one today

that upper left 72-cell panel is coming down and the new NEA black panel (just like the other 3 black panels up there)
is going to replace it. (Eventually those 4 panels - abt 200w worth - in column 3 will also be replaced with new NEA panels as well but not yet)
That 72-cell panel (blue) is going to the upper left slot of Array 2 as seen below:

Now array 2 is currently 24 volt configured, in that every panel has its own 2-wire circuit with a total of 5 breakers in the combiner box
Step 2 will be to re-wire array 2 to be 48 volts with 2 panels in series
BUT the issue I have with array 2 is that 6 panels @ 300 watts would be 1800 watts and THAT is too much power for my charge controller running to a 24 volt battery. The controller spec says 1700 watts is the max, but with 1430w on array 1 one and 1500w on array 2, on cold days it causes the controllers to do a over-current shutdown for a period of time. I have hit 3000w of total production on a couple of those cold days
SOOO, the lower 4 panels of array 2 will be modified to 48v 2S2P configuration and remain on the array 2 charge controller
After I put up panel #6 in the upper left, it will be configured as 2S1P with its friend to the right and a temporary wire circuit will be put in to run that 2 panel set to the Array 3 charge controller, which is already wired up waiting for panels
That will only add 310 more watts to the system - but I have a plan
Current total system generation will change from:
1430w for array 1
1500w for array 2
2930w total
To:
1440w for array 1
1200w for array 2
600w for array 3
3240 total
but wait....there's more.....
Step 3
I have now all the mounting rails, end pieces, mid clamps, etc to install the foundation for array 3.
In the above picture, that farthest panel is a solar THERMAL panel and it is coming down as I have decommissioned it and that panel is taking valuable PV space.
Once that is done, I (and my sons) will install the rails for array 3. There are 4 rails for a total of 2 rows of panels (to match the above 6 panels of array 2).
Step 4
is to purchase 2 more 310w panels ($480) and mount those on array 3 in the bottom row.
These 2 will then be wired (again 48volts) to the array 3 string (down pipe in upper picture - on the right, looks like a white stick)
This will then add 620w of panels to the system, from
1440w for array 1
1200w for array 2
600w for array 3
3240w total
to
1440w for array 1
1200w for array 2
1220w for array 3
3860w total
That boost should make my house totally solar based on full sunny days, whereas right now I cannot quite do that.
Why all the various steps?
cash flow and I have issues to resolve before the system is complete.
A 48volt inverter purchase is coming, but I need cash for that, so this multi-step development process is what I am following to prepare for that inverter.
Step 5
I will be adding an array 4 with its own charge controller, that will be added on the west side of the house, to the left of the above picture
4 panels there ($960), in a 48v 2S2P configuration. With this array I can harvest late afternoon and early evening photons
Then the system will be:
1440w for array 1
1200w for array 2
1220w for array 3
1240w for array 4
5100w total production
That will totally max out my system production capability when based on a 24v battery configuration
Step 6 and beyond
Once those steps are completed THEN the 48v inverter will be bought, installed, and the battery re-wired to 48volts
Further panel additions thereafter are again possible, because with the 48v configuration, I will be able to install 10 panels per array instead of just 4. That will have 3100w on each array. Max wattage is 3420 watts per array @ 48v per controller.
But those steps are for a future story on another day.......
why so much generation? I want to buy a Tesla and charge it from the sun in addition to run the house. THAT takes solar panels
dougbert
Step 1:
Buying 1 more panel (NEA 310w - $240) tomorrow, and putting that up in Array 1, where a panel destined for Array 2 currently is.
Here is array one today
that upper left 72-cell panel is coming down and the new NEA black panel (just like the other 3 black panels up there)
is going to replace it. (Eventually those 4 panels - abt 200w worth - in column 3 will also be replaced with new NEA panels as well but not yet)
That 72-cell panel (blue) is going to the upper left slot of Array 2 as seen below:
Now array 2 is currently 24 volt configured, in that every panel has its own 2-wire circuit with a total of 5 breakers in the combiner box
Step 2 will be to re-wire array 2 to be 48 volts with 2 panels in series
BUT the issue I have with array 2 is that 6 panels @ 300 watts would be 1800 watts and THAT is too much power for my charge controller running to a 24 volt battery. The controller spec says 1700 watts is the max, but with 1430w on array 1 one and 1500w on array 2, on cold days it causes the controllers to do a over-current shutdown for a period of time. I have hit 3000w of total production on a couple of those cold days
SOOO, the lower 4 panels of array 2 will be modified to 48v 2S2P configuration and remain on the array 2 charge controller
After I put up panel #6 in the upper left, it will be configured as 2S1P with its friend to the right and a temporary wire circuit will be put in to run that 2 panel set to the Array 3 charge controller, which is already wired up waiting for panels
That will only add 310 more watts to the system - but I have a plan
Current total system generation will change from:
1430w for array 1
1500w for array 2
2930w total
To:
1440w for array 1
1200w for array 2
600w for array 3
3240 total
but wait....there's more.....
Step 3
I have now all the mounting rails, end pieces, mid clamps, etc to install the foundation for array 3.
In the above picture, that farthest panel is a solar THERMAL panel and it is coming down as I have decommissioned it and that panel is taking valuable PV space.
Once that is done, I (and my sons) will install the rails for array 3. There are 4 rails for a total of 2 rows of panels (to match the above 6 panels of array 2).
Step 4
is to purchase 2 more 310w panels ($480) and mount those on array 3 in the bottom row.
These 2 will then be wired (again 48volts) to the array 3 string (down pipe in upper picture - on the right, looks like a white stick)
This will then add 620w of panels to the system, from
1440w for array 1
1200w for array 2
600w for array 3
3240w total
to
1440w for array 1
1200w for array 2
1220w for array 3
3860w total
That boost should make my house totally solar based on full sunny days, whereas right now I cannot quite do that.
Why all the various steps?
cash flow and I have issues to resolve before the system is complete.
A 48volt inverter purchase is coming, but I need cash for that, so this multi-step development process is what I am following to prepare for that inverter.
Step 5
I will be adding an array 4 with its own charge controller, that will be added on the west side of the house, to the left of the above picture
4 panels there ($960), in a 48v 2S2P configuration. With this array I can harvest late afternoon and early evening photons
Then the system will be:
1440w for array 1
1200w for array 2
1220w for array 3
1240w for array 4
5100w total production
That will totally max out my system production capability when based on a 24v battery configuration
Step 6 and beyond
Once those steps are completed THEN the 48v inverter will be bought, installed, and the battery re-wired to 48volts
Further panel additions thereafter are again possible, because with the 48v configuration, I will be able to install 10 panels per array instead of just 4. That will have 3100w on each array. Max wattage is 3420 watts per array @ 48v per controller.
But those steps are for a future story on another day.......
why so much generation? I want to buy a Tesla and charge it from the sun in addition to run the house. THAT takes solar panels
dougbert
Last edited:
dougbert
Solar Addict
New NEA 310w panel is now mounted on Array 1.
Now it looks....better. The 72 cell panel is waiting for Saturday for when we install it on array 2. It can be seen in the lower left

compare with picture at the top of this page. Better, but not best. That comes later
dougbert
Now it looks....better. The 72 cell panel is waiting for Saturday for when we install it on array 2. It can be seen in the lower left
compare with picture at the top of this page. Better, but not best. That comes later
dougbert
Last edited:
dougbert
Solar Addict
Old thermal panel removed today.
Needed first to install 2 safety mounts under the metal ridge cap. To these we can connect our body harnesses while on the roof.
From Amazon, $100 each
Topped out at 102F today here at 5500 ft, and 103F in Salt Lake City. Hotter down south. I cannot imagine Las Vegas temps at 112F
We started at 8am after everyone got here, then stopped around 10:30am when it was 90
My main objective was to get that thermal panel down off the roof. Succeeded.
Next will be to fill/plug the various holes left behind.
Then on to re-wire for Array 2. With the harness mounts, I will be feel much safer as I age.
Array 2 pic again


the "south facing open field" for Array 2 (top 2 rows 2 columns of it). Position for 4 panels.
Then Array 3 (bottom 1 row 2 columns of it). Positions for 2 panels.
Hopefully 2 more panels for Array 3 will fit near the gutter area below the antenna - will measure when we get there - or on the west facing surface of the ridge area
Generated 17.2kwh today with the 2.8kw of panels, maxing out at 2.3kw peak production curve. The heat really drives down production.

Little by little
Needed first to install 2 safety mounts under the metal ridge cap. To these we can connect our body harnesses while on the roof.
From Amazon, $100 each
Topped out at 102F today here at 5500 ft, and 103F in Salt Lake City. Hotter down south. I cannot imagine Las Vegas temps at 112F
We started at 8am after everyone got here, then stopped around 10:30am when it was 90
My main objective was to get that thermal panel down off the roof. Succeeded.
Next will be to fill/plug the various holes left behind.
Then on to re-wire for Array 2. With the harness mounts, I will be feel much safer as I age.
Array 2 pic again
the "south facing open field" for Array 2 (top 2 rows 2 columns of it). Position for 4 panels.
Then Array 3 (bottom 1 row 2 columns of it). Positions for 2 panels.
Hopefully 2 more panels for Array 3 will fit near the gutter area below the antenna - will measure when we get there - or on the west facing surface of the ridge area
Generated 17.2kwh today with the 2.8kw of panels, maxing out at 2.3kw peak production curve. The heat really drives down production.
Little by little
Last edited:
dougbert
Solar Addict
well how do I describe this.............
I now own 12 (new to me) solar panels, 355watts each, 40volts. That is 4200watts worth.
Cost: price of gas to pick them up
Can't say what panels, or how I got them (part of the deal) but they are 72 cell panels.
They are salvaged, so their cords were cut off
but I have determined a way to re-attach new MC4 cables
I don't know how many work, but I know one does, since I put it in temporary service this evening.
So my Plan Of Record gets accelerated, and I can add some of these panels to Array 3 now and don't have to get more cash, at least for more panels.
dancing a jig, dougbert
Last edited:
dougbert
Solar Addict
And the aluminum foil on the cables going into the weatherhead?
Is that for UV protection or ??
UV protection right now
I have some electrical struct bar I am going to put under it to keep it off the roof (heat and wear as well), and thinking on how to encase it within Gray Pipe - cut an elbow in half, or some such to better protect it
That array was number two and I was still learning proper installation procedures
dougbert
Solar Addict
I have modified 2 panels now and they are working just like my existing panels in terms of production divided by rated wattage, in the 63% to 71% range. My 2016 panels and my 2019 NEA panels are in the same range
Here is the junction box with the leads cut off

Here is the junction box after I cut away parts of the box, soldering in new leads and the first layer of caulk to protect it once more
It will dry to clear. Tape is just hold leads in proper position.

Here I have positioned 1 of the 2016 panels (blue on the left) and 2 of the mod'd 2020 panels in a TEMPORARY Array 3 position, running leads to the Array 3 combiner box
Left to right production rating:
300w + 355w + 355w = 1010w

2nd pic

Currently configured as 3S1P, voltage now is at 100vdc
On a good sunny day this week, I have gotten 2.3kw out of my prior 2.8kw pair of arrays
Today, I am averaging 3.0kw with a peak of 3.3kw when the clouds clear away
Light clouds passing over since just after noon.
So I am very pleased with this "gift".
Goal is to mod the next panel and add it to this temporary "patch" of panels to have 1365w of max production here on Temporary Array 3.
Thought I could set configuration as 4S1P, but Open Circuit voltage on these panels is 50v and my charge controller has a open circuit voltage of 150v, therefore will have to modify to 2S2P configuration for 4 panels.
Then mod 4 additional panels and actually install them on the roof for the real array 3
I can buy my 4th charge controller and a setup combiner box, then connect to the main system for Array 4, and move the leads of these temporary panels to the combiner box for array 4.
Production curve, with clouds coming in around 12:15PM

Here is the junction box with the leads cut off
Here is the junction box after I cut away parts of the box, soldering in new leads and the first layer of caulk to protect it once more
It will dry to clear. Tape is just hold leads in proper position.
Here I have positioned 1 of the 2016 panels (blue on the left) and 2 of the mod'd 2020 panels in a TEMPORARY Array 3 position, running leads to the Array 3 combiner box
Left to right production rating:
300w + 355w + 355w = 1010w
2nd pic
Currently configured as 3S1P, voltage now is at 100vdc
On a good sunny day this week, I have gotten 2.3kw out of my prior 2.8kw pair of arrays
Today, I am averaging 3.0kw with a peak of 3.3kw when the clouds clear away
Light clouds passing over since just after noon.
So I am very pleased with this "gift".
Goal is to mod the next panel and add it to this temporary "patch" of panels to have 1365w of max production here on Temporary Array 3.
Thought I could set configuration as 4S1P, but Open Circuit voltage on these panels is 50v and my charge controller has a open circuit voltage of 150v, therefore will have to modify to 2S2P configuration for 4 panels.
Then mod 4 additional panels and actually install them on the roof for the real array 3
I can buy my 4th charge controller and a setup combiner box, then connect to the main system for Array 4, and move the leads of these temporary panels to the combiner box for array 4.
Production curve, with clouds coming in around 12:15PM
Last edited:
dougbert
Solar Addict
added the forth panel to this temp array 3 this morning, configured as 2S2P
middle of the day production was 1050w just for this temp array 3
Its addition has boosted my system power to 3.4kw in full sun, and it topped off the battery up to 100%, since grid is configured to charged to 96% SoC. Ran the water heater element for some 4 hours after the battery was filled.
It was cloudy yesterday and battery only reached 81% SoC by the sun and by 7:45am this morning low battery trigger was reached and the grid starting charging it
Charging ran to 11:40am, shorter than normal, since solar started to assist the charging.
Normally grid charging reaches 2.7kw, but with the sun this morning, reached 4.3kw combined - about 1.2kw goes to run the house in the daytime (fans running to cool us down)
Hopefully battery lasts tonight without the grid, until the sun can begin charging it.
Nighttime, drain runs .6kw as the house is quiet.
I am modifying one panel per day - cutting open junction box and soldering in new leads - 9 more to go
again the cry for: More panel generation and more battery storage
dougbert
Solar Addict
Peaked production of 3.5kw
24kwh created today, my largest ever so far
4200 watts of installed panels in the three Arrays
battery never triggered grid charge.
With full sun, at this time I think I can live almost totally on sunshine
24kwh created today, my largest ever so far
4200 watts of installed panels in the three Arrays
battery never triggered grid charge.
With full sun, at this time I think I can live almost totally on sunshine
Similar threads
- Replies
- 23
- Views
- 944
- Replies
- 0
- Views
- 292
- Replies
- 20
- Views
- 1K
- Replies
- 1
- Views
- 216