diy solar

diy solar

Solar house generator I started DIY back in 2000 - My path from Trace to Xantrex (on FLA battery) to XW Pro inverters on Tesla Model S batteries

Got panels 5 to 8 down this evening before dark, but sun is down

while working from home, gives me an hour or two here and there to do things around the old house and
small lot. Wife actually likes me home, yet we each have separate caves we can go isolate ourselves

dougbert

F - panells 5 to 8 removed.JPG

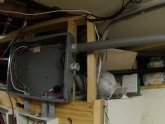
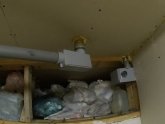
side note on that building
it was a one car garage built in 1948 (the original house was built in 1930 - and also in 1948 an addition was added)
That garage was cinder block with holes between most of the block where you could see daylight through

Well some 15+ years ago I rebuilt the cinderblock walls, 3-4 feet at a time - I removed the blocks to build the wall, poured a MUCH better foundation and replaced the blocks with 2x6 walls. Took some time, but I didn't get a building permit and I didn't take it all down at once - because it is actually ON the property line on the far side and they would not have allowed me to rebuild it if I took it all down at once.

I can see that it needs another paint job. The rafters were built of actually 2x4s - not 1.5"x3.5". I put the metal roof on, and it is a
very sturdy roof for the panels
 
Last edited:
Installed 2 more 310 watt panels, replacing 4-100w panels

Now I know the panel in the upper left is not the same. That panel will be installed on Array 2 later, when I convert to a 48v system, but can't right now. I can't put it in array 2 now because of too much current generated

Array 2 has 5 305w panels and is 1525 watts, and at 24volts the charge controller can only support 1740 watts (60 amps). 6 panels @310w, it would be 1860 watts. Later when converted to 48v array and battery, each array will support 3480 watts.
Then I will move that upper left panel and install another of the black panel. Also, those 4-100w panels will come down and two new black panels will go up and that array will have 1860 watts. Later I will add 4 more of those panels (placed on the house) for a total of 10 panels (3100 watts) per array

Note too, I aligned the panels a bit better this time

G - 2 new panels install on Array 1.JPG
 
Some finishing refactoring done on the above Array 1. I replaced the mast head with 1-1/4" conduit and a L-box (with access cover) to better feed the MC4 wires into the conduit system. Now there are only 3 circuits coming from the above 3 columns of panels (w/ground). Did better wire management under the panels with wire retainers and black zip ties (never use white zip ties in the weather, they die faster)

Next item to refactor is the OLD Ground Fault Protection. Remove the old one and utilize the system found in the Conext Charge controller

Here is the old GFP breaker system:

B0010001.JPG

This has 2 breakers (red wires on top) - 100 amp DC breakers. The one in the middle is a 1 amp breaker with NEG leg in white on the top and the GROUND wire in green on the bottom. THIS is the bonding point between NEGATIVE and GROUND and if there is a GF occurring this is where the protection system works.

If the POSITIVE leg touches GROUND any where in the system, the 1 amp breaker trips taking with it the 60 amp breakers and disconnecting/isolating the arrays. This older system could handle 4 arrays (add two more 100 amp breakers) in total, but when I bought it I was just having 1 array, so bought a second breaker for future (which I am now using) use. These breakers were expensive back then. Some $150 or so

Now today (20 years later) a better solution can be found

This is the Conext charge controller for my Array 1

B0020004.JPG

In the lower portion is a FUSE for Conext implementation of the GFP system. Each Conext CC has a fuse and when more than one CC is in the system, all the fuses BUT one should be removed.

When I installed these CCs, I had removed ALL of my fuses and DISABLED the GFP system of the Conext CC and I relied on the existing GFP system. Recently I researched more and decided to re-enable these Conext GFP systems and use them for GFP operation instead of the old system. When the one CC detects a GF exists (when the fuse blows), it communicates over the Xanbus to all other CCs and they all disconnect their respective arrays from the battery

Being no longer useful I will decommission the old GFP system and reuse that space. I will move my existing 60 amp breakers into the spot where the GFP breakers are.

Why am I doing this? Well, I am moving a future part of the my system into the present. I am going to install Array 3 and build that up. Each of my 2 arrays now are at 1400+ watts and I cannot add more panels to them (not until I move into a 48volt based system which will reduce current load by half, in the future). So in order to increase my production now, I will build up Array 3 to 1400watts (@24v, max is 1740watts).

Here are my new existing breakers:

B0030007.JPG

I am going to move those into the first pictures and add the 3rd breaker and be set for 3 arrays, and put them into the enclosure - and be somewhat more code compliant

I will also rearrange wall board placement of the current CCs to make room for the 3rd CC and move the 80amp output breakers as well.

Always something new to work on

dougbert
 
Last edited:
dang, I was going to edit the prior post to polish it a bit more, but encountered a 60 minute limit policy popup - darn
I guess the open editing window has been reduced from what it used to be, oh well, I must be more careful on post creation then
 
Last edited:
And task complete

The new Conext 60amp breakers installed in the old GFP enclosure.
Several wires no longer used, removed
Breakers for Arrays 1, 2, and 3, left to right
Array 3's breaker awaiting incoming wire to be run to outside combiner box and then down to the future Array 3's Charge Controller

B0010011.JPG

Moved Conext SCP box from the hole on the upper right, to the left (can barely see it in the upper left)

Moved Array #1's charge controller UP, and lengthen wire from CC to 80amp breaker

B0020014.JPG

Moved the 80amp output breakers down, next to Array #2's charge controller
Also there is room for Array #3's charge controller on the right in that empty space.
I do need a longer Cat5 cable for the Xanbus, which is running diagonal

Output breakers for Array 1, 2 and 3, left to right

B0030017.JPG

And finally, the covers reinstalled on the power distribution panel (PDP - with the 250 amp breaker) and the new Array incoming breaker box.
Conext SCP visible above and between the two
Cannot use the SCP until I get the new Conext XW Pro inverter - no power

A bit cleaner now

B0050013.JPG
 
Last edited:
UPDATED PLAN OF RECORD (POR)

Phase 1 Tasks: (COMPLETE)
  • Array #1: I adjusted 2 of the 3 rails of panels to the same plane as the 3rd one as it has shorter legs, so now I get rid of the that pesky shadow of column 2 over column 3 (DONE)
  • Also, since I have the new Conext SCC on array #1 now ($515), I spent some time on the dry roof turning array #1 into a 48v array from the old 24v setup. Instead of 6 circuits to the 12 panels, I now have 3, with 3 spare circuits just laying in the harness for now. I will unwind them later and use 2 of the circuits for the remaining 4 panels. (DONE)
  • Have Conext SCP ($215) installed but not powered - have to wait for inverter to be installed (DONE)
  • Conext Number 2 SCC ($507) is in flight to be delivered sometime next week, then will install it. Once installed, then I will a have far better way to harvest ALL solar generation data in a precise manner. (DONE)
  • Conext Gateway ($435) is installed and working. Can monitor the power plant at my desk at home or at work. Well the generation portion that is. (DONE)
  • Bought 2 more new 310w solar panels for array #1 ($450) (DONE)
  • Refactor wiring on Array 1, cleaner and more code compliant (DONE)
  • Refactor Ground Protection system from old implementation to the Conext Charge Controller implementation (DONE)
  • Current around 1400+ watts in Array 1 and in Array 2, total around 2800 watts
Phase 2 Tasks (Array 3) $2000
  • Run wire from combiner box (already installed) to input breaker ($60)
  • Buy and Install new Array 3's Charge Controller - wire it up ($500)
  • Buy and install mounting hardware (rails, stands, etc - about $600) to support 10 panels
  • Buy two panels to begin with, then 2 more ($900) 4 panels will give 1200 watts
Phase 3 Tasks (New battery stack and controller) $5700
  • Misc parts for battery stack ($700)
  • Save money for Jack Rickard's "Jack in a Box" battery controller $(2600)
  • and save more $$ again to get 2 Tesla batteries ($2000) - Price is coming down for these
  • build the rack for holding 6 to 10 pairs of Tesla batteries - for the future additions ($300?)
  • run them in 24v configuration using existing inverter
Phase 4 Tasks (6.8kw inverter) $4800
  • Buy large PDP first ($930) to support more than 1 inverter
  • Buy Conext 6.8kw inverter ($3300)
  • Rewire batteries to 48v
  • Conext Battery Monitor system ($450ish)
Cost for Version 2 (phase 2 to 4) update: $12,800

Original system cost $14,000 (parts, and fully DIY install) before tax credit of $2,000.

At the end of Phase 1 - will have 2.8kw of solar panels vs 1.2kw of originals
At the end of Phase 2 - will have 4.0kw of solar panels
At the end of Phase 3 - will have better battery stack
At the end of Phase 4 - bigger inverter - 6.8kw vs 4.0kw

better management features - local computer display and via cloud
"better" batteries - 11kwh usable of Lead Acid vs 10kwh Tesla (80% of that usable)
and can grow the system:

After all that then Phase 5 Tasks (17 more panels panels - $3800)
  • grow to 9.3 kw of panels - 3 arrays of 3.1kw each - 10 panels per array
  • grow to 60kwh and more of storage with 6 pairs of Tesla batteries - $2000 per 10kwh of batteries (2 batteries)
 
Last edited:
Things are accelerating in terms of parts that I can acquire now.

In the next week or so, I will be ordering the following parts:
  • Array 3 charge controller
  • The "Jack in the Box" Tesla battery controller (ESP32) and associated parts for several modules
  • 4 Tesla modules and parts
Here is the ESP32

ESP32ModuleController1-1_medium.jpg

Currently I have the following parts already for Array 3:
  • 6awg Wire
  • Disconnect switch
  • Conduit Installed

On the left is the line for Array 2 coming in, with future Array 3 on the right awaiting installing of the conduit

Array 2 -left- Array 3 -right.JPG

Also designing my wood "Rack" to support up to 16 to 20 modules (future additions) but starting with the 4 initial purchase. That rack will be located where the existing Lead Acid batteries are. It should look like the following picture of the PowerSafe 100, minus the box. (That grating is some great stuff - though too expensive $200 for a 4x8 sheet and $200 S+H). I am thinking of 3/4" plywood shelf.

tesla batteries 2.jpg

I am currently refactoring my PDP (power distribution panel) wall to support 4 arrays using Schneider-Electric Conext controllers, along with breakers, and various wires from point A to B.

I have added some flex conduit to run those wires from A to B, and the rest. More to come on those. Here on the top is the controller for Array 1. I moved the controller for Array 2 to the right on the board and below the one for Array 1. Two more flex conduit lines will be exiting the bottom of the 60 amp breaker box, to go to controllers 3 and 4.

I am pondering on where Array 3 controller will go, but will wait for more wires/conduit are installed to do the final decision. Note the breaker box in the lower left. That is where the 4 80 amp breakers are, each of which is downstream from their respective controllers.

Contained wires to charge controllers.JPG


To properly support the safety aspect of the ESP32 Tesla battery controller, I am installing 4 Gigavac contactors (relays), one for each of the 2 currently array incoming lines and 2 more for the future 2 arrays. These contactors will be enabled when the ESP32 controller deems it SAFE to CHARGE ENABLE the incoming power from the arrays. This week I installed the box (see below) to house these contactors and fed the current array lines through it, just before the upstream 60 amp breakers

Here is a pic of the GX11BAB that I will be installing.

GIGAVAC presents the GX11BA EPIC® sealed DC Contactor. GX Contactors can switch DC loads at both low and high voltage from 12 to 800VDC.
thinking
gx11_dc_kontaktor_gigavac.png


Here is the contactor box. Array 1 incoming line in the upper left. Array 2 in the upper right. Array 3 will be located just below Array 2. Array 4 is TBD, but will come into this box

Givagvac box.JPGthinking

Side view of the box. Array 2 incoming line is the top conduit with future Array 3 line going in below that. Below the box are the upstream 60 amp breaker box

Gigavac box side view.JPG

I am currently using 48 volts on one array and 24 volts on another. When the inverter is installed, all arrays will be 48 volts. This contactor will be on EACH incoming positive line of each array, all controlled by the ESP32. If any of the "trigger" points are reached that might endanger the Tesla modules, then these Normally Open contactors will be released and break incoming power thereby protecting against overcharge. The ESP32 also have its own internal contactors that it can release and thus protect against low voltage events.

My system is meant to be a fairly large generator. My goal is to have 5 days of reserve battery power for those stormy winter days and deep snow. As such, I need a capable controller that will protect the Tesla modules with redundant protection systems. That is where the $2500 ESP32 comes in. It is NOT meant for a small solar generators. Its control and display device is really cool and provides almost realtime monitoring of the battery pack

I currently have 1100 amp-hr Lead Acid batteries @ 24 volts. They are 5 years old now. I use around 200-300 amp-hr per day. Effectively I can only use 550 amp-hrs (50% DoD). I try to stay above 70% SoC before thinkinghaving the grid re-charge. With 4 Tesla modules to start with, that is abt 1000 amp-hr, and if I use 80% of that, that provides 800 amp-hrs I can utilize. For every 2 more modules, I can add another 500 amp-hr gross, with 400 amp-hr actually available.

Now the real fun can begin in this project

dougbert
 

Attachments

  • Gigavac box side view.JPG
    Gigavac box side view.JPG
    57.8 KB · Views: 3
  • Array 2 -left- Array 3 -right.JPG
    Array 2 -left- Array 3 -right.JPG
    42.4 KB · Views: 5
Last edited:
Each Array supports up to 60 amps, which at 24v is 1700 watts and I currently have abt 1400watts on each.
At 48 volts, there will be 3100 watts on each array string and again upto 60 amps and that will provide 240amps charging current to the battery.
So the system has to be built fairly large.

And yes, that will be 12,400 total watts of PV when all is said and done

dougbert
 
I received 2 of the Gigavac contactors today as well as some 4ga wire I needed to wire up the controller outputs. Also ordered the ESP32 V2 battery controller and related parts to install the controller.

finally

so waiting for it to ship

also will be ordering 2 Tesla S Modules shortly

dougbert
 
My plan of record has change again, but it's all good

The Jack-in-the-Box Tesla battery controller will be arriving this coming Wednesday AND I ordered two Tesla Model S batteries from, a salvaged 2017 with 29,000 miles on it. Awaiting notification of shipment.

oh yeah
 
Ok I decided to share the costs for the controller for others to compare.
I have ordered enough parts to support 22 tesla modules (110kwh) of storage over time. Well, THAT will take time to get, but have almost all the needed parts to do that. Will need cables or bar copper.

Below is the invoice


Details
Name
Unit Price
Quantity
Total
esp32bms
Battery Module Controller v2 for Tesla Model S Battery Modules​
$2,495.00​
1​
$2,495.00​
displays:
- No Additional Displays​
-​
-​
twomoduleharness
Two Module Harness for Tesla Battery Modules​
$49.95​
1​
$49.95​
extensionharness
48 inch Extension Harness for Tesla Modules​
$49.95​
1​
$49.95​
4moduleext
Four Module Extension Harness for Tesla Modules​
$69.95​
4​
$279.80​
fourmoduleharness
Four Module Harness for Tesla Battery Modules​
$59.95​
1​
$59.95​
shortingplug
Tesla Battery Module Shorting Plug​
$23.95​
1​
$23.95​
Tesla70mmstrapkit
Braided Battery Strap Kit for Tesla Battery Modules​
$9.00​
10​
$90.00​
stackingstrap
Stacking Strap for Tesla Battery Modules​
$21.95​
6​
$131.70​
A30QS400
Ferraz Shawmut A30QS400​
$63.50​
1​
$63.50​
P243G
Fuse Holder P243G​
$53.00​
1​
$53.00​
Sub Total:
$3,296.80​
Shipping:
$178.98​
Grand Total:
$3,475.78​

I do need to order more stackingstraps but in a separate order due the increase in shipping. From $180 to $255 for just 4 more straps. Doh!

Ordered the two batteries for $1000, $150 freight and $64 sales tax, each via ebay from North Carolina
Two more batteries will ordered over the next couple of months.

dougbert
 
Last edited:
Lots of mundane but vital things to install and verify, for this installation upgrade

When I installed the DC combiner boxes for Array 2 and 3, I "forgot" to install a disconnect for each of them. So I have installed a disconnect for Array 3 since I was wiring it up this past week. I will rewire the combiner box for Array 2 with its disconnect shortly. These are needed for firemen (or me) to disconnect the array from the charge controllers in the basement. There are breakers in each combiner box, but a phillips screw driver is needed to remove the cover, so that method is not fast

Here are the 2 combiner boxes along with the newly installed siding I recently (and finally) installed and painted. Covering 90 years of flaking paint and adding some R-10 of rigid form insulation. Also new window trim is in the works as well.
Need to put the NEC marking tags on the combiners as well

P1000002.JPG

and here is the disconnect for Array 3, simple arm to perform the disconnect:

P1000003.JPG

Array 2's disconnect will be installed similarly

Array 1's disconnect was installed long ago on the other side of the house. Array 4's as well as array 4 panels are all TBD later

Here I have mounted the contactors in their box, but not wired them yet
Array 1 on the left, the Array 2, and so on to the right

2 contactors I have for Arrays 1 and 2 mounted in the contactor box. Will be ordering contactors for arrays 3 and 4 in the near future
these will be controlled by the "Jack-n-the-box" battery controller and will be enabled ON when it is safe to charge the batteries.

P1000001.JPG
dougbert
 
Last edited:
received the ESP32 V2 Battery controller today, in a 33lb box

Came with:
  • The ESP32
  • The Raspberry Pi Display, which is a Pi 4, no less - nice
  • a small handheld keyboard
  • the other parts I ordered
here are the pics,
first the ESP32 controller, 2/0 cables

P1000001.JPG

Pi 4, and mini-keyboard

P1000002.JPG

and with the display powered on, connected to the 'solar' wifi hub and the Status page on - no batteries connected, thus no real data

P1000003.JPG

dougbert
 
Finally 1 of the 2 tesla batteries I ordered arrived and I spent some time configuring, connecting and examining what I got

Here the battery is connected to the ESP32, the black thing on the negative cable (on the left) is the current sensor

P1000004.JPG

Pic of the ESP32 connected to the battery
Blue light is POWER ON
Red light is NEGATIVE contactor (relay) ON

abt 8 seconds after Red light comes on then

Green light is POSITIVE contactor (relay) ON
the delay allows for a pre-charging of any capacitors to reduce high current across the contactors - which could weld them together

Also seen is the USB cable from the ESP32 to the Pi. This allows monitoring and configuring of the ESP32

P1000006.JPG

close up

P1000007.JPG

screen shot of the Display screen, showing the condition of this 1 battery
They charged it to 100% before sending it, cool
Cell voltages average is 4.089v
Battery voltage is 24.5v
Temp is 23c

1 Tesla Battery connected to ESP32.jpg

After some configuring, the following is the configuration screen

Tesla Configuration screen.jpg

I am viewing the Battery Display (which runs on the Raspberry Pi display device) on my Linux Desktop.
I am able to connect to the Display over a Wifi Hub bought ($20) just for this solar connection. I am using a software
program called VNC Viewer on my desktop. VNC Server comes configured on the Pi.
This allows me to view, configure and control the ESP32 BMS remotely, some 30 feet away from my desk.
Using VNC I can monitor things from any computer in my house.

The 2nd battery is scheduled to arrive on monday, June 1st. I can then wire them up in parallel

Next task is to design and build the "rack" to hold a bunch of these batteries
Oh and sell my 12 batteries. 5 years old, 1100ah 2Volt cells

dougbert
 
Last edited:
I have several items completed from my Plan of Record

Phase 2 Tasks (Array 3)
  • Run wire from combiner box (already installed) to input breaker ($60) (DONE)
  • Install Array 3 disconnect box ($100) (DONE)
  • Buy new Array 3's Charge Controller ($494) (DONE)
  • Install new Array 3's Charge Controller - wire it up
  • Buy and install mounting hardware (rails, stands, etc - about $600) to support 10 panels
  • Buy two panels to begin with, then 2 more ($900) 4 panels will give 1200 watts
  • Retro fit Array 2 with a disconnect box ($100), like Array 3's
Phase 3 Tasks (New battery stack and controller) $5700
  • Misc parts for battery stack ($900) (DONE)
  • Save money for Jack Rickard's "Jack in a Box" battery controller $(2500) (DONE)
  • Bought 2 2017 Model S Tesla batteries ($2300) - (DONE)
  • build the rack for holding 6 to 10 pairs of Tesla batteries - for the future additions ($300?)
  • run them in 24v configuration using existing inverter
Phase 4 Tasks (New inverter 48v)
  • Leaning now to buy the 15kw Sigineer 48v inverter ($3300) sold by Jack Rickard and programmed to properly charge the Tesla batteries (much bigger than my current 4kw inverter)
  • Rewire batteries to 48v
 
Last edited:
My current battery is 12 US Battery cells, each cell is 1100 amp-hours, 2 volts arranged in 1P12S configuration
1100amp-hr times 25volts is 27,500 watt-hrs or 27.5kwh.

I only use 25 DoD max in my operations. So I am using 27.5kwh times .25 = 6.875kwh per day.

With 2 Tesla batteries, 250 amp-hrs each, 500 amp-hrs * 24v = 12kwh capacity
Using only 80 percent, 12.5 * .80 = 9.6kwh daily usage

Then with 4 batteries, 19.2kwh usable capacity

dougbert
 
I need to correct the numbers on that last post
Instead of 24v on the tesla I should use 21.5 as the nominal voltage

These batteries are rated at 5.03 kwh each, thus 2 would be 10kwh and 80% of that would be 8 kwh
and 4 would be 16kwh usable
 
Two weeks later and have been able to do some cabling fixes

I currently have two Conext controllers and have bought a third. I designed the system to support 4 arrays, with each array carrying 60 amps at (currently) 24 volts. Future it will be 48 volts

Between each solar array and its respective controller there is a 60amp breaker. Between the controller and the battery there is a 80amp breaker, since MPPT can boost the current.

As also shown in a prior post, the following is the box housing the 4 60 amp breakers, array 1 on the left incoming breaker:

P1000009.JPG

Here is the controller for Array 1

P1000003.JPG

The output wire from controller 1 is a #4 single line for positive lead (the negative lead is the white wire in the pre-controller breaker box) and that positive wire drops out the bottom of the controller down to the 4 80 amp breaker box, shown the next picture

P1000001.JPG

80amp Breaker for array 1 on the right and proceeding to the left for array 4

Here is the pic of array 2's controller and the downstream 80amp breaker box

P1000002.JPG

at the bottom of the 80 amp breaker box is a 1" conduit carrying three (3) #4 output wires that go to the positive DC BusBar.
I used 1" grey conduit to carry the 3 outpus.
The future 4th output wire will go out a separate 3/4" conduit later

P1000005.JPG

Above is a picture of the end of the conduits and the red wires going to the DC busbar.
Below them are the 4/0 battery to inverter cables

Picture below shows the 600 amp DC busbars, one each for Negative on the left and Positive on the right

P1000006.JPG

Between the DC busbar and the battery is the 400amp Fuse.

Below shows the Positive busbar without the protective RED cover. Starting on the left: the Positive lead to the battery, 2 controller outputs, 1 future array 3 controller output (also where future 4th output wire will connect) and the Red lead to the battery.
Red protective cover shown partially in the lower right corner

P1000010.JPG

Fuller shot of both busbars.

These are Blue Sea part #2104, busbars and each can carry 600amps and are $71
The covers are Blue Sea part #2708 and are $18
They come in black and I just painted one RED
Order from Powerwerx.com

P1000007.JPG

Wires between the BusBar and the battery

P1000008.JPG

Location for controller #3
and controller #4 should fit to the left of that (hopefully)

P1000004.JPG

I am designing the Tesla battery shelf, use some 3/4" plywood. 32" wide and 24" deep.
Supports will be 2x6 stands

bolt by bolt, wire by wire

dougbert
 
Last edited:
I found what I thought would be a good fuse covering at the grocery store. Bought for like $2.00

fuse cover.JPG

but upon cutting the ends - which I thought would be easy - the plastic was brittle and shattered on each end.
I will look for better cover, but will keep this here for now as protection

dougbert
 
Positioning charge controller for Array 3 to see if the position will work

Array 3 charge controller.JPG


I previously planned to buy the Schneider-Electric XW Pro 6.8kw inverter along with its companion PDP (Power distribution panel) which would house all the pre and post controller breakers, and do so in a neat package - and not like what I have done above - ugly, but cheaper. Oh well, its my ugly basement LOL

BUT.... It is $800 for the PDP, $3300 for that inverter and it is only 6.8kw, so I would have to buy a second inverter (another $3300) later if my needs went up
SO.... I am now planing to get Jack Rickard's 15kw inverter, which is NOT a Grid Intertie inverter. Strictly off grid like - It will accept Grid input, but cannot sell back, which is fine with me
 
Last edited:
Did some work on the DC array contactor box and related circuits

In order to properly safe guard the Tesla batteries from OVER charging and other problems, the Rickard battery controller has an output circuit called CHARGE_ENABLE. This is a 12v control circuit that is active when the controller determines it is safe to charge the batteries. Proper temperature, proper voltage level, etc

I have wired up control buss bars that provide a 12v power supply from a 12v set of panels on the roof that provide power to my HAM radio 12v batteries. I am using power directly from the panels because I want this power supply to be OFF when the sun goes down. Sun goes down, panel turns off and so does this power supply.

In the following picture I have wired up this power supply to power a NEG and a POS buss bar that I can tap. They have a BLACK and RED common bars respectively

12v supply circuits for Contactor box.JPG

The solar panels powers these buss bars directly, no battery is connected

From this power bar I power 2 control circuits, each with their respective 12v relays (Top and bottom relays):

1) Hot water heater relay circuit
2) Contactor control circuit


I have documented the hot water heater relay in a prior post. Basicly, I use the top 12v DC relay. Its control coil comes from the AUX control port on Array 1's charge controller. You can see the yellow connectors on the bottom of the 12v relay. It is enabled when the battery is full, triggered at 29.4 volts. When enabled, that top relay in turn enables 2 DC relays that turn on the AC circuit that runs to the hot water heater. On a good day this heater comes on and I don't waste the excess PV power. Currently I am running a 120v single leg to the water heater, which allows for 1kw of power to the 4kw 240v heater element. Later with a new 15kw inverter I will be able to switch to a 2kw element at 240v. Even later I will add more solar panels and switch back to the 4kw elements

Next, is the contactor control circuit that uses the lower 12v DC relay.

When the Rickard's battery controller enables the CHARGE_ENABLE control circuit which will be connected to the relay, that enables a NEG and POS set of buss bars inside the box. The CHARGE_ENABLE circuit is not shown in the above picture, but will attached to the bottom of the lower DC relay.

In the next picture you can see the NEG (left) and POS (right) bars inside the box, along with the large DC contactors.

Contactor box.JPG

When these bars are enabled, they will engage the 4 larger DC relays (one for each incoming solar panel array, but currently just 3 at the moment), each can handle 150 amps DC, but will be max of 60 amps each due to the Nexus charge controller limits.

Thus one protection of the Tesla battery is provided.

The main control circuits from Array 1's charge controller and the Rickard Battery controller can only support a few hundred mill-amps so the 12v relays are needed for the larger current draw of the secondary relays

I am getting close to having all things ready for the battery swap. I also ordered a 3rd tesla battery and in another month will be able to order the 4th one

dougbert
 
Last edited:
I measured how much power the 3 contactors consume when engaged. 2.65 amps, so about .9 amps per contactor. 200 watts of panels and derated by 25% for age, I would calc about 150 watts. Divide that by 18v, gives a max of 8.3 amps. So, 3.6 amps going to 4 contactors should be okay in full sun, will some power left over to keep the battery charge. I don't use the radios that much.

Plan is to up grade the panels outside with some bigger anyway down the road

so all is good
 
Heavy lifting day today: Moving the Lead Acid battery out of the basement to holding area on the patio

Here are pics of the queue of cells to be hauled up the stairs with a wheeled dolly

P1000001.JPG

in front of the new tesla shelves

P1000002.JPG

These guys are 115 lbs each. I brought them down, but gravity helped. Now old muscles must lift. Doing one at a time, then resting - like posting pics here

Here is the empty battery stall:

P1000004.JPG

and a pic of tesla battery #3

P1000003.JPG

As for the old battery with 12 cells, l listed them on the classified of KSL.COM around 6 PM. I got a text at 8PM asking about them
This morning the guy bought all of them for the $1200 I was asking. 5 years ago I bought the 12 for $4997 and have used them well. I think the buyer was waiting for such a deal. He is ordering freight to come, pack them up and ship them to him - sweet for me.

I still have 9 more to lift today. Also sold him the 11 battery interconnect cables (13") for $10 each - again sweet for him and I no longer need them.

With this cash, I will be ordering Tesla battery #4 once the check clears

a good day I will say. Now, building the tesla battery shelf in between cell lifting
 
And the tesla batteries are installed and running the house at this moment
Inverter and array charge controllers have been re-programmed for the tesla's attribues

here are some pics of the shelves and the 3 tesla batteries

I have 6 shelves available but currently only using 2 for the 3 batteries and 1 shelf for the Rickard controller
there will be 4 Model S modules per shelf possible.
I will eventually use a 2"x1/4" silver flashed copper bars, one for NEG and one for POS to connect the modules together across the shelves and NOT use the 4/0 Cables

The Rickard Controller has 2/0 orange cables

P1000001.JPG

upper shelves

P1000002.JPG

from other side

P1000003.JPG

close up of the 3 batteries

P1000004.JPG

Close up of the Raspberry Pi display. Battery is DISCHARGING 1.18 kw into the house

P1000005.JPG

Detail of the 3 sets of 6 series batteries
Nice voltage levels

P1000006.JPG

And finally a pic of the new EPEVER 40a charge controller I got for the 12v secondary solar system, runs the HAM shack

P1000007.JPG

Very fruitful day, lots of work done. I lifted 4 of the L16 LA cells. 8 more to go

dougbert
 
Last edited:

diy solar

diy solar
Back
Top